Instructions

motorola walkie talkie operating instructions

Motorola Walkie Talkies are renowned for their durability and clarity, offering reliable communication for outdoor enthusiasts, professionals, and families. They provide easy-to-use interfaces, essential features, and ensure seamless connectivity in various environments. Built with quality, these devices are perfect for staying connected during adventures, events, or emergency situations.

1.1 Overview of Motorola Walkie Talkies

Motorola Walkie Talkies are renowned for their reliability, durability, and crystal-clear communication. Designed for both professionals and casual users, they offer advanced features like NOAA weather alerts, VOX hands-free operation, and emergency alert systems. With models ranging from compact designs to rugged devices, Motorola ensures seamless connectivity in various environments. These radios are ideal for outdoor adventures, workplace coordination, or family outings, providing a user-friendly experience. Always follow the operating instructions to maximize performance and safety while using these devices.

1.2 Importance of Proper Operating Instructions

Proper operating instructions are crucial for safe and effective use of Motorola Walkie Talkies. They ensure compliance with RF energy exposure regulations and optimize device performance. Understanding these guidelines helps users navigate advanced features like emergency alerts and VOX mode efficiently. Misuse can lead to connectivity issues or safety risks, making it essential to follow instructions closely. Always review the manual to ensure correct setup and operation, especially for features like privacy codes and NOAA weather alerts, to maximize functionality and reliability in various communication scenarios.

Pre-Operation Checklist

Ensure all walkie talkies are on the same channel, batteries are fully charged, and accessories are securely installed. Verify settings like NOAA alerts are enabled for safety.

2.1 Understanding the Components of the Walkie Talkie

The Motorola Walkie Talkie consists of key components like the LCD display, PTT button, volume knob, antenna, and battery compartment. Each part serves a specific function, ensuring seamless communication. The LCD display shows channel numbers and settings, while the PTT button allows voice transmission. The antenna improves signal range, and the battery compartment ensures extended use. Familiarizing yourself with these components is essential for efficient operation and troubleshooting, helping you maximize the device’s capabilities for clear and reliable communication in various environments.

2.2 Charging the Battery

Proper charging is crucial for optimal performance. Use the provided charger and cable to ensure compatibility and safety. Plug the charger into a power source and connect the walkie talkie or battery to it. The charging time varies depending on the battery type and capacity. Avoid overcharging, as it can reduce battery life. Monitor the charging status via the LCD display or indicator lights. Once fully charged, disconnect the device to prevent overheating. Always store the battery in a cool, dry place when not in use to maintain its longevity and performance.

2;3 Installing Accessories

Installing accessories enhances functionality and convenience. Use Motorola-approved accessories to ensure compatibility and safety. Align the connectors carefully when attaching items like earpieces or headsets. Secure the accessory firmly to prevent loose connections. For belt clips or holsters, follow the manufacturer’s instructions for proper mounting. Test the accessory after installation to ensure it works correctly. Refer to the user manual for specific guidance on compatible accessories and installation procedures. Properly installed accessories ensure optimal performance and durability of your Motorola Walkie Talkie.

Basic Operations

Mastering basic operations ensures smooth communication. Learn to turn devices on/off, select channels, and adjust volume for clear interactions. Familiarize yourself with essential controls for seamless usage.

3;1 Turning the Walkie Talkie On and Off

To power on your Motorola Walkie Talkie, locate the power button, typically on the top or side, and press and hold it until the device activates. You may hear a confirmation tone or see LED indicators light up. Once on, adjust the volume to your preferred level using the volume control. To turn it off, press and hold the same power button until the device shuts down completely. Ensure the walkie talkie is fully powered off to conserve battery life and avoid accidental transmissions.

3.2 Selecting the Correct Channel

Selecting the correct channel on your Motorola Walkie Talkie ensures clear communication with your group. Use the channel selector button or menu to choose a channel number. Ensure all users are on the same channel for proper connectivity. Some models feature privacy codes (CTCSS) to minimize interference. Match the channel and privacy code settings with other users to maintain seamless communication. Refer to the device’s menu for channel options, which may include NOAA weather channels for emergency alerts. Proper channel selection is crucial for effective and uninterrupted communication.

3.3 Adjusting the Volume

Adjusting the volume on your Motorola Walkie Talkie ensures optimal audio clarity in various environments. Locate the volume control button or knob, typically found on the top or side of the device. Turn the knob or press the button to increase or decrease the volume. For louder settings, turn the knob clockwise or press the “+” button. For quieter settings, turn counterclockwise or press the “-” button. Ensure the volume is set to a comfortable level to hear communications clearly while conserving battery life. Proper volume adjustment enhances communication effectiveness.

Communication Features

Motorola Walkie Talkies offer advanced communication features like VOX for hands-free operation, NOAA weather alerts for emergency updates, and customizable call tones for user convenience.

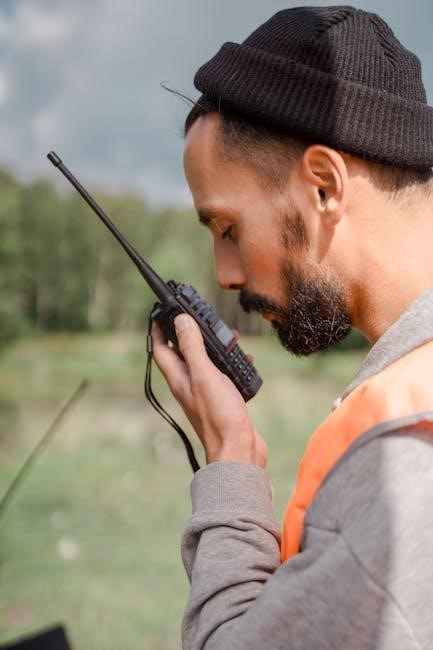
4.1 Using the Push-to-Talk (PTT) Button

The Push-to-Talk (PTT) button is essential for initiating voice transmissions. Locate it on the side or front of the device. Press and hold the PTT button firmly to activate the transmitter. Speak clearly into the microphone for optimal audio quality. Release the button to switch back to receive mode. Ensure the channel is set correctly for communication. Regularly check the button for proper function and clean it to avoid transmission issues. Proper PTT usage ensures smooth and effective communication. Always test the button before critical use.

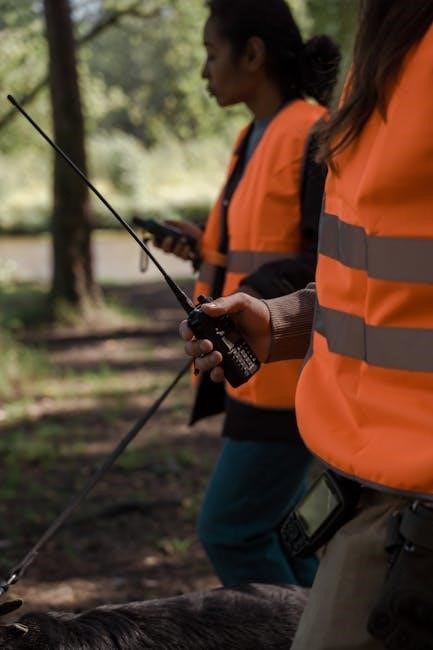
4.2 VOX (Voice-Activated Transmission) Mode

VOX (Voice-Activated Transmission) mode allows hands-free communication by automatically transmitting when you speak. Enable VOX in the settings menu. Adjust sensitivity to prevent accidental activation. Use this feature for convenience during activities requiring both hands. Ensure the microphone is clear for optimal performance. VOX mode is ideal for active environments where manual PTT operation is impractical. Test the sensitivity levels to balance responsiveness and reduce false triggers. This feature enhances usability while maintaining reliable communication. Always monitor battery life, as VOX may increase power consumption.

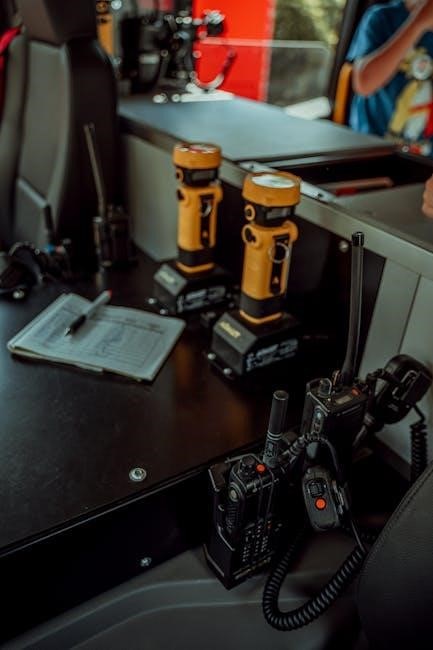
4.3 Using the Built-in Flashlight

The built-in flashlight on your Motorola Walkie Talkie provides convenient illumination in low-light conditions. To activate it, press and hold the designated flashlight button. Some models offer adjustable brightness settings. Use the flashlight to navigate, signal for help, or find items in the dark. It’s a practical feature for outdoor adventures or emergencies. Remember to turn it off when not in use to conserve battery life. The flashlight enhances versatility, making your walkie talkie a multi-functional tool for various situations. Always ensure the flashlight is in good working condition for reliability.

Advanced Settings

Motorola Walkie Talkies offer advanced settings like privacy codes, NOAA weather channels, and squelch levels to enhance communication. These features ensure clearer signals and better connectivity in various conditions.

5.1 Setting Up Privacy Codes (CTCSS)

To enhance privacy, Motorola Walkie Talkies use CTCSS (Continuous Tone-Coded Squelch System). This feature allows selection of specific tones to filter transmissions, ensuring only intended communications are received. By accessing the menu and selecting a CTCSS tone, users can customize their experience, reducing unwanted chatter. Coordination among group members is essential for seamless communication. This system also supports NOAA weather channels, enabling alerts without interference. Proper setup ensures clear and private interactions, tailored to user needs for effective communication.

5.2 Configuring Squelch Settings

Configuring squelch settings on Motorola Walkie Talkies helps minimize background noise and static. Access the menu, navigate to the squelch option, and adjust the level using the navigation buttons. A lower setting reduces weak signals, while a higher setting may block stronger ones. Proper adjustment ensures clear communication by filtering out unwanted interference. This feature is particularly useful in noisy environments or areas with overlapping signals. Regularly check and adjust squelch levels to maintain optimal performance and reduce distractions during transmissions.

5.3 Enabling NOAA Weather Channels

Enabling NOAA weather channels on Motorola Walkie Talkies provides real-time weather updates and emergency alerts. Access the menu, select the NOAA weather option, and choose from available channels. Some models automatically scan for the nearest weather station. Once enabled, you’ll receive alerts for severe weather conditions, ensuring you stay informed and prepared. This feature is especially useful for outdoor activities, helping you avoid dangerous conditions. Make sure to test the feature before relying on it in critical situations to ensure proper functionality.

Safety and Emergency Features

Motorola Walkie Talkies include emergency alert functionality, weather monitoring, and call tones to ensure user safety. These features provide critical updates and alerts during hazardous conditions.

6.1 Emergency Alert Functionality

Motorola Walkie Talkies feature an emergency alert system that sends a distress signal to all connected devices. This function is activated by pressing a dedicated button, ensuring quick response during crises. The alert includes a loud siren and visual notifications, making it ideal for critical situations. Users can rely on this feature to signal for help instantly, enhancing safety in remote or high-risk environments. It is a vital tool for ensuring rapid communication when emergencies arise.

6.2 Monitoring Weather Alerts

Motorola Walkie Talkies allow users to monitor NOAA weather channels for real-time updates and emergency alerts. By enabling weather mode, users receive critical notifications about severe weather conditions. This feature is essential for outdoor activities, ensuring safety and preparedness. The device alerts users with tones or LED indicators when a weather warning is issued. Staying informed about changing weather conditions helps users make timely decisions and stay safe during emergencies. This feature is a crucial tool for anyone working or exploring in areas prone to severe weather events.

6.3 Using the Call Tone Feature

The call tone feature on Motorola Walkie Talkies allows users to send a distinctive tone to other radios on the same channel. This feature helps grab attention before transmitting a message, reducing interruptions and ensuring clear communication. To activate it, press the call tone button before speaking. The tone can be adjusted or turned off in the settings menu. This feature is particularly useful in noisy environments or when the volume is low, ensuring the recipient is aware of an incoming transmission. It also provides confirmation that the transmission was successful. Regular use of this feature enhances communication efficiency and clarity in various settings.


Maintenance and Troubleshooting

Regular cleaning and proper storage maintain performance. Troubleshooting involves checking antennas, battery life, and charging ports. Updating firmware ensures optimal functionality and resolving common issues efficiently.

7.1 Cleaning the Walkie Talkie

Regularly clean your Motorola Walkie Talkie to maintain performance and durability. Use a soft, dry cloth to wipe down the exterior, avoiding harsh chemicals. For tougher stains, slightly dampen the cloth but ensure no moisture enters the device. Avoid submerging the walkie-talkie in water, as this may compromise its water-resistance. Use compressed air to gently remove dust from crevices and ports, ensuring proper charging and audio functionality. Never use abrasive materials or harsh chemicals, as they may damage the casing or screen. Clean the PTT button and volume controls with a soft cloth to maintain responsiveness. Always ensure the device is dry before turning it on to prevent electrical damage.

7.2 Storing the Device Properly

Store your Motorola Walkie Talkie in a cool, dry place to prevent damage. Use the original packaging or a protective case to safeguard it from scratches and dust. Avoid exposing the device to direct sunlight or extreme temperatures, as this may degrade the battery or internal components. Ensure the walkie-talkie is turned off and the battery is charged to about 50% before long-term storage to prevent deep discharge. Keep it away from children and pets to avoid accidental damage. Regularly inspect the device for signs of wear or corrosion before and after storage.

7.3 Resolving Common Issues

If your Motorola Walkie Talkie is not functioning properly, start by resetting it to factory settings. Ensure both devices are on the same channel and privacy code. Check for battery issues by charging or replacing them. Static or interference may indicate nearby electronic devices; move to an open area. If communication fails, verify that VOX or squelch settings are not blocking signals. For persistent issues, refer to the user manual or contact Motorola support for assistance. Regular maintenance and updates can prevent recurring problems.

Motorola Walkie Talkies are reliable, durable, and packed with essential features for seamless communication. By following proper operating instructions, users can maximize their experience, ensuring safety and optimal performance. This guide has covered key aspects, from basic operations to advanced settings, helping you make the most of your device. Always adhere to the provided instructions to maintain functionality and stay connected in any situation. With Motorola, communication is made easy, efficient, and enjoyable for everyone.

Manuals

bryant evolution thermostat manual pdf

Welcome to the Bryant Evolution Thermostat Manual PDF guide‚ designed to help users understand and optimize their thermostat’s features for enhanced comfort and energy efficiency.

1.1 Overview of the Bryant Evolution Thermostat

The Bryant Evolution Thermostat is a state-of-the-art HVAC control system offering advanced features like 5-stage heating and cooling‚ occupancy sensing‚ and smart home integration. Designed for precision comfort‚ it provides intuitive controls and energy-efficient operation. This thermostat replaces conventional systems‚ offering a single wall-mounted control for all components. Its user-friendly interface and compatibility with the MyEvolution app ensure seamless remote management‚ enhancing home comfort and convenience.

1.2 Importance of the User Manual for Proper Operation

The user manual is essential for understanding and operating the Bryant Evolution Thermostat effectively. It provides detailed installation‚ configuration‚ and troubleshooting guidelines‚ ensuring optimal performance. The manual outlines safety considerations‚ software versions‚ and feature-specific instructions‚ helping users navigate advanced functions like occupancy sensing and smart integration. Referencing the manual is crucial for maximizing the thermostat’s efficiency and enjoying its full range of benefits.

Features and Benefits of the Bryant Evolution Thermostat

The Bryant Evolution Thermostat offers advanced features like occupancy sensing‚ smart home integration‚ and multi-stage heating/cooling capabilities‚ ensuring energy efficiency and enhanced comfort for users.

Okay‚ so the user is asking me to generate text for a specific section of an article about the Bryant Evolution Thermostat manual PDF. They want it under the subheading ‘

2.1 Occupancy Sensing and Smart Home Integration

‘. I need to make sure I don’t include any information from other sections.

First‚ I should recall the information provided earlier. The user shared some details from the internet about the Bryant Evolution Thermostat‚ including its features like occupancy sensing and smart home integration. They mentioned that occupancy sensing is available with Series B or Series C Evolution Connex Controls. Also‚ there’s something about the MyEvolution web and mobile applications for remote access.

So‚ I need to focus on occupancy sensing and smart home integration. I should highlight how the thermostat detects presence‚ adjusts settings‚ and integrates with smart systems. Also‚ mention the MyEvolution apps for remote control via Wi-Fi. It’s important to note compatibility with Series B and C‚ as that was in the provided info.

I should structure it with a heading‚ then a paragraph. Use bold for key terms like “Bryant Evolution Thermostat‚” “occupancy sensing‚” “smart home integration‚” “MyEvolution web and mobile applications‚” and “Wi-Fi.”

Let me count the words to ensure it’s exactly 64. I’ll draft something like:

The Bryant Evolution Thermostat features advanced occupancy sensing‚ automatically adjusting settings based on presence. It seamlessly integrates with smart home systems‚ enhancing convenience. Using the MyEvolution web and mobile applications‚ users can control the thermostat remotely via Wi-Fi‚ optimizing energy use and comfort. This feature is available on Series B and C models‚ offering a modern‚ connected experience.

Wait‚ that’s . I need to add 8 more. Maybe expand on the benefits:

The Bryant Evolution Thermostat features advanced occupancy sensing‚ automatically adjusting settings based on presence. It seamlessly integrates with smart home systems‚ enhancing convenience. Using the MyEvolution web and mobile applications‚ users can control the thermostat remotely via Wi-Fi‚ optimizing energy use and comfort. This feature is available on Series B and C models‚ offering a modern‚ connected experience for homeowners.

2.2 Multi-Stage Heating and Cooling Capabilities

The Bryant Evolution Thermostat offers advanced multi-stage heating and cooling‚ providing precise temperature control. The Evolution Connex Control supports up to 5-stage systems‚ while the 2-stage HP thermostat offers 2 discrete stages. This flexibility ensures optimal performance‚ efficiency‚ and comfort‚ adapting to various home environments with ease.

Installation and Setup Guide

Read the entire manual before starting installation. Follow safety considerations and local electrical codes. The Evolution Control replaces conventional thermostats‚ simplifying system control.

3;1 Step-by-Step Installation Instructions

Begin by turning off power to the HVAC system. Remove the old thermostat and disconnect wiring. Mount the new Evolution Control‚ ensuring proper alignment. Connect wires according to the manual’s wiring diagram. Turn power back on and test system operation. Follow safety guidelines and local codes. If unsure‚ consult a licensed professional for assistance.

3.2 Initial Setup and Configuration Options

After installation‚ turn on power and follow on-screen prompts to set basic configurations. Choose temperature range‚ time‚ and preferences. Configure smart features like occupancy sensing and remote access via the MyEvolution app. Set up multi-stage heating/cooling if applicable. Customize system settings for energy efficiency and comfort. Refer to the manual for detailed guidance on advanced configurations and troubleshooting tips to ensure optimal performance.

Operating Modes and Functions

The Bryant Evolution Thermostat offers Heat‚ Cool‚ and Auto modes‚ ensuring precise temperature control. Advanced features like 5-stage heating/cooling enhance efficiency and comfort‚ adapting to your needs seamlessly.

4.1 Understanding Heat‚ Cool‚ and Auto Modes

The Bryant Evolution Thermostat operates in Heat‚ Cool‚ and Auto modes. Heat mode activates heating‚ while Cool mode engages cooling. Auto mode automatically switches between heating and cooling based on the set temperature. The Heat/Cool LEDs indicate the active mode‚ and the Right Up/Down Button adjusts the temperature. This intuitive system ensures precise climate control‚ optimizing comfort and energy efficiency in your home.

4.2 Advanced Features Like 5-Stage Heating/Cooling

The Bryant Evolution Thermostat offers advanced 5-stage heating and cooling‚ providing precise temperature control. This feature enhances system performance‚ reducing temperature swings and improving efficiency. The thermostat adapts to your home’s needs‚ adjusting stages seamlessly. Occupancy sensing and smart integration further optimize comfort. Higher stages activate during extreme temperatures‚ ensuring consistent heating and cooling. This advanced functionality makes it ideal for modern smart home systems‚ delivering superior comfort and energy savings.

Troubleshooting Common Issues

The manual provides solutions for common issues‚ such as error codes and thermostat malfunctions. Troubleshooting steps ensure optimal performance and quick resolution of problems.

5.1 Identifying and Resolving Error Codes

The manual lists common error codes for the Bryant Evolution Thermostat‚ such as E1‚ E2‚ and E3‚ and provides step-by-step solutions. Error codes often indicate issues like temperature differences or sensor malfunctions. Users can refer to the troubleshooting section for detailed instructions on resolving these issues. Regularly checking connections and restarting the system can often fix problems. If errors persist‚ contacting a professional is recommended for advanced assistance.

5.2 Resetting the Thermostat to Factory Settings

Resetting the Bryant Evolution Thermostat to factory settings can resolve persistent issues. The manual provides a step-by-step guide‚ typically involving pressing and holding specific buttons for a few seconds. This process restores default settings but may erase custom configurations. After resetting‚ restart the system and reconfigure preferences as needed. If problems persist‚ contact Bryant customer support for further assistance.

Maintenance and Care Tips

Regular cleaning with a soft cloth and avoiding harsh chemicals ensures optimal performance. Refer to the manual for detailed care instructions to maintain efficiency and longevity.

6.1 Cleaning the Thermostat for Optimal Performance


Cleaning your Bryant Evolution Thermostat regularly ensures optimal performance and maintains its advanced features. Use a soft‚ dry cloth to gently wipe the touchscreen and exterior surfaces. Avoid harsh chemicals or liquids‚ as they may damage the display or internal components. For detailed cleaning instructions‚ refer to the manual‚ which provides step-by-step guidance to keep your thermostat functioning at its best.

6.2 Updating Software for Enhanced Functionality

Regular software updates are essential for maximizing the performance of your Bryant Evolution Thermostat. Refer to the manual for instructions on checking and installing updates‚ ensuring you have the latest features and improvements. Visit the MyEvolutionConnex website to download the newest software versions. Always follow the provided guidelines to maintain compatibility and optimize your thermostat’s functionality.

Downloading the Bryant Evolution Thermostat Manual PDF

The Bryant Evolution Thermostat manual is easily accessible online. Visit reliable sources like ManualsDir.com or Bryant’s official website to download the PDF for free without registration.

7.1 Reliable Sources for Manual Download

The Bryant Evolution Thermostat manual can be downloaded from trusted sources like ManualsDir.com or Bryant’s official website. Visit Bryant.com and navigate to the support section. Use the model number search bar to find your specific manual. Additionally‚ platforms like ManualsLib or Scribd may host the PDF. Ensure you verify the source’s credibility to avoid unauthorized downloads.

7.2 Navigating the Manual for Specific Information

The Bryant Evolution Thermostat manual is organized for easy navigation. Use the table of contents to locate sections like installation‚ features‚ or troubleshooting. For quick access‚ utilize the PDF’s search function to find specific keywords. Key sections include “Operating Modes” and “Maintenance Tips.” Ensure you refer to the correct version of the manual corresponding to your thermostat model for accurate guidance.

Remote Access and Smart Control

The Bryant Evolution Thermostat offers remote access and smart control through the MyEvolution app‚ enabling users to adjust settings‚ monitor systems‚ and receive alerts from anywhere.

8.1 Using the MyEvolution Web and Mobile Applications

The MyEvolution web and mobile applications provide seamless control over your Bryant Evolution Thermostat. Adjust settings‚ monitor system performance‚ and receive alerts remotely. The app offers intuitive navigation‚ allowing users to optimize comfort and energy efficiency effortlessly. Access advanced features like scheduling and smart home integration directly from your device. Refer to the manual for detailed setup and usage instructions to maximize functionality.

8.2 Benefits of Remote Thermostat Management

Remote thermostat management offers unparalleled convenience and energy savings. Adjust settings‚ monitor performance‚ and optimize comfort from anywhere using the MyEvolution app. Receive alerts for system updates or issues‚ ensuring your home remains comfortable year-round. Remote access allows you to preemptively manage energy use‚ reducing waste and lowering utility bills. This feature enhances your control over home comfort while providing peace of mind.

Warranty and Customer Support

The Bryant Evolution Thermostat is backed by a comprehensive warranty‚ ensuring coverage for parts and labor. Dedicated customer support is available via phone‚ email‚ and online resources.

9;1 Understanding the Warranty Coverage

The Bryant Evolution Thermostat is protected by a comprehensive warranty program‚ ensuring coverage for parts and labor under specific conditions. Typically‚ the warranty lasts for a defined period‚ such as 5-10 years‚ depending on the component. Proper registration and installation by a certified technician are often required to maintain warranty validity. Refer to the manual for detailed terms and conditions.

9.2 Contacting Bryant Customer Service

For assistance with your Bryant Evolution Thermostat‚ contact customer service via phone‚ email‚ or through the official Bryant website. The manual provides detailed contact information and support options. Bryant’s dedicated team is available to address inquiries‚ resolve issues‚ and provide guidance. Visit the Bryant website for live chat support or to submit a service request. Representatives are ready to help ensure optimal performance and satisfaction with your thermostat.

The Bryant Evolution Thermostat Manual PDF provides comprehensive guidance for optimizing your system. Refer to it for detailed instructions and troubleshooting‚ ensuring peak performance and efficiency year-round.

10.1 Summary of Key Features and Benefits

The Bryant Evolution Thermostat offers advanced features like occupancy sensing‚ smart home integration‚ and multi-stage heating/cooling. It provides precise temperature control‚ energy efficiency‚ and remote access via the MyEvolution app. The thermostat’s intuitive interface and compatibility with various systems ensure enhanced comfort and convenience. These features‚ detailed in the manual‚ help users optimize their HVAC system for maximum performance and savings.

10.2 Encouragement to Refer to the Manual for Detailed Guidance

The manual is an invaluable resource for mastering the Bryant Evolution Thermostat. It provides detailed instructions for installation‚ operation‚ and troubleshooting‚ ensuring optimal performance. Refer to the manual to explore advanced features‚ understand error codes‚ and learn maintenance tips. By following the guide‚ users can maximize functionality‚ resolve issues quickly‚ and enjoy a seamless smart home experience tailored to their comfort needs.

Guide

everquest leveling guide kunark

Welcome to the EverQuest Kunark Leveling Guide‚ your ultimate resource for navigating the iconic expansion. This guide covers leveling strategies‚ zones‚ and tips for a seamless journey from 1 to 60‚ ensuring efficient progress in the vast world of Kunark.

1.1 Overview of the Kunark Expansion

The Ruins of Kunark expansion‚ released in 2000‚ introduced the continent of Kunark‚ raising the level cap to 60. It added the Iksar race‚ epic quests‚ and iconic zones like Sebilis‚ Chardok‚ and Veeshan’s Peak. This expansion enhanced gameplay with new dragons‚ dungeons‚ and high-level content‚ offering players diverse opportunities to explore and advance in the vast world of EverQuest.

1.2 Importance of Kunark in EverQuest Leveling

Kunark’s expansion significantly enhanced EverQuest by introducing a new continent‚ the Iksar race‚ and raising the level cap to 60. It provided structured leveling paths‚ epic quests‚ and high-level dungeons like Lower Guk‚ essential for progression. The addition of diverse zones and content made Kunark a cornerstone for advancing characters‚ offering challenges and rewards that shaped the game’s endgame experience and remain central to efficient leveling strategies.

Leveling from 1-15 in Kunark

Starting your journey in Kunark‚ the early levels (1-15) are foundational. Focus on exploring newbie zones and completing quests to build a strong base for future progression.

2.1 Best Zones for Early Levels

The early levels (1-15) in Kunark are best experienced in the newbie zones. Staying in your starting area is highly recommended as it offers tailored content for new players. Zones like Noble’s Crossing and Crescent Reach provide essential quests and mobs that help build a solid foundation. These areas are designed to ease players into the game’s mechanics and progression system.

2.2 Strategies for Solo and Group Play

Solo players can efficiently level by kiting or root-rotting mobs in zones like the Ocean of Tears. Group play offers faster XP through coordinated pulls and shared XP. For boxers‚ Undead Isle provides ample undead mobs for easy management. Balancing solo and group play ensures a well-rounded progression‚ leveraging Kunark’s diverse content for optimal leveling efficiency and enjoyment.

Leveling from 15-25 in Kunark

Experience the diverse zones of Kunark‚ including the Ocean of Tears and Undead Isle‚ offering excellent XP for both solo and group play‚ ensuring smooth progression.

3.1 Ocean of Tears and Undead Isle

The Ocean of Tears and Undead Isle are exceptional zones for leveling between 15-25. These areas offer abundant undead mobs‚ making them ideal for solo players and boxers alike. The undead are easy to pull and provide consistent XP. Solo players can kite around the island’s edges‚ while groups can tackle tougher enemies. This zone is a favorite for its accessibility and efficient leveling opportunities.

3.2 Effective Grinding Spots

Discover the best grinding spots in Kunark for efficient leveling. The Overthere and Lake of Ill Omen are hotspots for consistent XP gain. The Undead Isle offers endless undead mobs‚ perfect for solo or group farming. Warslik’s Woods provides a dense spawn of iksar mobs‚ ideal for quick kills. These zones ensure steady progression‚ making them essential for any Kunark leveling strategy.

Leveling from 25-40 in Kunark

Explore optimal zones like Lower Guk and Chardok for efficient XP gain. These areas offer rich monster spawns and suitable challenges for mid-level players‚ ensuring steady progression through Kunark;

4.1 Lower Guk and Its Benefits

Lower Guk is a top destination for leveling from 25-40‚ offering abundant undead mobs for consistent XP. Its layout provides multiple paths‚ reducing competition and allowing for efficient solo or group play. Quest opportunities and access to valuable loot make it a prime location for advancing your character during this critical leveling phase in Kunark.

4.2 Alternate Routes and Zones

Beyond Lower Guk‚ players can explore Warslik’s Woods (levels 20-30) for varied mobs and a dynamic environment. The Overthere (35-45) offers diverse enemies and loot‚ while Charasis (53-60) provides challenging dungeon content. These zones reduce competition and offer fresh experiences‚ keeping your leveling journey engaging and efficient in Kunark.

Leveling from 40-50 in Kunark

Transitioning from 40 to 50‚ focus on Warslik’s Woods (levels 20-30) and The Overthere (35-45) for diverse enemies and loot. Engage in dungeon raids for optimal experience and gear‚ ensuring a smooth progression through this critical leveling phase in Kunark.

5.1 Advanced Zones and Quests

For levels 40-50‚ explore Skyfire (50-60) and Charasis (53-60)‚ which offer challenging enemies and rewarding loot. Engage in epic quests like those in Veeshan’s Peak for powerful rewards. Dungeons such as Lower Guk provide excellent XP and gear‚ while Warslik’s Woods offers diverse enemies for consistent leveling. These zones and quests are crucial for advancing efficiently in Kunark.

5.2 Preparing for the Final Push

Before reaching the final levels‚ ensure your gear is optimized by acquiring items from zones like Skyfire and Charasis. Focus on enhancing your mana and health efficiency‚ and master your class’s skill rotations. Join groups for challenging content and plan your progression carefully to maintain steady XP gain. Proper preparation is key to smoothly advancing through the higher levels of Kunark.

Leveling from 50-60 in Kunark

Reaching the final levels requires focus on high-end zones like Skyfire and Veeshans Peak. Engage in challenging content‚ including dragons and epic quests‚ to maximize XP gain efficiently.

6.1 Endgame Content and Zones

The final stretch to level 60 involves tackling Kunark’s endgame zones like Skyfire‚ Veeshans Peak‚ and Charasis. These areas offer challenging content‚ including dragons and elite mobs‚ providing substantial XP. Players must navigate complex mechanics and often require groups for efficiency. These zones are designed to test skills and preparation‚ making them the ultimate test before reaching the level cap.

6.2 Maximizing Experience Gain

To maximize XP in Kunark’s endgame‚ focus on high-density zones like Skyfire and Veeshans Peak. Use kite tactics for soloing or group up for faster mob clears. Pulling multiple enemies and utilizing area-of-effect spells can significantly boost XP gain. Don’t forget to use potions and buffs to enhance efficiency. Consistent grinding in these zones ensures a steady climb to level 60.

Class-Specific Leveling Strategies in Kunark


Optimize your class’s unique abilities to dominate Kunark. Necros excel at soloing with pets‚ while magicians thrive with kiting. Tailor your playstyle to maximize efficiency.

7.1 Optimal Classes for Kunark

Certain classes shine in Kunark due to their unique abilities. Necromancers and Magicians excel with solo-friendly spells‚ while Rangers and Rogues benefit from the expansion’s vast open zones. Shadowknights and Paladins thrive in group settings‚ leveraging their tanking capabilities. Each class has strengths; play to yours for a smoother leveling experience;

7.2 Tailoring Your Playstyle

Adapt your playstyle to Kunark’s diverse zones. Solo players should focus on kite-friendly areas like the Ocean of Tears‚ while group-oriented classes can excel in dungeons such as Lower Guk. Hybrid classes like Bards can balance melee and spellcasting‚ making them versatile in any setting. Adjust your strategies to maximize efficiency and enjoyment based on your class and play preferences.

Epic Quests and Their Role in Leveling

Epic quests in Kunark offer substantial experience and unique rewards‚ accelerating progression. They provide challenging objectives that enhance your character’s power and story immersion‚ making them indispensable for efficient leveling.

8.1 Importance of Epic Quests

Epic quests in Kunark are pivotal for character advancement. They offer exclusive rewards‚ such as powerful weapons and armor‚ that significantly enhance gameplay. Completing these quests not only boosts experience but also provides unique storylines‚ enriching your journey. They are particularly beneficial for high-level players aiming to maximize their character’s potential and prepare for endgame content efficiently.

8.2 Completing Epic Quests for Advancement

Completing epic quests in Kunark is a cornerstone of progression. These quests often require careful planning and coordination‚ especially for class-specific epics. Rewards include potent weapons and abilities that are crucial for tackling higher-level content. Each step brings significant power increases‚ making them indispensable for reaching the level cap and excelling in late-game challenges and raids.

Grinding vs. Questing in Kunark

Grinding offers consistent experience but can be repetitive‚ while questing provides variety and better rewards. Balancing both ensures efficient leveling and keeps gameplay engaging in Kunark.

9.1 Pros and Cons of Grinding

Grinding in Kunark offers consistent XP gain and allows players to target specific mobs for drops. However‚ it can be repetitive and time-consuming‚ potentially leading to boredom. Solo players may find it efficient‚ while groups might prefer questing for varied rewards and dynamic gameplay. Balancing grinding with quests ensures a well-rounded progression strategy in Kunark.

9.2 Balancing Quests and Grinding

Combining quests and grinding optimizes leveling efficiency in Kunark. Quests provide varied rewards and story progression‚ while grinding offers consistent XP. Alternate between questing in zones like Ocean of Tears and grinding undead mobs to avoid monotony. This balance prevents burnout and accelerates progress‚ especially when targeting specific loot or XP needs in the expansive Kunark landscape.

Utilizing Dungeons and Raids

Dungeons like Lower Guk and Sebilis offer rich XP and loot. Raids in Kunark provide epic rewards‚ enhancing your leveling journey with powerful gear and shared victories.

10.1 Key Dungeons in Kunark

Kunark’s dungeons are integral to efficient leveling. Lower Guk‚ with its sprawling layout‚ offers ample XP and gear. Sebilis‚ home to the Iksar‚ provides challenging encounters and valuable drops. Chardok and Veeshan’s Peak are high-end dungeons‚ perfect for endgame content. Each dungeon offers unique experiences tailored to different levels and playstyles‚ making them essential for any Kunark adventurer.

10.2 Participating in Raids for Experience

Participating in raids is a fantastic way to gain experience and gear in Kunark. Dungeons like Veeshan’s Peak and Sebilis offer raid content with substantial XP rewards. Raids require coordination but provide exclusive loot and faster leveling. They are ideal for tackling tough enemies and progressing through high-end content efficiently‚ making them a cornerstone of advanced gameplay in Kunark.

Social Dynamics and Grouping

Grouping enhances XP gain and efficiency in Kunark‚ fostering teamwork and social interaction. Zones like Ocean of Tears and Undead Isle are ideal for collaborative play‚ ensuring a smoother leveling experience and stronger in-game connections.

11.1 Benefits of Group Play

Group play in Kunark offers increased XP‚ shared loot‚ and coordinated strategies‚ making leveling more efficient. Zones like Ocean of Tears and Undead Isle provide ample opportunities for collaborative play‚ while dungeons and raids become more accessible with a team.

Grouping fosters camaraderie and allows players to leverage diverse skill sets‚ enhancing overall progression and enjoyment in the expansive world of Kunark.

11.2 Finding and Managing Groups

Finding groups in Kunark is streamlined through in-game channels and social hubs. Players often gather in zones like Ocean of Tears or Undead Isle‚ making it easy to recruit members. Use LFG tools or join popular group spots to connect with others.

Managing groups involves clear communication‚ setting goals‚ and ensuring balanced roles. A coordinated team enhances efficiency‚ especially in dungeons and raids‚ and fosters a positive gaming experience.

Economy and Gear in Kunark

In Kunark‚ the economy revolves around vendor trash‚ rare drops‚ and player-driven markets. Acquiring gear strategically ensures optimal performance‚ with dungeons and raids offering high-quality loot essential for leveling efficiently.

12.1 Managing In-Game Currency

Effectively managing platinum in EverQuest is crucial for gear and supplies. Sell vendor trash like bone chips and hides to accumulate wealth. Participate in the player-driven economy by buying low and selling high. Prioritize purchasing spells‚ weapons‚ and armor to enhance your character’s performance. Conserving platinum ensures you can afford essential items as you progress through Kunark.

12.2 Acquiring Essential Gear

Acquiring gear in EverQuest is vital for progression. Focus on looting weapons‚ armor‚ and accessories from dungeons like Lower Guk and Chardok. Crafted items from tradeskills can also be potent. Quest rewards and rare drops from named mobs are highly sought after. Regularly check vendors for rare items and consider raiding for high-end equipment to stay competitive in Kunark’s challenging environments.

Concluding your EverQuest journey through Kunark involves mastering zones‚ optimizing gear‚ and strategic play. Stay focused‚ utilize quests‚ and maintain a balanced approach for efficient leveling success.

13.1 Summary of Key Points

This guide highlights essential strategies for leveling in EverQuest’s Kunark expansion. It emphasizes optimal zones for each level range‚ effective grinding spots‚ and the importance of epic quests. Balancing solo and group play‚ managing economy‚ and equipping the right gear are crucial. Utilizing dungeons and raids‚ along with class-specific tactics‚ ensures a streamlined path to reaching level 60 efficiently.

13.2 Final Advice for Efficient Leveling

To maximize your leveling experience in Kunark‚ stay flexible with zones and strategies. Prioritize quests for rewarding experience and gear. Engage in group play for challenging content and utilize dungeons for concentrated XP. Maintain a balanced approach between grinding and questing‚ and regularly update your gear. Consistency and adaptability are key to efficiently reaching level 60 in this expansive world.

Canada

gourmia air fryer instructions français

The Gourmia Air Fryer is a versatile kitchen appliance designed for healthier cooking. With its 8-quart capacity, digital controls, and preset modes, it offers easy air frying, baking, and dehydrating. Perfect for creating delicious meals with minimal oil, it features advanced settings like temperature control up to 450°F and a viewing window for monitoring. Ideal for home cooks seeking convenient, nutritious, and tasty recipes.

Overview of the Gourmia Air Fryer and Its Benefits

The Gourmia Air Fryer is a cutting-edge kitchen appliance that combines versatility with healthy cooking options. It allows users to enjoy crispy, fried-like foods with minimal oil, making it a great alternative to traditional deep frying. With its spacious 8-quart capacity, it’s ideal for cooking for families or preparing large meals. The air fryer features preset modes for various cooking techniques, including air frying, baking, and dehydrating, ensuring perfect results every time. Its intuitive controls, digital interface, and advanced temperature settings (up to 450°F) make it user-friendly and efficient. Additionally, the fryer’s compact design and easy cleanup options enhance its practicality for everyday use.

Installation and Setup

Place the Gourmia Air Fryer on a stable, heat-resistant surface. Plug it in and ensure all parts are securely attached. Follow the manual for initial setup and safety checks.

Unboxing and Initial Preparation

When unboxing your Gourmia Air Fryer, ensure all components are included: the main unit, basket, pan, and user manual. Gently remove packaging materials and inspect for damage. Before first use, wash the basket and pan with mild soap and dry thoroughly. Place the air fryer on a stable, heat-resistant surface, ensuring proper ventilation. Plug in the device and familiarize yourself with the controls. Read the manual carefully to understand safety guidelines and operation. Preheating is recommended before cooking to ensure optimal performance; This preparation ensures a smooth and safe cooking experience with your new Gourmia Air Fryer.

Placing the Air Fryer on a Stable Surface

Position the Gourmia Air Fryer on a stable, heat-resistant, and flat surface, ensuring it is level and secure. Avoid placing it near water or in humid environments to prevent damage. The surface should be sturdy enough to support the appliance’s weight and allow proper airflow for ventilation. Keep it away from flammable materials and ensure there is at least 4 inches of clearance around the air fryer for optimal performance. This setup ensures safety, prevents accidents, and maintains the appliance’s efficiency. Always follow the manufacturer’s guidelines for placement to guarantee safe and effective operation of your Gourmia Air Fryer.

Understanding the Controls and Features

The Gourmia Air Fryer features a user-friendly digital interface with intuitive controls. It includes a temperature control knob and buttons for adjusting time and selecting preset modes. The appliance offers multiple preset settings for air frying, baking, and dehydrating, making it versatile for various recipes. The digital display provides clear visibility of settings, and some models include a viewing window to monitor cooking progress. Additional features like an internal light and a non-stick basket enhance convenience. The controls allow precise adjustments, with temperature settings ranging up to 450°F. Understanding these features ensures optimal use of the air fryer for achieving perfectly cooked dishes every time.

Operating the Gourmia Air Fryer

Operate the Gourmia Air Fryer by setting temperature, time, and selecting preset modes for air frying, baking, or dehydrating. Use the digital controls for precise adjustments up to 450°F.

Basic Controls: Temperature, Time, and Preset Modes

The Gourmia Air Fryer features intuitive controls for easy operation. Adjust temperature up to 450°F using the TEMP/TEMPS dial. Set cooking time with the plus and minus buttons. Preset modes, such as air fry, bake, and dehydrate, simplify cooking various dishes. Simply select the mode, set the temperature, and start cooking. The digital interface ensures precise control, making it easy to achieve perfect results. These basic controls allow users to customize their cooking experience while maintaining simplicity for all skill levels.

Cooking Techniques: Air Frying, Baking, and Dehydrating

The Gourmia Air Fryer excels in air frying, baking, and dehydrating. Air frying produces crispy results with minimal oil, ideal for fries and chicken. Baking mode is perfect for cakes, bread, and roasted vegetables, ensuring even cooking. Dehydrating allows for homemade snacks like jerky or dried fruits. Each preset mode optimizes temperature and time for specific dishes. With these versatile techniques, users can explore a wide range of healthy and flavorful recipes effortlessly. The air fryer’s advanced features ensure consistent results, making it a go-to appliance for diverse culinary creations.

Cleaning and Maintenance

Regularly clean the basket and pan with warm soapy water, dry thoroughly to prevent rust, and wipe the exterior with a damp cloth. Check for food residue to maintain optimal performance and efficiency.

Steps for Cleaning After Each Use

To maintain your Gourmia Air Fryer, clean it after every use. Unplug the appliance before cleaning to ensure safety. Wipe the exterior with a damp cloth to remove splatters. For the basket and pan, wash them with warm soapy water, then rinse thoroughly. Dry all parts to prevent rust. Regular cleaning prevents food residue buildup and maintains performance. Avoid using abrasive cleaners or scourers, as they may damage surfaces. For stubborn stains, soak the basket and pan in hot water before scrubbing gently. Always ensure the air fryer is completely dry before storing it. This routine keeps your device in optimal condition for future use.

Deep Cleaning and Maintaining Optimal Performance

For deep cleaning, unplug the Gourmia Air Fryer and let it cool. Remove and wash the basket and pan with hot soapy water. Use a soft brush to clean the heating element and fan. Wipe the exterior with a damp cloth and mild detergent. Dry all parts thoroughly to prevent rust. Regularly cleaning the interior vents and ensuring no food particles are stuck will maintain airflow and performance. Avoid abrasive cleaners to protect surfaces. Deep cleaning every 1-2 months ensures your air fryer remains efficient and hygienic for long-term use. This maintenance routine keeps your appliance in excellent working condition.

Troubleshooting Common Issues

Common issues include the air fryer not turning on, uneven cooking, or excessive noise. Check power connections, ensure proper basket placement, and clean debris. Resetting or consulting the manual often resolves malfunctions. Regular maintenance and cleaning can prevent these issues and ensure optimal performance. Addressing problems promptly helps maintain the appliance’s efficiency and longevity.

Resolving Error Codes and Malfunctions

Common issues with the Gourmia Air Fryer may include error codes or malfunctions. If the appliance does not turn on, check the power connection and ensure it is properly plugged in. For error codes like E1 or E2, refer to the user manual for specific troubleshooting steps. Often, resetting the device or cleaning debris from sensors resolves these issues. Excessive noise or uneven cooking may indicate improper basket placement or food overload. Regular cleaning and maintenance can prevent many malfunctions. If problems persist, contact customer support or consult the warranty for repair options. Addressing issues promptly ensures optimal performance and longevity of your air fryer.


Cooking Chart and Time/Temperature Settings

The Gourmia Air Fryer includes a detailed cooking chart for precise time and temperature settings. Adjust the dial to select temperatures up to 450°F for optimal results. Use the chart to achieve perfect doneness for fries, chicken, and vegetables, ensuring crispy textures and even cooking. Referencing this guide helps customize settings for various recipes, guaranteeing delicious outcomes every time. Always preheat before cooking for best performance. The chart is your key to mastering air frying, baking, and dehydrating with ease and consistency.

Using the Air Fryer Cooking Chart for Perfect Results

The Gourmia Air Fryer Cooking Chart is your guide to achieving flawless dishes. It provides recommended time and temperature settings for various foods, from crispy fries to tender chicken. Refer to the chart to ensure precise cooking for vegetables, meats, and snacks. Adjust the temperature dial and timer based on the chart’s instructions for optimal results. Preheating is essential for even cooking. Use the chart to customize settings for specific recipes, ensuring crispy textures and consistent flavors. This resource is designed to help you master air frying, baking, and dehydrating with ease and confidence. Follow the chart for perfect, delicious outcomes every time.

Recipe Ideas and Tips

Discover the Gourmia Air Fryer’s potential with diverse recipes: crispy fries, tender chicken, and vibrant vegetables. Use preset modes for consistency. Ensure even cooking by preheating and avoiding overcrowding. Shake the basket halfway for crispiness and explore healthy, oil-free options for delicious meals.

Healthy and Delicious Meal Options

The Gourmia Air Fryer excels at creating nutritious and flavorful dishes with minimal oil. Try crispy chicken wings, tender salmon, or roasted vegetables like broccoli and sweet potatoes. For a quick snack, air-fry homemade fries or veggie sticks. Experiment with global-inspired recipes, such as Korean-style BBQ beef or Mediterranean chickpeas. The air fryer’s precision temperature control ensures perfectly cooked meals every time. Achieve golden, crispy textures without deep frying, making it ideal for health-conscious cooking. Preheating and proper basket arrangement are key for even cooking. Explore endless possibilities while enjoying guilt-free, delicious meals tailored to your dietary preferences.

Warranty and Customer Support

Gourmia offers a comprehensive warranty and dedicated customer support. For repairs or inquiries, contact their team through the official website or provided support channels for assistance.

Understanding Your Warranty and Repair Options

Gourmia air fryers come with a warranty covering manufacturing defects for a specified period, typically one year. To ensure coverage, register your product on the Gourmia website. For repairs, contact customer support through their official channels. Provide proof of purchase and a detailed description of the issue. Gourmia may offer free repairs or replacements under warranty. If issues arise outside the warranty period, optional repair services or replacement parts may be available for purchase. Visit the Gourmia website for full warranty terms and conditions. Their dedicated support team is ready to assist with any inquiries or repair needs, ensuring your air fryer performs optimally.

Final Thoughts on Using the Gourmia Air Fryer

The Gourmia Air Fryer offers a versatile, easy-to-use solution for healthier cooking. With its advanced features and preset modes, it enhances your culinary experience, making meal prep efficient and enjoyable.

The Gourmia Air Fryer is an excellent choice for home cooks seeking a healthier, versatile cooking solution. Its 8-quart capacity, preset modes, and temperature control up to 450°F make it ideal for air frying, baking, and dehydrating. The intuitive digital interface and viewing window enhance convenience, while the durable design ensures long-lasting performance. Regular cleaning and maintenance are straightforward, keeping the appliance in optimal condition. With its ability to deliver crispy, flavorful results with minimal oil, the Gourmia Air Fryer is a valuable addition to any kitchen, offering endless possibilities for delicious and nutritious meals. Its compact storage options, like the Fry N Fold model, further add to its practicality. Whether you’re a novice or an experienced cook, this air fryer simplifies meal prep while promoting healthier eating habits. The Gourmia Air Fryer truly stands out as a reliable and versatile kitchen companion.

PDF

ap biology unit 1 test pdf

Overview of AP Biology Unit 1

AP Biology Unit 1 introduces foundational concepts like the chemistry of life, biological molecules, and cell structure. It is a challenging yet essential starting point for the course. Students can prepare effectively using practice test PDFs, which include multiple-choice questions and free-response questions (FRQs) to simulate real exam conditions. These resources help familiarize students with the exam format and improve test-taking skills, ensuring better performance on the actual AP Biology Unit 1 test.

1.1 Importance of Unit 1 in AP Biology

Unit 1 of AP Biology is foundational, introducing core concepts like the chemistry of life and biological molecules. Mastery of these topics is crucial as they form the basis for understanding more complex ideas in later units. The unit assesses essential skills such as scientific inquiry and data analysis. Students who excel in Unit 1 typically perform better overall, making it a critical starting point. Practice tests and FRQs from sources like Etiwanda High help students gauge their readiness and refine their test-taking strategies effectively.

1.2 Key Topics Covered in Unit 1

AP Biology Unit 1 focuses on foundational concepts such as the chemistry of life, biological molecules, and cell structure. Key topics include the structure of atoms, chemical bonding, properties of water, and the hierarchy of biological organization. Students also explore biomolecules like carbohydrates, lipids, proteins, and nucleic acids. Practice tests highlight these areas, ensuring comprehension of essential biological principles. The unit also introduces evolutionary concepts, such as the role of populations as evolutionary units, preparing students for advanced topics in later units.

1.3 Why Practicing with a Test PDF is Essential

Practicing with a Unit 1 test PDF is crucial for success in AP Biology. These resources simulate real exam conditions, helping students familiarize themselves with question formats and time constraints. PDFs often include multiple-choice questions and free-response questions, allowing students to assess their understanding of key topics like the chemistry of life and biological molecules. Regular practice with PDFs enhances test-taking strategies, identifies knowledge gaps, and boosts confidence, ultimately improving performance on the actual AP Biology Unit 1 exam.

Structure of the AP Biology Unit 1 Test

The test is divided into two sections: Section I with multiple-choice questions and Section II with free-response questions. It assesses knowledge of biological concepts and applications.

2.1 Multiple-Choice Questions: Format and Timing

Section I contains 69 multiple-choice questions, divided into Part A (63 questions) and Part B (6 grid-in questions). Students have 90 minutes to complete this section. Part A focuses on standard multiple-choice questions, while Part B requires numerical answers. Practice test PDFs provide examples of these formats, helping students familiarize themselves with the question types and improve time management skills. The multiple-choice section assesses factual knowledge and analytical thinking, mirroring the actual exam structure.

2.2 Free-Response Questions (FRQs): Structure and Grading

Section II includes 6-7 free-response questions (FRQs), requiring detailed, essay-like answers. Each FRQ is divided into parts (e.g., a, b, c) and assesses critical thinking and in-depth knowledge. Grading is based on point systems, with scores ranging from 4-7 points per question, depending on accuracy and completeness. Practice test PDFs often include sample FRQs with answer keys, helping students understand grading expectations and refine their responses. This section tests the ability to articulate complex biological concepts clearly and concisely.

2.3 Section I and Section II: Content Breakdown

Section I consists of 69 multiple-choice questions, divided into Part A (63 questions) and Part B (6 grid-in questions). These assess knowledge of Unit 1 topics like chemistry, biological molecules, and cell structure. Section II includes 6-8 free-response questions (FRQs), focusing on deeper analysis and application of concepts. Together, both sections evaluate understanding of foundational biology principles. Practice test PDFs provide examples of both question types, helping students prepare for the exam’s dual-format structure.

Practice Test PDFs for Unit 1 Preparation

Practice test PDFs for Unit 1 provide realistic exam simulations, featuring multiple-choice questions and FRQs. They help students assess their understanding and identify areas for improvement effectively.

3.1 Where to Find Reliable Practice Test PDFs

Reliable practice test PDFs for AP Biology Unit 1 can be found on official College Board resources, school websites like Etiwanda High, and educational platforms such as Khan Academy. Additionally, online forums and study groups often share released FRQs and practice exams. These materials are essential for familiarizing yourself with the exam format and content, ensuring you are well-prepared for the actual test. Always verify the source to ensure the PDFs are accurate and up-to-date for the best study experience.

3.2 How to Use Practice Tests Effectively

To use practice tests effectively for AP Biology Unit 1, start by simulating exam conditions, including timing and environment, to build familiarity with the format; After completing a test, review each question to understand why answers are correct or incorrect, focusing on weak areas. Consider discussing challenging questions with classmates to deepen understanding. Maintain a positive attitude, using tests as a tool for improvement rather than a measure of self-worth. Track progress over time and adjust study plans accordingly, ensuring a strategic and focused approach to preparation. This methodical use of practice tests will enhance readiness for the actual exam.

3.3 Analyzing Sample Questions from Released Tests

Analyzing sample questions from released tests is crucial for understanding the exam format and content focus. Review multiple-choice questions to identify common themes, such as the chemistry of life or biological molecules. Examine free-response questions (FRQs) to understand how to structure clear, concise answers. Pay attention to recurring topics, like cell structure or evolutionary concepts, and use answer keys to clarify misunderstandings. This process helps refine test-taking strategies and builds confidence in addressing various question types effectively. Regular analysis ensures targeted preparation.

Released Free-Response Questions (FRQs)

Released FRQs are valuable study tools, offering insights into exam expectations. They cover key topics like biological molecules and evolutionary concepts, helping students refine their writing skills and time management.

4.1 Examples of FRQs from Past Exams

Past AP Biology Unit 1 FRQs often focus on evolutionary biology and molecular structure. For instance, the 2009 FRQ asked about population genetics, while the 2008 exam included questions on biological molecules and their functions. These examples provide students with a clear understanding of the types of questions to expect and help refine their ability to articulate scientific concepts concisely. Reviewing these questions is a proven strategy to improve exam performance and master Unit 1 content effectively.

4.2 Strategies for Answering FRQs

To excel in FRQs, focus on understanding the question and addressing all parts. Use clear, concise language and organize your answers logically. Practice past FRQs to familiarize yourself with common question formats. Allocate time wisely, ensuring each section is completed. Reviewing released FRQs and sample questions helps refine your approach. Use diagrams or flowcharts when appropriate to enhance explanations. Regular practice with timed conditions builds confidence and improves performance in the actual exam setting.

4.3 Common Mistakes to Avoid in FRQs

Common mistakes in FRQs include not fully addressing all parts of the question, providing irrelevant information, and poor time management. Students often neglect to label diagrams or explain concepts thoroughly. Misinterpreting the question and failing to use proper terminology can also lead to point deductions. Additionally, some students rush through their answers, resulting in unclear or incomplete responses. Practicing with sample FRQs helps identify and avoid these errors, ensuring more accurate and comprehensive answers during the actual exam.

Content Review for Unit 1

Unit 1 focuses on the chemistry of life, biological molecules, and cell structure. Key concepts include biomolecules, cellular organelles, and the basics of chemical interactions in living organisms.

5.1 Chemistry of Life: Key Concepts

The chemistry of life explores the foundational elements of biology, including carbon, hydrogen, oxygen, nitrogen, and phosphorus. These elements form the basis of biological molecules. Key concepts include chemical bonds, water’s unique properties, pH scales, and the structure of biomolecules like carbohydrates, proteins, lipids, and nucleic acids. Understanding these principles is crucial for grasping cellular functions and interactions. Practice tests highlight these topics, ensuring students master the chemical foundation of life, essential for advanced AP Biology concepts.

5.2 Biological Molecules and Their Functions

Biological molecules, such as carbohydrates, lipids, proteins, and nucleic acids, are vital for life. Carbohydrates provide energy, lipids store it and form membranes, proteins perform diverse functions, and nucleic acids store genetic information. Understanding their structures, roles, and interactions is essential for AP Biology. Practice tests often include questions on these molecules, helping students connect their functions to cellular processes and overall organismal health, reinforcing their importance in biological systems and preparing them for exam success.

5.3 Cell Structure and Organization

Cells are the basic structural and functional units of life, composed of organelles like mitochondria, ribosomes, and the nucleus. Each organelle has specific roles, such as energy production or protein synthesis. Cell membranes regulate material transport, and cytoskeletal elements provide support. Understanding cell organization is critical for AP Biology, as it explains how cells maintain homeostasis and perform specialized functions. Practice tests often include questions on organelle functions and cellular processes, reinforcing these concepts for exam readiness and success.

Test-Taking Strategies

Mastering time management is crucial for AP Biology Unit 1. Allocate time evenly across sections, prioritizing questions you’re confident about. For multiple-choice, eliminate incorrect options first. When tackling free-response questions, outline your answer before writing to ensure clarity and completeness. Practice active reading of questions to identify key terms and focus your responses. These strategies enhance efficiency and accuracy, maximizing your score potential.

6.1 Time Management During the Exam

Effective time management is critical for success on the AP Biology Unit 1 exam. Allocate 90 seconds per multiple-choice question to ensure timely completion. For free-response questions (FRQs), spend 15-20 minutes per question to provide detailed answers. Skim through the test first to identify easier questions and tackle them early. Avoid spending excessive time on a single question; move forward and return if time permits. Practice under timed conditions using practice test PDFs to refine your pacing and reduce exam-day stress.

6.2 Approaches to Tackling Multiple-Choice Questions

When tackling multiple-choice questions on the AP Biology Unit 1 exam, focus on identifying key terms in the stem to narrow down answers. Eliminate clearly incorrect options first to increase chances of selecting the right answer. Skim through all questions quickly to answer easier ones first, saving time for more challenging ones later. Use process of elimination and understand that some questions may require recalling specific details from practice test PDFs. Always guess if unsure, as there’s no negative marking. Practice these strategies to improve efficiency and accuracy during the exam.

6.3 Tips for Writing Clear and Concise FRQ Answers

When answering Free-Response Questions (FRQs), prioritize clear and concise writing to ensure all points are addressed. Begin by carefully reading the question to identify key components. Outline your response briefly to organize your thoughts. Use specific biological examples and terminology to support your answers. Avoid unnecessary details and focus on directly addressing the question; Practice writing under timed conditions to improve efficiency. Finally, proofread your answers to correct errors and ensure clarity, as neat and organized responses are easier for graders to follow.

Additional Resources for Success

Recommended textbooks, online study guides, and interactive platforms provide comprehensive support for mastering AP Biology Unit 1 concepts and practicing with test PDFs effectively.

7.1 Recommended Textbooks and Study Guides

Key resources include textbooks like Campbell Biology and Cracking the AP Biology Exam, which offer in-depth explanations and practice questions. Study guides such as Kaplan AP Biology provide focused review materials. Additionally, online platforms like Khan Academy and College Board offer free study resources. These tools, along with practice test PDFs, help students master Unit 1 topics like the chemistry of life and biological molecules, ensuring a strong foundation for the AP exam.


7.2 Online Platforms for Practice and Review

Online platforms like Khan Academy and College Board offer free practice materials and review resources for AP Biology Unit 1. Websites such as Canvas provide access to multiple-choice questions and free-response questions (FRQs) for self-assessment. Additionally, platforms like Quizlet and Albert.io provide interactive exercises and study guides tailored to Unit 1 topics. These tools are excellent for reinforcing concepts like the chemistry of life and biological molecules while offering flexible, self-paced learning opportunities.

7.3 Joining Study Groups or Forums

Joining study groups or forums can enhance your preparation for AP Biology Unit 1. Platforms like Reddit’s r/APBiology or Facebook study groups connect students globally, fostering collaborative learning. These communities allow you to discuss challenging topics, share resources like test PDFs, and gain insights from peers. Active participation can help clarify doubts, provide diverse perspectives, and build confidence for tackling the exam. Engaging with others also keeps you motivated and accountable throughout your study journey.

Final Preparation Tips

Final preparation involves creating a detailed study schedule, ensuring adequate rest, and maintaining proper nutrition. Staying confident and motivated is crucial for optimal performance on the AP Biology Unit 1 test. Regularly reviewing notes, practicing past questions, and seeking clarification on doubts will help reinforce understanding and readiness.

8.1 Creating a Study Schedule

Creating a study schedule is essential for effective preparation. Allocate specific time slots for each topic, ensuring balanced coverage of Unit 1 content. Prioritize challenging areas and incorporate practice tests. Set realistic goals and deadlines to avoid burnout. Regular breaks and review sessions help maintain focus and retention. A well-structured schedule ensures all key topics are covered, allowing students to approach the exam with confidence and thorough preparation.

8.2 Importance of Rest and Nutrition

Rest and nutrition play a critical role in maximizing cognitive function and memory retention during AP Biology Unit 1 preparation. Ensure 7-9 hours of sleep nightly to allow your brain to consolidate information effectively. Maintain a balanced diet rich in fruits, vegetables, lean proteins, and whole grains to fuel your mind. Stay hydrated to enhance focus and avoid brain fog. A well-rested, nourished body and mind are essential for optimal performance during study sessions and the actual exam.

8.3 Staying Confident and Motivated

Maintaining confidence and motivation is crucial for success in AP Biology Unit 1. Celebrate small achievements, like mastering a concept or acing a practice question, to build momentum. Surround yourself with supportive peers or join study groups to stay inspired. Remind yourself of your long-term goals and the importance of this exam. A positive mindset and consistent effort will help you approach challenges with confidence, ensuring you’re mentally prepared for the test and beyond.

Manuals

monessen fireplace manual

Welcome to the Monessen Fireplace Manual‚ your comprehensive guide to understanding and maintaining your vent-free gas fireplace. This manual provides essential information for installation‚ operation‚ and troubleshooting‚ ensuring safe and efficient use of your fireplace. Designed to enhance your home’s ambiance‚ Monessen fireplaces offer a clean‚ energy-efficient alternative to traditional wood-burning units. By following the guidelines outlined in this manual‚ you can enjoy optimal performance and longevity of your fireplace. Whether you’re installing a new unit or maintaining an existing one‚ this resource is your go-to for all Monessen fireplace needs.

Overview of Monessen Fireplaces

Welcome to the world of Monessen Fireplaces‚ a leading brand offering high-quality‚ energy-efficient vent-free gas fireplaces. Known for their sleek designs and realistic flame effects‚ Monessen fireplaces provide a cozy and inviting atmosphere to any room. With models like the MCFS36 and the AVFL Series‚ these fireplaces are designed to meet various installation requirements and aesthetic preferences. Monessen fireplaces are engineered for safety and performance‚ featuring advanced combustion systems that ensure efficient heat output. Their vent-free technology eliminates the need for chimneys‚ making them a practical choice for homeowners. Whether you’re seeking a traditional or modern look‚ Monessen fireplaces deliver warmth‚ comfort‚ and style‚ backed by durable construction and innovative engineering.

Importance of Reading the Manual

Reading the Monessen Fireplace Manual is crucial for ensuring safe and efficient operation of your vent-free gas fireplace. This guide provides detailed instructions for installation‚ maintenance‚ and troubleshooting‚ helping you avoid potential hazards and performance issues. The manual includes specific guidelines for models like the MCFS36 and AVFL Series‚ ensuring compliance with safety standards. By following the manual‚ you can optimize your fireplace’s performance‚ extend its lifespan‚ and enjoy a worry-free experience. Whether you’re a homeowner or an installer‚ the manual serves as an essential resource for understanding your fireplace’s features and requirements. It is your key to unlocking the full potential of your Monessen fireplace while maintaining safety and efficiency.

Installation Guidelines

The Monessen Fireplace Manual provides a detailed guide for installing vent-free gas fireplaces‚ ensuring safe and efficient setup. Follow the instructions carefully to avoid hazards and ensure proper functionality. Specific models like the MCFS36 and AVFL Series may have unique requirements‚ so adherence to the manual is crucial for optimal performance and safety.

Step-by-Step Installation Process for Vent-Free Gas Fireplaces

Begin by carefully planning the installation location‚ ensuring it meets local building codes and Monessen’s specifications. Measure the space to confirm it fits the fireplace dimensions. Locate the rating plate‚ typically near the gas control valve‚ to verify the model and specifications. Unpack and inspect the unit for damage. Assemble the fireplace by attaching the log set and ensuring all connections are secure. For models like the AVFL Series‚ follow specific requirements for mantel height and depth. Connect the gas line‚ ensuring it is leak-free and properly sized. Test the ignition system and verify proper ventilation for safe operation. Finally‚ install any decorative components and test the fireplace to ensure optimal performance.

Specific Requirements for the AVFL Series

The AVFL Series by Monessen requires precise installation steps to ensure safety and performance. Mantel height and depth must adhere to the specifications outlined in the manual‚ as improper installation can compromise efficiency and safety. Refer to the Monessen AVFL Series Installation Manual (4099-901 Rev. A‚ 03/21) for detailed guidelines. The manual emphasizes proper venting‚ gas line sizing‚ and clearance requirements. Additionally‚ ensure all components are securely connected and tested before use. For optimal performance‚ follow the recommended maintenance schedule and troubleshooting tips provided in the manual. This ensures your AVFL Series fireplace operates efficiently and safely for years to come. Always consult the official manual for model-specific instructions.

Safety Precautions and Guidelines

Always follow safety guidelines when operating your Monessen Fireplace. Ensure proper ventilation‚ avoid flammable materials nearby‚ and inspect gas lines regularly. Refer to the Monessen Fireplace Manual for detailed safety precautions to prevent accidents and ensure safe operation.

Placing Gas Log Sets in Fireplaces with Restrictive Barriers

When installing a gas log set in a fireplace with restrictive barriers‚ ensure proper placement to maintain safety and efficiency. Restrictive barriers‚ such as grilles or screens‚ must be correctly measured and positioned to allow adequate airflow. Refer to the Monessen Fireplace Manual for specific guidelines on barrier clearance and log set placement. Always follow manufacturer recommendations to prevent obstruction of combustion air or exhaust. Improper installation can lead to performance issues or safety hazards. If unsure‚ consult a professional to ensure compliance with safety standards and optimal operation of your gas fireplace system.

Location of the Rating Plate for Gas Fireplaces

The rating plate for gas fireplaces is typically located near the gas control valve‚ which is often housed behind the lower or side control door. This plate contains essential information‚ including the model number‚ serial number‚ and safety certifications. It is crucial to locate the rating plate for compliance with installation and operational guidelines. For Monessen fireplaces‚ the rating plate may also provide specific instructions or warnings. Always refer to the rating plate to ensure your fireplace is installed and maintained according to manufacturer specifications. If the rating plate is difficult to find‚ consult the Monessen Fireplace Manual or contact a certified technician for assistance.

Maintenance and Upkeep

Regular maintenance ensures optimal performance and safety of your Monessen fireplace. Daily cleaning and inspections‚ along with seasonal checks‚ are crucial. Always refer to the manual for specific recommendations tailored to your model‚ ensuring compliance with safety standards and warranty requirements.

Daily Maintenance Tips for Optimal Performance

Daily maintenance is essential to ensure your Monessen fireplace operates efficiently and safely. Start by inspecting the glass panels for any soot or residue‚ cleaning them with a soft cloth when necessary. Check the gas logs and burners for proper alignment and ensure they are free from debris. Regularly vacuum the firebox to remove dust and dirt. Inspect the gas line connections to confirm they are secure and leak-free. Additionally‚ keep the surrounding area clear of flammable materials. For optimal performance‚ follow the manual’s cleaning schedule and avoid using harsh chemicals. Finally‚ monitor the unit for unusual sounds or odors‚ addressing any issues promptly to prevent damage. By adhering to these daily tips‚ you can maintain your fireplace’s efficiency and extend its lifespan.

Seasonal Maintenance Recommendations

Seasonal maintenance is crucial to ensure your Monessen fireplace remains efficient and safe throughout the year. Before the heating season begins‚ inspect the venting system for blockages or damage‚ ensuring proper ventilation. Clean or replace the venting components as needed. Inspect the burner and logs for wear or soot buildup‚ cleaning them gently with a soft brush. Check the gas line connections for leaks and tighten them if necessary. Lubricate any moving parts‚ such as the damper or control valves‚ to maintain smooth operation. Additionally‚ during the off-season‚ turn off the gas supply and cover the fireplace to protect it from dust and debris. Regular seasonal upkeep will help prolong the lifespan and performance of your fireplace.

Troubleshooting Common Issues

This section helps identify and resolve common problems with your Monessen fireplace‚ such as ignition issues‚ low flame‚ or unusual odors. Always check the gas supply and venting system for blockages before troubleshooting. Refer to the manual for specific solutions and safety guidelines to ensure your fireplace operates efficiently and safely.

Identifying and Resolving Common Problems

Common issues with Monessen fireplaces include ignition problems‚ low flame output‚ or unusual odors. Always start by checking the gas supply and ensuring vents are clear of obstructions. If the fireplace fails to ignite‚ verify that the gas valve is fully open and the pilot light is functioning. For low flames‚ inspect the air shutter for proper alignment and ensure no debris is blocking the burner. Unusual odors may indicate improper venting or gas log placement. Refer to the manual for specific troubleshooting steps‚ and always reset the gas control valve if necessary. For persistent issues‚ consult a certified technician to ensure safety and efficiency. Regular maintenance can prevent many of these problems. Always follow the guidelines provided in the manual for optimal performance.

Resetting the Gas Control Valve

Resetting the gas control valve is a common troubleshooting step for Monessen fireplaces. To reset‚ first ensure the gas supply is turned off and the area is well-ventilated. Locate the gas control valve‚ typically found near the base or behind the lower control door. Press and hold the reset button for 30 seconds to allow any residual gas to clear. Release the button and turn the gas supply back on. If the issue persists‚ check for blockages or obstructions in the valve or surrounding areas. Always refer to the manual for specific instructions‚ as procedures may vary slightly by model. If problems continue‚ consult a certified technician to ensure safe and proper operation.


Where to Find the Monessen Fireplace Manual

The Monessen Fireplace Manual can be downloaded from the official Monessen website or authorized dealers. Visit their support section and search by model number for easy access.

Downloading the Manual from Official Sources

To download the Monessen Fireplace Manual‚ visit the official Monessen website and navigate to the support or resources section. Use the search function to find your specific model by entering its name or product number. For example‚ users can search for the MCFS36 model to access its manual. Once located‚ click the download button to save the PDF version. Ensure the manual matches your fireplace model for accurate information. Always compare the downloaded manual with the printed version provided with your unit for consistency. This ensures you have the most up-to-date and relevant instructions for installation‚ maintenance‚ and operation. Official sources guarantee authenticity and reliability.

Accessing Manuals for Specific Models Like MCFS36

To access the manual for the MCFS36 model‚ visit the official Monessen website and navigate to the support section. Use the model-specific search feature by entering MCFS36 to locate the correct manual. The manual will be available in PDF format‚ ensuring easy downloading and printing. Additionally‚ the Monessen website may provide a direct link to the MCFS36 manual‚ eliminating the need for extensive searching. Always verify the manual’s authenticity by cross-checking it with the product information provided at purchase. This ensures you have accurate and model-specific instructions for installation‚ operation‚ and maintenance. By following the guidelines in the MCFS36 manual‚ you can optimize your fireplace’s performance and safety.

PDF

how to edit a pdf after signature

Editing a signed PDF presents challenges, requiring careful navigation of legal and technical limitations to maintain document integrity while addressing post-signature modifications and ensuring authenticity.

1.1 Understanding the Challenges of Post-Signature Editing

Editing a PDF after it has been digitally signed poses significant challenges. Once a document is signed, altering its content can invalidate the signature or lock the file, making further edits difficult. Many PDF editors lack the capability to modify signed documents without removing the signature, which may not be ideal for users needing to preserve authenticity. Additionally, some tools may not support post-signature edits, requiring workarounds like printing and re-saving the document, which can compromise quality or functionality.

Methods to Edit a PDF After Signature

Explore methods to edit PDFs after signatures, such as using Adobe Acrobat, alternative editors, or online tools, ensuring security and document authenticity throughout the process.

2.1 Using Adobe Acrobat for Post-Signature Edits

Adobe Acrobat offers robust tools for editing PDFs after signatures. Open the signed PDF, navigate to Edit PDF mode, and make necessary changes without invalidating the signature. While Acrobat restricts certain edits on locked documents, basic modifications like text adjustments or annotations are possible. For extensive changes, consider removing the signature temporarily. Always save the edited file as a new copy to preserve the original signed version. This method ensures document authenticity while accommodating post-signature adjustments efficiently.

2.2 Alternative PDF Editors for Post-Signature Modifications

Beyond Adobe Acrobat, tools like Smallpdf, PDF-XChange Editor, or Foxit PhantomPDF offer solutions for editing signed PDFs. These editors allow text adjustments, annotations, and even signature removal. Online platforms such as Sejda or DocHub provide browser-based editing options. While these tools enable post-signature changes, they may lack advanced features compared to Acrobat. Always verify compatibility and ensure the PDF isn’t locked for editing. These alternatives are convenient for users seeking affordable or temporary solutions to modify signed documents effectively.

Step-by-Step Guide to Editing a Signed PDF

Open the PDF in an editor like Adobe Acrobat, navigate to edit mode, make desired changes, and save. This process ensures document integrity post-signature edits.

3.1 Opening the Signed PDF in Adobe Acrobat

To edit a signed PDF, launch Adobe Acrobat and select File > Open to locate your document. Once opened, Acrobat may display a read-only warning. If the PDF is locked, you’ll need to authenticate or use alternative methods to proceed with edits while preserving the signature integrity for further modifications.

3.2 Navigating to the Edit Mode

After opening the signed PDF in Adobe Acrobat, access the editing tools by clicking on the Tools pane on the right side. Select Edit PDF to enter Edit Mode. If the PDF is read-only, a warning may appear, indicating that editing requires authentication or additional permissions. Once in Edit Mode, you can modify text, images, and other elements while preserving the digital signature, though some features may remain restricted due to the signature’s protective locking mechanisms.

3.3 Making Changes to the PDF Content

In Edit Mode, use the Format Text tool to modify text, adjust fonts, or resize elements. Click and drag to highlight text for editing or insert new text boxes. For images, use the Objects tool to resize, rotate, or replace visuals. Ensure changes are minimal to avoid invalidating the signature. After editing, save the file with a new name to preserve the original signed version. Always review changes to maintain document accuracy and compliance with legal standards before finalizing.

Removing or Updating Digital Signatures

To remove or update a digital signature, open the PDF in Adobe Acrobat, navigate to the Signatures panel, and right-click the signature to edit or delete it.

4.1 How to Remove a Digital Signature

To remove a digital signature, open the PDF in Adobe Acrobat. Navigate to the Signatures panel, right-click the signature, and select Delete. This action removes the signature but doesn’t alter the document content. Ensure you have permission to remove the signature, as it may impact the document’s legal validity. After removal, save the PDF to apply changes. Note that removing a signature doesn’t unlock the document for editing if it was previously locked after signing.

4.2 Updating a Digital Signature After Edits

After editing a signed PDF, updating the digital signature is crucial to maintain authenticity. Open the PDF in Adobe Acrobat, make the necessary edits, then re-sign the document using your digital ID. This process invalidates the original signature and creates a new one, ensuring the updated content is validated. Ensure all parties are informed of the changes to uphold legal validity. Always use trusted tools to avoid compromising the document’s security and integrity.

Using Online Tools for Post-Signature Edits

Online tools like Adobe Acrobat and other PDF editors allow users to edit signed PDFs conveniently. These platforms enable modifications while ensuring document integrity and security, though removing the signature is often required for edits.

5.1 Popular Online PDF Editors for Post-Signature Changes

Popular online tools like Adobe Acrobat, Smallpdf, and DocHub offer robust solutions for editing PDFs after signatures. These platforms provide intuitive interfaces for text editing, annotation, and layout adjustments. Some tools allow users to remove or update signatures directly, while others require downloading and re-uploading the document. Ensure the chosen editor supports post-signature modifications and maintains document security. Always verify the tool’s compatibility with your PDF’s encryption level to avoid accessibility issues during edits.

5.2 Ensuring Security When Using Online Tools

When using online tools for post-signature edits, prioritize document security. Verify the tool uses SSL encryption and adheres to data privacy regulations. Choose platforms with end-to-end encryption to protect sensitive information. Avoid tools that store your PDF indefinitely. Always review the service’s privacy policy and ensure it complies with standards like GDPR or HIPAA. Use strong, unique passwords and enable two-factor authentication for your account. Avoid using public or unsecured networks to upload or edit your PDF. Lastly, ensure the tool does not alter the document’s digital signature without your consent.

Manual Workarounds for Locked PDFs

Explore manual methods to edit locked PDFs, such as printing and re-saving or using OCR tools, though this may remove digital signatures.

6.1 Printing and Re-saving the PDF

One effective workaround for editing a locked PDF is to print it and save it as a new file. Open the PDF, go to File > Print, and select “Save as PDF” as the printer option. This creates a new, editable version of the document. While this method removes the digital signature, it allows you to make necessary changes. After editing, you can re-save the file. Note that this process may slightly alter formatting, so always review the final document for accuracy.

6.2 Using OCR Tools for Locked PDFs

When a PDF is locked after being signed, OCR (Optical Character Recognition) tools can help extract editable text from scanned or image-based PDFs. These tools convert non-editable content into a format that allows modifications. While this method doesn’t remove the digital signature, it enables you to recreate the document’s content. After extracting the text, you can edit and save it as a new PDF. Note that OCR may not perfectly retain the original formatting, so some adjustments might be needed after conversion.

Legal and Technical Considerations

Editing a signed PDF can have legal implications, as it may invalidate the signature or breach contractual agreements. Technical restrictions may also prevent certain edits entirely.

7.1 Understanding the Legal Implications of Editing a Signed PDF

Editing a signed PDF can have serious legal consequences, as it may invalidate the digital signature or breach contractual agreements. Once a document is signed digitally, altering its content can be considered tampering, potentially leading to legal disputes. It is crucial to understand that digital signatures are designed to ensure authenticity and integrity, and any post-signature edits may undermine these principles, making the document legally unenforceable. Always consult legal counsel before making changes to a signed PDF.

7.2 Technical Limitations of Post-Signature Edits

Technically, editing a signed PDF is restricted due to the read-only status triggered by digital signatures. Once a document is signed, altering its content often requires removing the signature first, which may invalidate the agreement. Additionally, certain editing tools may not support post-signature modifications without compromising the PDF’s integrity. Advanced technical workarounds, such as printing and re-saving, can bypass some limitations but may result in loss of original formatting or data. Understanding these constraints is essential for maintaining document fidelity and functionality after edits.

Best Practices for Editing a Signed PDF

Always maintain document integrity, communicate changes transparently to all parties, and use reputable tools to ensure authenticity and compliance with legal and technical standards when editing.


8.1 Maintaining Document Integrity

Maintaining document integrity is crucial when editing a signed PDF. Ensure all changes are transparent, with clear annotations or version history. Avoid altering original content without authorization. Use tools like Adobe Acrobat to track modifications, preserving the document’s authenticity and trustworthiness. Regularly validate the PDF to ensure no unauthorized edits compromise its integrity. Always inform all parties involved of any changes to uphold transparency and maintain legal validity.

8.2 Communicating Changes to All Parties

Clear communication is essential when editing a signed PDF. Inform all stakeholders about modifications through email, formal letters, or digital collaboration tools. Provide detailed explanations of changes to avoid misunderstandings. Ensure all parties acknowledge updates to maintain trust and legal validity. Transparency in communication fosters cooperation and ensures the document’s integrity remains intact.

Editing a signed PDF is feasible but requires careful consideration of legal and technical constraints. Tools like Adobe Acrobat enable adjustments while preserving document integrity. Always communicate changes to stakeholders to maintain trust and legality. Remember, post-signature edits may limit future modifications, so plan accordingly. By adhering to best practices and using appropriate tools, you can manage PDFs effectively while respecting their legal standing.

PDF

music and movement activities for preschoolers lesson plans pdf

Engaging music and movement activities foster creativity‚ coordination‚ and social skills in young children. These structured experiences enhance learning and development through playful exploration of rhythm and motion.

Overview of Benefits

Music and movement activities offer numerous benefits for preschoolers‚ enhancing cognitive‚ motor‚ and emotional development. These engaging experiences improve rhythm‚ balance‚ and coordination while fostering creativity. They also encourage social interaction‚ teamwork‚ and self-expression. By integrating music with physical movement‚ children develop auditory skills‚ memory‚ and language abilities. Such activities promote emotional well-being‚ confidence‚ and a lifelong appreciation for music and physical expression. They create a foundation for future academic and physical success‚ making them essential in early childhood education.

Importance of Structured Lesson Plans

Structured music and movement lesson plans ensure purposeful and organized learning experiences for preschoolers. They provide clear objectives‚ materials‚ and activities‚ guiding educators to meet developmental goals. These plans promote consistency‚ engagement‚ and progression‚ helping children build skills systematically. By incorporating warm-ups‚ themed sessions‚ and cool-downs‚ structured plans create a balanced routine. They also allow for assessment of progress and adaptation to diverse learning needs‚ ensuring an effective and enjoyable educational experience for young learners.

Sample Music and Movement Lesson Plan Structure

A typical music and movement lesson plan includes a warm-up‚ a themed music session‚ and a cool-down. It ensures a balanced and engaging experience for young learners.

Warm-Up Activities

Warm-up activities are essential to engage preschoolers and prepare them for music and movement sessions. Simple actions like clapping hands‚ marching‚ or stretching get children moving and excited. These activities help increase energy levels‚ improve coordination‚ and introduce basic rhythmic concepts. Using rhythm sticks or homemade shakers during warm-ups can also encourage creativity and participation. These initial exercises set the tone for a fun and interactive learning experience‚ ensuring children are ready to explore music and movement more deeply.

Music and Movement Session

The core of the lesson involves interactive music and movement exercises‚ where children explore rhythm and tempo through dance‚ mimicry‚ and storytelling. Activities like the Hokey Pokey or Wheels on the Bus encourage active participation‚ while themed songs‚ such as animal sounds or seasonal tunes‚ make learning engaging. Using props like scarves or ribbons adds an element of creativity‚ allowing children to express themselves freely while developing motor skills and musical awareness in a playful‚ structured environment.

Cool-Down and Wrap-Up

The session concludes with calming activities to gradually transition children to a resting state. Gentle stretches‚ slow rhythms‚ or quiet marching help regulate their energy. Soft music‚ such as lullabies‚ encourages relaxation‚ preparing them for the next part of their day.

A brief wrap-up involves summarizing the activities and reflecting on what was learned. This reinforces memory and provides a sense of accomplishment‚ while also offering an opportunity for children to share their favorite moments‚ fostering a connection to the experience.

Popular Music and Movement Activities for Preschoolers

Engaging activities like Freeze Dance‚ Musical Statues‚ and action songs such as The Hokey Pokey and Wheels on the Bus encourage creativity and motor skill development through joyful participation.

Musical Statues and Freeze Dance

These interactive activities are perfect for developing self-control and motor skills. In Musical Statues‚ children dance to music and freeze when it stops‚ holding their positions until the music resumes. Freeze Dance follows a similar structure‚ often incorporating tempo changes and directional movements. Both games encourage creativity‚ physical expression‚ and laughter‚ making them ideal for engaging preschoolers while fostering listening skills and coordination. They also provide a fun way to introduce children to musical dynamics and rhythm‚ promoting active participation and imaginative play. Educators can adapt these activities to suit different age groups and abilities‚ ensuring inclusivity and enjoyment for all.

The Hokey Pokey and Wheels on the Bus

The Hokey Pokey encourages children to follow directions and explore their bodies through music. They place body parts “in‚ out‚ and shaken all about‚” fostering coordination and laughter. Wheels on the Bus engages preschoolers with imaginative actions like turning wheels‚ opening doors‚ and wiggling eyes. These songs promote creativity‚ physical movement‚ and social interaction while aligning with lesson plan objectives for motor skills and musical awareness. Both activities are simple to prepare and customize for different age groups and abilities.

Incorporating Musical Instruments

Introducing simple instruments like maracas‚ drums‚ and tambourines enhances rhythm awareness and creativity. Preschoolers explore sounds‚ developing fine motor skills and musical expression through hands-on play and structured activities.

Rhythm Sticks and Homemade Shakers

Rhythm sticks and homemade shakers are excellent tools for introducing preschoolers to musical expression. Rhythm sticks encourage coordination and timing as children tap out beats to songs. Homemade shakers‚ like bottle shakers filled with beads‚ foster creativity and exploration of sound. These instruments help children recognize rhythm and tempo‚ while also developing fine motor skills. Simple activities‚ such as tapping along with music or creating beats with everyday objects‚ make learning fun and engaging for young learners.

Thematic Integration in Lesson Plans

Thematic integration in music and movement lesson plans enhances engagement by linking activities to captivating themes like animals‚ nature‚ and seasonal celebrations‚ fostering creativity and imagination in preschoolers.

Animals and Nature-Themed Songs

Animals and nature-themed songs are a vibrant way to engage preschoolers in music and movement. Songs like “The Animal March” or “The Itsy Bitsy Spider” encourage imaginative movements‚ such as hopping like frogs or flapping like birds. These activities foster creativity and physical coordination while connecting children to the natural world. Seasonal themes‚ like autumn leaf dances or winter snowflake twirls‚ add variety and relevance to lessons. such engaging themes make learning fun and meaningful for young minds.

Assessment and Progress Tracking

Assessment involves observing children’s participation‚ creativity‚ and coordination during activities. Progress is tracked through improved rhythm awareness‚ movement confidence‚ and ability to follow instructions over time.

Observational Methods

Observing children during music and movement activities is key to assessing their progress. Teachers can note participation levels‚ creativity in movements‚ and ability to follow rhythms. This method provides insights into individual development and group dynamics. By documenting improvements in coordination and confidence‚ educators can tailor future lessons to meet specific needs. Checklists and anecdotal records are effective tools for tracking growth over time. These observations help identify areas of strength and opportunities for further development in a nurturing environment. Consistent monitoring ensures personalized support for each child.

Cultural and Seasonal Activities

Incorporate seasonal themes like autumn leaves or Teddy Bears Picnic into music and movement lessons. These activities connect children to cultural traditions and seasonal changes through engaging songs and movements.

Autumn and Teddy Bears Picnic Themes

Autumn-themed music and movement activities include singing harvest songs and mimicking falling leaves with scarves. Teddy Bears Picnic lessons feature marching‚ clapping‚ and teddy-themed movements. These seasonal activities encourage creativity‚ coordination‚ and cultural awareness while aligning with preschoolers’ natural curiosity about the world around them. Free downloadable PDFs offer structured plans for educators‚ making it easy to integrate these engaging themes into daily lesson plans and celebrate seasonal changes with young learners.

Free Resources and Printable PDFs


Discover free downloadable lesson plans and printable PDFs featuring themed music and movement activities for preschoolers. These resources include song sheets‚ activity guides‚ and creative ideas for educators to use instantly.

Downloadable Lesson Plans and Song Sheets

Access a variety of free downloadable lesson plans and printable song sheets designed for preschoolers. These resources include engaging music and movement activities‚ such as Musical Statues‚ The Hokey Pokey‚ and themed songs like The Wheels on the Bus. Perfect for educators‚ these PDFs offer structured ideas to save time and inspire creativity. They also provide simple instructions for incorporating rhythm sticks and homemade instruments‚ ensuring a fun and interactive learning experience for young children.

Parental Involvement and Home Activities

Encourage parents to engage in simple music and movement activities at home‚ such as dance parties or freeze dance. Share song sheets and activity guides to extend learning beyond the classroom.

Encouraging Music and Movement at Home

Parents play a vital role in extending music and movement learning beyond the classroom. Simple activities like singing nursery rhymes‚ playing freeze dance‚ or creating homemade instruments can foster creativity and physical development. Share downloadable song sheets and activity guides to help families incorporate these practices into daily routines. Encouraging movement at home reinforces classroom lessons and nurtures a lifelong appreciation for music and physical expression. Provide parents with easy-to-follow ideas to make music and movement a fun family experience.

Safety and Space Considerations

Ensure the play area is clear of hazards and obstacles. Provide soft flooring and adequate space for movement to prevent accidents. Supervise children during activities.

Setting Up a Safe Movement Environment

Creating a secure space for preschoolers involves clearing the area of hazards and ensuring soft flooring. Provide enough room for free movement without overcrowding. Supervise activities closely to prevent accidents. Secure furniture and breakable items‚ and use safety mats for added protection. Ensure children wear appropriate footwear and remove any loose jewelry. Safety should always be prioritized to allow children to explore movement confidently and freely.

PDF

romeo and juliet play script pdf

The Romeo and Juliet Play Script PDF offers a complete‚ accessible version of Shakespeare’s tragic love story. It captures the feud between Montagues and Capulets‚ introducing iconic characters like Romeo‚ Juliet‚ and Tybalt‚ while preserving the original dialogue and emotional depth of the play‚ making it an invaluable resource for both educational purposes and personal enjoyment.

1.1 Overview of the Play and Its Significance

The Romeo and Juliet Play Script PDF presents William Shakespeare’s timeless tragedy‚ exploring themes of love‚ hate‚ fate‚ and identity. Set in Verona‚ the play revolves around the bitter feud between the Montagues and Capulets‚ which ultimately leads to the tragic demise of the two young lovers. Romeo and Juliet’s story has captivated audiences for centuries‚ offering profound insights into human emotions and societal conflicts. Its universal themes and poetic language make it a cornerstone of literature‚ while the PDF format ensures accessibility for modern readers‚ students‚ and scholars alike.

1.2 Importance of the PDF Format for Accessibility

The Romeo and Juliet Play Script PDF ensures easy access to Shakespeare’s classic for modern readers. The portable format allows users to download and print the text‚ making it ideal for study or performance. PDFs preserve the original layout‚ including stage directions and dialogue‚ while offering adjustable font sizes for readability. This format is particularly beneficial for students‚ educators‚ and theater groups‚ as it provides a reliable and versatile way to engage with the play. Its universal compatibility across devices ensures that the timeless story remains accessible to audiences worldwide.

Key Scenes and Dialogues in the Romeo and Juliet PDF

The Romeo and Juliet PDF highlights iconic scenes like the balcony dialogue‚ Mercutio and Tybalt’s duel‚ and Juliet’s potion decision‚ preserving Shakespeare’s emotional depth and dialogue richness.

2.1 The Iconic Balcony Scene (Act 2‚ Scene 2)

The balcony scene is one of the most poignant moments in Romeo and Juliet‚ where Romeo serenades Juliet beneath her window. This emotionally charged dialogue showcases their deep affection and longing. Romeo’s poetic declarations‚ such as “But soft‚ what light through yonder window breaks?” highlight his romantic nature. Juliet’s response‚ “O Romeo‚ Romeo‚ wherefore art thou Romeo?” reflects her internal conflict and love for him despite their families’ feud. The scene’s beauty lies in its simplicity‚ capturing the essence of their star-crossed love and setting the stage for the tragic events that follow.

2.2 The Tragic Fight Between Mercutio and Tybalt (Act 3‚ Scene 1)

In this pivotal scene‚ Mercutio’s fiery temperament clashes with Tybalt’s arrogance‚ leading to a deadly duel. Despite Romeo’s efforts to calm tensions‚ Mercutio is fatally wounded by Tybalt. Enraged by his friend’s death‚ Romeo kills Tybalt‚ resulting in his banishment from Verona. The scene underscores the devastating consequences of the feud and the impulsive actions of the characters. Mercutio’s final words‚ “A plague o’ both your houses!” serve as a haunting prophecy‚ highlighting the senseless violence plaguing the two families and setting the stage for further tragedy.


2.3 Juliet’s Heartbreaking Decision to Use the Potion (Act 4‚ Scene 3)

In a desperate bid to avoid her arranged marriage to Paris‚ Juliet turns to Friar Laurence for help. He provides her with a potion that will make her appear lifeless‚ hoping to buy time for Romeo to rescue her. Juliet‚ torn between loyalty to her family and love for Romeo‚ decides to drink the potion despite the risks. Her resolve reflects both her courage and the tragic circumstances driving her to such an extreme measure. This poignant moment showcases Juliet’s growth from an obedient daughter to a determined individual willing to defy fate.

Main Characters in Romeo and Juliet

The play centers around Romeo‚ a passionate Montague‚ and Juliet‚ a determined Capulet‚ whose families’ feud fuels the tragic events. Supporting characters like Friar Laurence‚ Tybalt‚ and the Nurse add depth to the narrative‚ shaping the lovers’ fate through their actions and decisions.

3.1 Romeo Montague: His Role and Personality

Romeo Montague is the tragic hero of the play‚ a young man of about sixteen‚ known for his handsome appearance‚ intelligence‚ and emotional sensitivity. As a member of the Montague family‚ he is deeply entangled in the feud with the Capulets. Romeo’s personality is marked by his passion for love‚ as seen in his infatuation with Rosaline and later his profound love for Juliet. His impulsive decisions‚ such as secretly marrying Juliet and killing Tybalt‚ highlight his rash and emotional nature. Romeo’s role as a lover and a victim of fate makes him one of Shakespeare’s most enduring characters.

3.2 Juliet Capulet: Her Development Throughout the Play

Juliet Capulet evolves from a naive‚ obedient daughter to a determined‚ independent individual. Initially‚ she is portrayed as a young girl adhering to her family’s expectations‚ but her encounter with Romeo sparks a transformation. Her decision to marry Romeo in secret and later to fake her death to avoid another marriage showcases her growing independence and willingness to challenge societal norms. Juliet’s emotional depth and resilience are highlighted as she navigates love‚ loss‚ and tragedy‚ ultimately becoming a symbol of devotion and strength in the face of overwhelming adversity.

3.3 Supporting Characters: Friar Laurence‚ Tybalt‚ and the Nurse

Friar Laurence‚ a wise mentor‚ plays a pivotal role in uniting Romeo and Juliet through his plan to marry them in secret. His well-intentioned but flawed scheme ultimately leads to tragedy. Tybalt‚ Juliet’s cousin‚ embodies the violent hatred between the families‚ fueling the conflict with his aggressive nature. The Nurse‚ Juliet’s loyal caregiver‚ provides emotional support but struggles with conflicting loyalties‚ ultimately unable to prevent the devastating outcome. Together‚ these characters add depth to the story‚ highlighting themes of loyalty‚ conflict‚ and the consequences of impulsive decisions.

Themes and Motifs in the Play

Shakespeare explores themes of love‚ fate‚ and deception in Romeo and Juliet‚ highlighting the destructive nature of hate and the redemptive power of love‚ all preserved vividly in the PDF script.

4.1 Love vs. Hate: The Central Conflict

In the Romeo and Juliet Play Script PDF‚ the central conflict revolves around the intense struggle between love and hate. The feud between the Montagues and Capulets fuels hatred‚ while Romeo and Juliet’s bond represents pure love. Their love transcends familial animosity but ultimately succumbs to the destructive power of hate. The balcony scene highlights their affection‚ while the tragic fight between Mercutio and Tybalt showcases the devastating consequences of hatred. This duality underscores Shakespeare’s exploration of human emotions‚ emphasizing how love and hate shape destiny in Verona.

4.2 Fate and Destiny: The Role of Fortune in the Play

Fate and destiny play a pivotal role in Romeo and Juliet‚ shaping the characters’ lives and the tragic outcome. The prologue introduces the idea of “star-cross’d lovers‚” suggesting their fate is sealed from the beginning. The series of unfortunate events‚ such as the fight between Mercutio and Tybalt‚ Romeo’s banishment‚ and Juliet’s forced marriage‚ are driven by fortune’s cruel hand. Even Juliet’s decision to use the potion is influenced by fate‚ as it ultimately leads to the heartbreaking conclusion. Shakespeare explores how destiny intertwines with human choices‚ creating an inevitable path toward tragedy for the beloved characters.

4.3 Appearance vs. Reality: Deception and Illusion

In Romeo and Juliet‚ appearance often masks reality‚ creating a web of deception and illusion; Juliet’s fake death and Romeo’s secret marriage highlight the disparity between truth and outward appearances. The balcony scene‚ where Juliet confesses her love unaware of Romeo’s presence‚ blurs the line between private thoughts and public reality. The Nurse’s loyalty appears unwavering but later falters‚ while Friar Laurence’s potion‚ meant to resolve conflicts‚ deepens the tragedy. Shakespeare masterfully explores how characters hide behind illusions‚ leading to misunderstandings and ultimately‚ the heartbreaking conclusion of the play.

Educational Resources and Study Guides

The Romeo and Juliet Play Script PDF is complemented by educational resources like No Fear Shakespeare and SparkNotes‚ offering modern translations‚ summaries‚ and analysis for deeper understanding and study.

5.1 No Fear Shakespeare: Modern Translations for Better Understanding

No Fear Shakespeare provides modern translations of Shakespeare’s texts‚ making Romeo and Juliet more accessible to contemporary readers. This resource offers side-by-side comparisons of the original script and its modern interpretation‚ helping students and educators grasp complex language and themes. By simplifying Shakespeare’s poetic prose‚ it ensures that the emotional depth and dramatic intensity of the play remain intact while being easier to comprehend. This tool is particularly valuable for classrooms‚ enabling learners to engage deeply with the story and its universal themes of love‚ conflict‚ and fate.

5.2 SparkNotes and Other Study Aids for Romeo and Juliet

SparkNotes and other study aids provide comprehensive guides to understanding Romeo and Juliet‚ offering detailed summaries‚ character analyses‚ and thematic explanations. These resources are invaluable for students‚ helping them unpack Shakespeare’s complex language and historical context. Features like chapter summaries‚ study questions‚ and essay topics enable deeper engagement with the play. Additionally‚ interactive tools and multimedia resources enhance learning‚ making these study aids indispensable for both classroom use and independent study. They complement the Romeo and Juliet PDF by offering additional layers of analysis and insight.

5.3 Adaptations and Interpretations for Classroom Use

Adaptations and interpretations of Romeo and Juliet offer diverse ways to engage students with the play. Modern translations‚ such as No Fear Shakespeare‚ present the text in contemporary language‚ making it more accessible. Film adaptations‚ like Baz Luhrmann’s 1996 version‚ provide visual and cultural reimaginations‚ while stage productions introduce students to live performances. These resources help educators tailor lessons to different learning styles‚ fostering a deeper understanding of Shakespeare’s themes and characters. They also encourage creative projects‚ allowing students to explore the play’s timeless relevance in innovative ways‚ enhancing both comprehension and appreciation.

Where to Find the Romeo and Juliet PDF

The Romeo and Juliet PDF is available from official sources like the Folger Shakespeare Library and NoSweatShakespeare‚ offering free‚ accessible downloads for educational and personal use.

6.1 Official Sources: Folger Shakespeare Library and NoSweatShakespeare

The Folger Shakespeare Library and NoSweatShakespeare are reputable sources for downloading the Romeo and Juliet PDF. The Folger Shakespeare Library provides high-quality‚ faithful reproductions of Shakespeare’s works‚ including the full text of Romeo and Juliet with original language and annotations. NoSweatShakespeare offers modern translations‚ making the play more accessible to contemporary readers. Both platforms ensure authenticity and ease of access‚ catering to students‚ educators‚ and enthusiasts alike. These official sources are reliable and trusted for accurate and well-formatted versions of the play.

6.2 Free Downloads and Printable Versions

Several websites offer free Romeo and Juliet PDF downloads‚ making the play accessible to everyone. Platforms like NoSweatShakespeare and Folger Shakespeare Library provide downloadable versions that are free of cost and printable. These resources are ideal for students‚ educators‚ and theater enthusiasts‚ ensuring easy access to the play’s script. The PDFs often include the original text‚ modern translations‚ or annotated versions‚ catering to different needs. This cost-effective and convenient option allows readers to study‚ perform‚ or enjoy Shakespeare’s masterpiece without any financial barriers‚ making it widely available for educational and creative purposes.

6.3 Adapted Scripts for Modern Audiences

Adapted scripts of Romeo and Juliet cater to modern audiences by blending the original text with contemporary language and settings. These versions aim to make Shakespeare’s classic more relatable and engaging for today’s readers and performers. Some adaptations incorporate diverse cultural influences‚ while others simplify the dialogue for easier comprehension. These scripts are particularly useful in educational settings‚ helping students connect with the timeless story. Additionally‚ they are popular in theater productions seeking to refresh the narrative for modern sensibilities‚ ensuring the play’s relevance endures across generations and cultural shifts seamlessly.

The Romeo and Juliet Play Script PDF remains a timeless resource‚ blending classic storytelling with modern accessibility‚ ensuring Shakespeare’s masterpiece endures for future generations to study and cherish.

7.1 The Enduring Relevance of Romeo and Juliet

Romeo and Juliet’s themes of love‚ conflict‚ and fate continue to resonate globally. The PDF script ensures easy access to Shakespeare’s timeless tale‚ making it a vital educational tool. Its universal themes appeal to diverse audiences‚ fostering empathy and understanding. The play’s exploration of human emotions and societal conflicts remains as relevant today as it was centuries ago‚ solidifying its place in literature and education.

7.2 The PDF Format’s Role in Preserving Shakespeare’s Work

The Romeo and Juliet PDF plays a crucial role in preserving Shakespeare’s work for future generations. By maintaining the original text’s integrity‚ the PDF format ensures that the play’s poetic language and dramatic structure remain accessible. It allows for easy distribution and archiving‚ making Shakespeare’s masterpiece available to global audiences. Educational institutions and readers worldwide benefit from this format‚ which aligns with modern reading habits while honoring the timeless essence of Shakespeare’s writing. This digital preservation ensures that Romeo and Juliet continues to inspire and educate‚ keeping its legacy alive in the digital age.

PDF

163 bus schedule nj pdf

The 163 bus route‚ operated by NJ Transit‚ connects key locations in New Jersey‚ offering reliable transportation with frequent departures and accessible services.

Schedule Overview

The 163 bus route operates frequently‚ with services available on weekdays and weekends‚ ensuring convenient travel options for commuters throughout the day.

2.1 Weekday and Weekend Timetables

The 163 bus route operates on distinct schedules for weekdays and weekends. On weekdays‚ buses run frequently‚ with departures every 15-20 minutes during peak hours and slightly less often during off-peak times. Weekend services are adjusted to accommodate lighter passenger demand‚ with buses departing every 30-40 minutes. The timetable ensures consistent service throughout the day‚ catering to both commuters and casual travelers. Detailed timetables‚ including exact departure times for each stop‚ are available in the official NJ Transit PDF schedule. Riders can also access real-time updates and plan their trips using the NJ Transit website or mobile app. This scheduling structure provides flexibility and reliability for passengers traveling along the route.

Service Improvements

NJ Transit has enhanced the 163 bus route with increased frequency‚ improved reliability‚ and better accessibility features‚ ensuring a more efficient and comfortable travel experience for all passengers.

3.1 Increased Frequency

NJ Transit has implemented significant enhancements to the 163 bus route‚ focusing on increasing service frequency to accommodate growing passenger demand. During peak hours‚ buses now operate at shorter intervals‚ reducing wait times and improving overall efficiency. This adjustment ensures that commuters can rely on more consistent and timely arrivals‚ especially during busy morning and evening rushes. Additionally‚ weekend schedules have been optimized to offer more frequent departures‚ addressing the needs of both regular riders and occasional travelers. These changes aim to alleviate overcrowding and provide a smoother travel experience for all passengers. By adding more trips throughout the day‚ NJ Transit has demonstrated its commitment to meeting the evolving needs of its community.

3.2 Reliability Measures

NJ Transit has introduced several reliability measures to enhance the 163 bus route’s performance. These include improved scheduling coordination and the implementation of real-time tracking systems‚ allowing passengers to monitor bus locations accurately. The agency has also focused on reducing delays by optimizing traffic light prioritization and adjusting routes to avoid congested areas during peak times. Additionally‚ better communication with passengers through updated digital boards and mobile apps ensures that any service disruptions are promptly addressed. These measures aim to provide a more consistent and dependable travel experience‚ making the 163 bus route a trustworthy option for daily commuters and occasional riders alike.

Stops and Route Map

The 163 bus route operates across a network of strategically located stops‚ ensuring convenient access for passengers. The route spans key areas‚ including major intersections and transit hubs‚ making it a vital link for both local and regional travel. A detailed route map is available‚ showcasing the entire journey from start to end‚ with clear markings of all designated stops. This map helps passengers plan their trips efficiently and understand the route’s layout. Whether you’re commuting within the city or traveling to nearby neighborhoods‚ the 163 bus route’s map provides a visual guide to navigate seamlessly. The map is also accessible online and can be downloaded as part of the PDF schedule for offline use‚ ensuring accessibility for all users.

Fare Information

Fares for the 163 bus route are affordable‚ with options to pay using cash‚ credit cards‚ or mobile payments. Children ride free‚ making it family-friendly.

5.1 Payment Options

Passengers on the 163 bus route can choose from various payment options for a convenient travel experience. Cash payments are accepted onboard‚ while credit and debit cards are also valid. Additionally‚ mobile payments through apps like NJ Transit’s mobile ticketing platform offer a seamless way to pay fares. Reduced fares are available for seniors‚ students‚ and individuals with disabilities with proper ID. Riders can also purchase tickets at participating retail locations or online in advance. This flexibility ensures that everyone can easily access the service without hassle.


Accessibility Features

The 163 bus route is designed to be accessible to all passengers‚ including those with disabilities. NJ Transit has implemented various features to ensure ease of use for everyone. All buses on this route are equipped with wheelchair ramps and designated priority seating areas for passengers with mobility challenges. Additionally‚ bus stops are strategically located to minimize walking distances and provide clear pathways. Visual and audio announcements are made at each stop to assist visually and hearing-impaired riders. NJ Transit also offers reduced fares for eligible passengers with disabilities‚ making the service more affordable. The agency continuously works to improve accessibility by upgrading vehicles and infrastructure‚ ensuring that the 163 bus route remains inclusive and user-friendly for all commuters.

Recent Updates

NJ Transit has recently enhanced the 163 bus route with increased frequency and reliability. Additional bus trips have been added to reduce crowding during peak hours‚ improving the overall passenger experience. The agency has also introduced contingency plans to accommodate commuters affected by rail strikes‚ ensuring seamless travel options. Furthermore‚ NJ Transit has taken over several privately operated bus routes‚ expanding its service coverage and integrating them into the existing network. These updates aim to provide more efficient and accessible transportation for residents and visitors alike. By continuously monitoring and adapting to commuter needs‚ NJ Transit strives to maintain high standards of service quality on the 163 route.

Future Plans

NJ Transit has announced plans to further enhance the 163 bus route by expanding service coverage and integrating new technologies. Future updates include the introduction of electric vehicles to modernize the fleet and reduce environmental impact. Additionally‚ there are proposals to increase the frequency of buses during peak hours to accommodate growing commuter demand. The agency also aims to improve real-time tracking systems‚ providing passengers with more accurate and reliable information. Furthermore‚ NJ Transit is exploring the expansion of the 163 route to connect additional neighborhoods‚ ensuring better accessibility for all residents. These initiatives reflect a commitment to sustainable and efficient public transportation‚ aligning with broader goals to enhance the overall transit network in New Jersey.

How to Access the PDF Schedule

Visit the official NJ Transit website‚ navigate to the “Schedules” section‚ select the 163 bus route‚ and download the PDF schedule for convenient access.

9.1 Finding the Schedule Online

To access the 163 bus schedule‚ visit the official NJ Transit website. Navigate to the “Schedules” section and enter “163” in the search bar. Select the route from the dropdown menu. The PDF schedule will appear‚ detailing departure times‚ stops‚ and route maps. Ensure you select the correct direction and time of day for accurate information; For convenience‚ use the website’s filters to refine your search by weekday‚ weekend‚ or holiday schedules. Recent updates‚ such as the integration of A&C bus routes‚ are also reflected in the latest PDF versions. Always verify the date at the top of the document to ensure you have the most current schedule. This method provides quick and reliable access to the 163 bus route details.

9.2 Downloading and Saving

Once you’ve located the 163 bus schedule PDF on the NJ Transit website‚ click the “Download” button to save it to your device. The file will typically be saved in your default “Downloads” folder. To organize it‚ consider creating a dedicated folder for transit schedules. After downloading‚ open the PDF to verify its contents‚ ensuring it includes the most recent updates‚ such as the integration of A&C bus routes. For offline access‚ save the file to your smartphone or tablet. Regularly check for updated versions‚ especially during schedule changes or service improvements‚ to ensure you have the latest information. This convenient method allows you to access the schedule anytime‚ making trip planning efficient and stress-free.

Comparison with Other Routes

The 163 bus route stands out among other NJ Transit routes due to its enhanced frequency and reliability improvements. Unlike routes 144‚ 145‚ 148‚ and 164‚ the 163 route benefits from recent service upgrades‚ including additional trips and better scheduling coordination. While other routes may cover broader areas‚ the 163 focuses on key commuter corridors‚ making it a preferred choice for travelers seeking efficient connections. Additionally‚ the integration of A&C bus routes has further strengthened the 163’s network‚ offering riders more seamless transfers and expanded coverage. Compared to other routes‚ the 163 is also set to benefit from future plans‚ including the introduction of electric vehicles‚ aligning it with modern transit standards and sustainability goals.

The 163 bus route offers enhanced reliability and frequency‚ making it a top choice for commuters. With ongoing improvements and future electric vehicle integration‚ it exemplifies modern transit efficiency.

Final Tips

Planning your commute on the 163 bus route? Consider these tips for a smoother experience: Check the schedule in advance to plan your trip accurately. Use the NJ Transit app for real-time updates and track your bus arrival. Familiarize yourself with the route map to identify key stops and connections. Opt for off-peak travel to avoid crowded buses. Always carry a valid ticket or pass‚ and have your payment ready for faster boarding. Take advantage of the increased frequency and reliability improvements for a hassle-free ride. Lastly‚ stay informed about any service alerts or updates before your journey to ensure a seamless travel experience.

PreviousNext

You Want To Have Your Favorite Car?

We have a big list of modern & classic cars in both used and new categories.