Manuals

mirro pressure canner manual

Welcome to the Mirro Pressure Canner Manual, your comprehensive guide to understanding and utilizing your pressure canner effectively. This manual covers setup, operation, and maintenance, ensuring safe and efficient use. Discover how to prepare delicious meals, preserve food, and explore versatile cooking options with your Mirro Pressure Canner. Proper usage and safety guidelines are emphasized to guarantee optimal performance and longevity of your appliance.

1.1 Importance of Reading the Manual

Reading the Mirro Pressure Canner Manual is essential for safe and effective use. It provides critical safety guidelines, operating instructions, and troubleshooting tips. Improper use can lead to burns, injuries, or appliance damage. The manual ensures you understand pressure settings, maintenance, and proper handling. By following the instructions, you can optimize performance, extend the product’s lifespan, and enjoy efficient cooking and canning experiences. Always prioritize safety and efficiency by adhering to the guidelines provided in the manual.

1.2 Overview of the Mirro Pressure Canner

The Mirro Pressure Canner is a versatile kitchen appliance designed for efficient cooking and canning. It allows users to prepare meals quickly, including beans, soups, and poultry, while also enabling safe food preservation. Built with durable materials, the canner features pressure gauges, safety valves, and locking mechanisms to ensure secure operation. Its design combines functionality with ease of use, making it ideal for both beginners and experienced cooks. The Mirro Pressure Canner is a reliable tool for home kitchens, offering a variety of cooking and canning options.

Safety Precautions and Warnings

Always follow safety guidelines to avoid burns and injuries. Improper use can be hazardous. Read the manual carefully, and ensure proper pressure settings and vent tube clearance.

2.1 General Safety Guidelines

Always read the manual thoroughly before using your Mirro Pressure Canner to ensure safe operation. Keep the vent tube clear to avoid blockages and maintain proper pressure release. Never leave the canner unattended while in use, and ensure all safety locks are securely in place. Avoid using abrasive cleaners that could damage the finish. Regularly inspect the gasket and other components for wear. Follow recommended pressure settings and guidelines to prevent accidents.

2.2 Understanding Pressure Canner Risks

Improper use of the Mirro Pressure Canner can lead to burns, injury, and damage. Overpressure is a significant risk if vents are blocked or malfunctioning. Always ensure the vent tube is unobstructed and the pressure gauge functions correctly. Failure to follow guidelines can result in explosions or scalding steam. Regular maintenance and adherence to safety protocols are crucial to mitigate these risks and ensure safe operation. Never ignore warning signs or maintenance recommendations.

2.3 Proper Handling and Usage

Always handle the Mirro Pressure Canner with care to avoid accidents. Ensure the vent tube is clear and functioning properly before use. Never leave the canner unattended while in operation. Use oven mitts or tongs to handle hot jars and lids. Maintain the recommended water levels and avoid overfilling. Regularly inspect seals and gaskets for wear. Follow the manual’s guidelines for pressure settings and timing to ensure safe and effective canning. Proper handling extends the lifespan of your appliance.

Parts and Features of the Mirro Pressure Canner

The Mirro Pressure Canner features a durable design, including a pressure gauge, safety valves, and locking mechanisms. It also includes a vent tube and jar rack for efficient canning.

3.1 Main Components of the Canner

The Mirro Pressure Canner consists of key components, including the main body, lid, pressure gauge, safety valves, and locking mechanisms. Additional features include a vent tube, jar rack, and gasket. These parts work together to ensure safe and efficient pressure canning. The pressure gauge monitors the internal pressure, while safety valves prevent excessive pressure buildup. The locking mechanism secures the lid during operation, and the jar rack protects jars during processing. Proper maintenance of these components is essential for optimal performance.

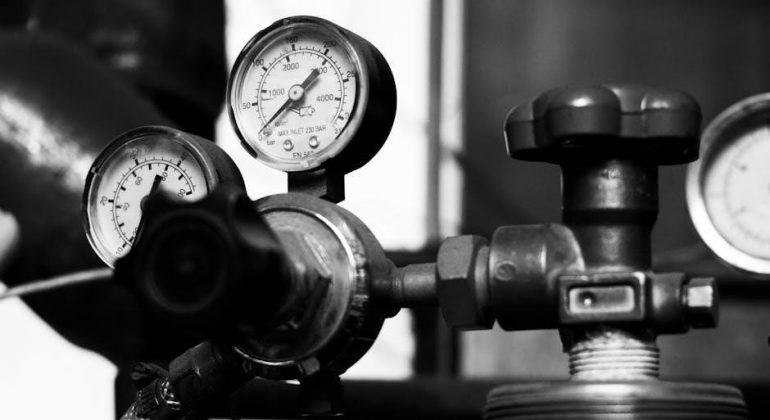
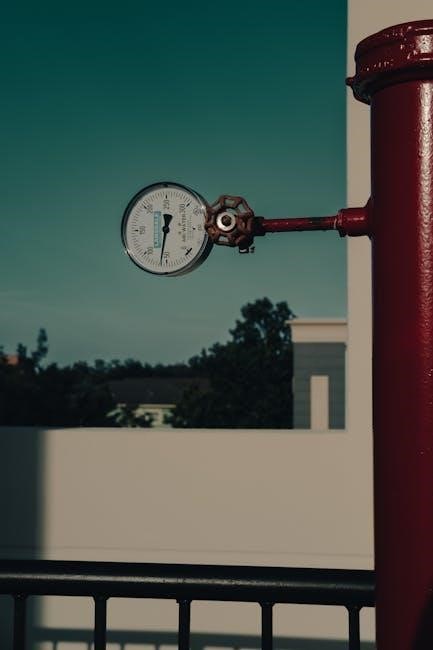
3.2 Understanding the Pressure Gauge

The pressure gauge on the Mirro Pressure Canner monitors and displays the internal pressure during operation. It ensures the canner operates within safe and recommended pressure levels, typically 10-15 PSI. The gauge is essential for maintaining precise control, especially during canning processes. Always refer to the gauge to verify pressure levels, as accurate readings are critical for safe and effective food preservation. Regular checks and maintenance of the gauge are recommended to ensure accuracy and functionality.

3.3 Safety Valves and Locking Mechanisms

The Mirro Pressure Canner features safety valves and locking mechanisms to ensure secure and safe operation. These components prevent excessive pressure buildup and accidental lid opening. The safety valve releases excess steam if pressure exceeds safe levels, while the locking mechanism secures the lid tightly during operation. Regular inspection of these parts is crucial to maintain their functionality and ensure safe canning processes. Always follow manual guidelines for proper usage and maintenance of these critical safety features.

Initial Setup and Preparation

Initial setup and preparation are essential for safe and effective use of your Mirro Pressure Canner. Begin with unpacking and cleaning the unit thoroughly. Assemble all components according to the manual’s instructions. Before first use, inspect the gasket, safety valves, and locking mechanisms. Familiarize yourself with safety guidelines to ensure proper operation.

4.1 Unpacking and Cleaning

Start by carefully unpacking your Mirro Pressure Canner, ensuring all components are included and undamaged. Clean the canner thoroughly with mild soap and warm water, paying attention to the lid, gasket, and safety valves. Avoid abrasive cleaners to preserve the finish. Rinse and dry all parts before assembly; Inspect the gasket for any signs of wear or damage, as it is crucial for proper sealing. A clean and well-maintained canner ensures safe and efficient operation.

4.2 Assembling the Pressure Canner

Begin by placing the gasket on the lid, ensuring it is properly seated for a tight seal. Attach the pressure gauge securely, aligning it with the designated port. Next, install the safety valves according to the manual’s instructions. Once all components are in place, ensure they are tightly secured to prevent leaks or malfunctions. Double-check the alignment of all parts before use to guarantee safe and efficient operation. Consult the manual for specific assembly details tailored to your model.

4.3 Preparing for First Use

Before first use, wash all components with warm soapy water and rinse thoroughly. Ensure the vent tube is clear of obstructions. Place the jar rack in the canner and add 2-3 inches of hot water. Check the gasket for proper placement and integrity. Familiarize yourself with the controls and safety features. A small test run without jars is recommended to ensure everything functions correctly. This preparation ensures a safe and successful first use of your Mirro Pressure Canner.


Operating the Mirro Pressure Canner

Operating the Mirro Pressure Canner involves following specific guidelines to ensure safety and efficiency. Build and maintain pressure, monitor timing accurately, and always refer to the manual for detailed instructions.

5.1 Cooking Basics: Time and Pressure Settings

Mastering the basics of time and pressure settings is essential for safe and efficient cooking. Always regulate pressure according to the recipe, maintaining 10-15 PSI for most tasks. Adjust heat to stabilize pressure, ensuring accurate timing. For beans, meats, and vegetables, specific settings are required. Refer to the manual or recipe book for precise guidelines. Monitoring during cooking is crucial to achieve perfectly cooked meals and maintain safety standards.

5.2 Canning Procedures: Step-by-Step Guide

Begin by preparing your jars and ingredients according to the recipe. Pack food into hot, sterilized jars, leaving the recommended headspace. Secure lids and rings tightly, ensuring proper sealing. Place jars in the canner, add water to cover, and seal the lid. Process at the specified pressure and time, adjusting heat to maintain consistent pressure. After processing, allow the pressure to drop naturally before removing jars. Let jars cool, check seals, and store in a cool, dark place for later use.

5.3 Maintaining Pressure During Cooking

Maintaining consistent pressure is crucial for safe and effective canning. Monitor the pressure gauge to ensure it stays within the recommended range. Adjust the heat source as needed to prevent pressure from dropping or exceeding safe levels. Keep the vent tube clear to avoid blockages. Never open the lid during cooking, as this can disrupt pressure and lead to unsafe conditions. Consistent pressure ensures proper food sterilization and adherence to safety standards.

Recipes and Meal Ideas

Discover delicious meal ideas using your Mirro Pressure Canner, perfect for cooking beans, soups, poultry, and one-dish meals efficiently. Explore canning recipes for fruits and vegetables, and tips for custom creations.

6.1 Popular Pressure Cooker Recipes

Explore a variety of mouthwatering recipes designed for your Mirro Pressure Canner, such as hearty stews, tender roasts, and flavorful grains. Popular options include chili, soups, and poultry dishes, all cooked to perfection in record time. Additionally, discover how to can fresh fruits and vegetables to preserve summer’s bounty for year-round enjoyment. These recipes highlight the versatility and efficiency of your pressure canner, making meal prep a breeze.

6.2 Canning Recipes for Fruits and Vegetables

Preserve the freshness of your favorite fruits and vegetables with the Mirro Pressure Canner. From juicy peaches to crisp green beans, canning recipes ensure flavorful and nutritious results. Follow tested recipes to maintain proper pressure and timing, capturing the natural flavors and nutrients of your produce. This method allows you to enjoy seasonal bounty year-round, with clear guidance for safe and delicious canning outcomes using your Mirro Pressure Canner.

6.3 Tips for Creating Your Own Recipes

Experiment with flavors and ingredients to craft unique recipes using your Mirro Pressure Canner. Start by understanding basic pressure settings and cooking times for various foods. Balance flavors with spices, herbs, and seasonings. Test small batches to ensure taste and texture. Document your creations for future reference. Always follow safety guidelines and consult the manual for specific pressure requirements. This approach allows you to innovate while maintaining safe and delicious results with your Mirro Pressure Canner.

Maintenance and Troubleshooting

Regularly clean and inspect your Mirro Pressure Canner to ensure optimal performance. Address issues promptly, such as clogged vents or worn seals, to maintain safety and efficiency.

7.1 Cleaning and Storing the Canner

Regular cleaning is essential to maintain your Mirro Pressure Canner’s performance and longevity; Wash all parts with mild soap and warm water after each use, avoiding abrasive cleaners. Dry thoroughly to prevent rust. Store the canner in a dry, cool place, ensuring all components are secure and protected from dust. Proper storage and cleaning habits will ensure your appliance remains in excellent condition for years of reliable service.

7.2 Common Issues and Solutions

Common issues with the Mirro Pressure Canner include pressure loss during cooking or clogged vent pipes. If pressure drops, check the vent tube for blockages and ensure the lid is sealed properly; For persistent issues, consult the manual or contact customer support. Regular cleaning and proper assembly can prevent most problems. Always refer to the troubleshooting section for detailed solutions to ensure optimal performance and safety when using your Mirro Pressure Canner.

7.3 When to Replace Parts

Replace parts like gaskets, sealing rings, or valves if they show signs of wear or damage. If the pressure gauge malfunctions, it should be replaced immediately. Check for cracks in the lid or excessive rust on metal components. Refer to the manual for guidance on inspecting and replacing parts. Use only genuine Mirro parts to ensure safety and optimal performance. Regularly inspecting and replacing worn parts will extend the lifespan of your pressure canner and maintain its efficiency.

Accessories and Replacement Parts

The Mirro Pressure Canner offers various accessories to enhance functionality, such as replacement gaskets, valves, and recipe books. Ensure to use genuine Mirro parts for optimal performance and safety.

8.1 Essential Accessories for Your Canner

Essential accessories for your Mirro Pressure Canner include replacement gaskets, pressure gauges, and locking mechanisms. These parts ensure optimal performance and safety. Additionally, recipe books and sealing rings are valuable for enhancing your canning experience. Regularly updating these accessories guarantees longevity and efficiency. Always opt for genuine Mirro parts to maintain quality and functionality, ensuring your canner operates at its best for years to come.

8.2 Finding Genuine Mirro Parts

To ensure optimal performance and safety, always use genuine Mirro parts for your pressure canner. These can be found through authorized retailers or official Mirro distributors. Look for parts specifically designed for your model, such as gaskets, sealing rings, and pressure gauges. Avoid counterfeit products, as they may compromise safety and functionality. Visit trusted online marketplaces or appliance repair shops to locate authentic Mirro components, ensuring your canner operates efficiently and reliably for years.

Congratulations on mastering your Mirro Pressure Canner! With this manual, you’re equipped for safe, efficient canning and cooking. Happy preserving and culinary experimenting!

9.1 Final Tips for Optimal Use

For the best experience with your Mirro Pressure Canner, always follow safety guidelines and maintenance tips. Regularly inspect seals and valves to ensure proper function. Experiment with recipes while adhering to recommended pressure and timing settings. Keep the manual handy for quick reference. Happy cooking and canning!

9.2 Resources for Further Learning

For further learning, download the official Mirro Pressure Cooker and Canner manual, which includes detailed instructions and recipes. Explore online communities and forums for tips and troubleshooting. Visit trusted retailers for genuine parts and accessories. Additionally, find instructional guides and videos to enhance your skills. Always refer to the manual for specific guidance and safety precautions to ensure optimal use of your Mirro Pressure Canner.

Manuals

ge monogram refrigerator manual

Welcome to the GE Monogram Refrigerator Manual! This comprehensive guide provides essential information for installation, operation, and maintenance of your high-end appliance. Discover key features, advanced settings, and troubleshooting tips to ensure optimal performance and longevity. Designed to help you master your refrigerator’s capabilities, this manual is your go-to resource for a seamless ownership experience. Explore the innovative features and maintenance routines tailored to enhance your kitchen experience with GE Monogram.

1.1 Understanding the Importance of the Manual

The GE Monogram Refrigerator Manual is an essential resource for optimizing your appliance’s performance. It provides detailed instructions for installation, operation, and maintenance, ensuring safety and efficiency. By understanding the manual, you can troubleshoot issues, customize settings, and extend the lifespan of your refrigerator. This guide empowers users to make informed decisions, preventing errors and enhancing overall satisfaction. It serves as a comprehensive reference for diagnosing problems and maintaining peak functionality, making it indispensable for both new and experienced users. Regularly consulting the manual ensures you maximize your appliance’s capabilities and enjoy lasting reliability.

1.2 Overview of GE Monogram Refrigerator Features

The GE Monogram Refrigerator boasts advanced features designed for premium performance and convenience. It includes smart integration capabilities, allowing seamless connectivity with smart home systems. The appliance offers customizable temperature and humidity settings, ensuring optimal food preservation. Advanced cooling features, such as rapid chill and precision temperature control, enhance freshness. Energy-efficient designs align with modern standards, reducing consumption while maintaining superior functionality. These features, combined with a sleek and durable build, make the GE Monogram Refrigerator a top choice for discerning homeowners seeking both style and reliability in their kitchen. Explore these innovations to elevate your culinary experience.

Installation and Setup Guide

Ensure proper installation by preparing the site, following step-by-step instructions, and leveling the refrigerator. This ensures optimal performance and prevents potential issues. Start here for a smooth setup.

2.1 Pre-Installation Requirements

Before installing your GE Monogram refrigerator, ensure the site is level, dry, and clear of obstructions. Verify the space meets the appliance’s dimensions and weight requirements. Check electrical connections, water supply lines, and drainage systems for compatibility. Ensure proper ventilation and adherence to local building codes. Disconnect power and water supplies before starting. Review the manual for specific model recommendations. Prepare the area thoroughly to avoid installation delays and ensure safety. Proper preparation guarantees a smooth and successful setup process for your refrigerator.

2.2 Step-by-Step Installation Instructions

Begin by carefully unpacking and inspecting the refrigerator for damage. Position it in the allocated space, ensuring proper alignment. Connect the water supply line securely to avoid leaks. Plug in the appliance and ensure the electrical connection meets safety standards. Follow the manual’s leveling guide to stabilize the unit. Test all features, including doors and drawers, for smooth operation. Double-check connections and ensure the compressor functions properly. Consult a professional if unsure about any step. This process ensures a safe and efficient installation tailored to your GE Monogram refrigerator model.

2.3 Leveling and Aligning the Refrigerator

Proper leveling ensures your GE Monogram refrigerator operates efficiently and maintains even door alignment. Use a wrench to adjust the leveling feet until the unit is stable. Place a level on the top surface to verify balance. Adjust the feet as needed until the bubble aligns centered. Ensure the doors are parallel and evenly spaced for smooth operation. Tighten the locking nuts once the desired position is achieved. Regularly check and adjust the alignment to maintain optimal performance and prevent potential issues. This step is crucial for longevity and functionality.

Daily Operation and Maintenance

Maintain your GE Monogram refrigerator by cleaning surfaces regularly, sanitizing shelves, and checking door seals for tightness. Optimize energy efficiency by adjusting settings wisely and ensuring proper air circulation. Regular filter replacements and monitoring temperature settings are essential for consistent performance. Follow these practices to preserve your appliance’s longevity and functionality.

3.1 Understanding Control Panels and Settings

The control panel on your GE Monogram refrigerator offers intuitive access to temperature, humidity, and advanced features. Familiarize yourself with the digital display and buttons to adjust settings like freshness zones and ice maker controls. Customize temperature settings for the main compartment and freezer to suit your needs. Explore smart integration options for remote monitoring. Regularly check and adjust settings to maintain optimal conditions. Mastering these controls ensures efficient operation and preserves the quality of your stored food. Adjust settings wisely to enhance performance and energy efficiency.

3.2 Tips for Optimal Refrigerator Performance

To optimize your GE Monogram refrigerator’s performance, ensure proper temperature settings (37°F-40°F for the fresh zone and 0°F-5°F for the freezer). Regularly inspect door seals for tight closure and clean gaskets to prevent air leaks. Store food in airtight containers to maintain humidity levels and reduce odors. Avoid overcrowding shelves, as this hinders air circulation. Clean the condenser coils every 6 months to improve efficiency. Defrost the freezer periodically to maintain performance. Follow these tips to enhance energy efficiency and preserve food quality. Proper maintenance ensures longevity and optimal operation.

3.4 Cleaning and Sanitizing the Appliance

Regular cleaning and sanitizing are crucial for maintaining your GE Monogram refrigerator’s hygiene and performance. Remove all shelves and drawers and wash them with mild detergent. Wipe the interior with a mixture of baking soda and water, avoiding harsh chemicals. Clean the door seals and handles to prevent bacteria buildup. Sanitize surfaces with a solution of equal parts water and white vinegar. Dry thoroughly to prevent moisture spots. Monthly deep cleaning ensures freshness and prevents odors. Always follow the manual’s cleaning guidelines for specific materials and components.

Troubleshooting Common Issues

Identify and resolve common issues with your GE Monogram refrigerator using error codes, diagnostic modes, and maintenance tips. Ensure optimal performance by addressing problems promptly and effectively.

4.1 Identifying Common Problems

Common issues with GE Monogram refrigerators include temperature fluctuations, defrost cycle malfunctions, and error codes. Symptoms like uneven cooling, excessive noise, or water leaks can indicate problems. Check for blocked air vents or faulty door seals to ensure proper function. If error codes appear, refer to the manual for specific meanings. Regular maintenance, such as cleaning condenser coils, can prevent many issues. Always address problems promptly to avoid further damage and ensure optimal performance. Consult the troubleshooting section for detailed solutions and diagnostic guidance.

4.2 Error Codes and Their Meanings

GE Monogram refrigerators display error codes to help diagnose issues. Common codes include “E” for electronic control problems, “F” for freezer temperature malfunctions, and “C” for cooling system faults. Each code corresponds to specific components or sensors, guiding repairs. Refer to the manual for detailed explanations of each code. Understanding these codes enables quick troubleshooting and prevents further damage. Always consult the diagnostic chart provided in the manual or contact a certified technician for complex issues. Accurate code interpretation is key to resolving problems efficiently.

4.3 Resetting and Diagnostic Modes

To reset your GE Monogram refrigerator, press and hold the “Reset” button for 5 seconds or unplug it for 30 seconds. This resets settings to factory defaults. For diagnostics, enter Diagnostic Mode by pressing specific buttons (varies by model) to identify issues. The display will show error codes and test component functionality. After diagnostics, restart the refrigerator to resume normal operation. Always refer to the manual for exact reset and diagnostic procedures, as methods may differ slightly between models. Regular use of diagnostic modes helps maintain appliance health and prevents unexpected breakdowns.

Advanced Features and Customization

Discover how to maximize your GE Monogram refrigerator’s potential with smart integration, customizable temperature settings, and advanced cooling features. Explore innovative options for tailored performance and convenience.

5.1 Exploring Smart Integration Capabilities

The GE Monogram refrigerator offers advanced smart integration features, allowing seamless connectivity to your home network. With Wi-Fi capabilities, you can monitor and control settings via a smartphone app. Receive notifications for temperature changes, door status, and filter replacement reminders. Integrate with voice assistants like Amazon Alexa or Google Assistant for hands-free control. Customize energy usage with smart grid compatibility, optimizing performance and efficiency. Explore how these cutting-edge features enhance convenience, ensuring your appliance adapts to your modern lifestyle demands effortlessly.

5.2 Customizing Temperature and Humidity Settings

Your GE Monogram refrigerator allows precise control over temperature and humidity levels to preserve food freshness. Adjust settings via the digital control panel or through the smartphone app for convenient customization. Set separate zones for fresh and frozen compartments, ensuring optimal conditions for different food types. Advanced sensors monitor and maintain consistent temperatures, while multi-air flow technology ensures even distribution. Custom humidity controls in the crisper drawers keep produce crisp and fresh. Tailor these settings to your needs for unparalleled food preservation and energy efficiency.

5.3 Utilizing Advanced Cooling Features

Your GE Monogram refrigerator offers cutting-edge cooling technologies for exceptional food preservation. Multi-air flow technology ensures consistent temperatures throughout the compartments, while advanced sensors adapt cooling based on load and ambient conditions. Quick-cool modes rapidly lower temperatures for fresh food storage, and smart humidity control prevents moisture fluctuations. These features work seamlessly to maintain optimal conditions, reducing energy consumption and extending food freshness. Explore these settings through the control panel or smart app for tailored cooling performance that enhances your culinary experience.

Safety Precautions and Compliance

Always follow essential safety guidelines to prevent accidents and ensure compliance with energy standards. Proper handling and disposal instructions are provided for environmental sustainability and safety. Adhere to these precautions to maintain appliance performance and user safety. Compliance with regulations ensures eco-friendly operation and longevity of your GE Monogram refrigerator.

6.1 Essential Safety Guidelines

To ensure safe operation of your GE Monogram refrigerator, always follow these guidelines:

  • Avoid exposing the appliance to extreme temperatures or moisture.
  • Never unplug the refrigerator by pulling the cord; always grip the plug.
  • Keep children away from moving parts and shelves.
  • Do not store flammable materials near the refrigerator.
  • Ensure proper ventilation around the appliance for efficient operation.
  • Follow recommended defrosting and cleaning procedures to prevent damage.

These precautions are crucial for maintaining safety and appliance longevity. Always refer to the manual for specific compliance requirements.


6.2 Compliance with Energy Standards

Your GE Monogram refrigerator is designed to meet rigorous energy efficiency standards. It adheres to U.S. Department of Energy (DOE) regulations, ensuring minimal energy consumption while delivering superior performance. Look for the ENERGY STAR certification, which indicates compliance with federal energy standards. Features like adaptive defrost and smart cooling modes optimize energy use without compromising performance. Regular maintenance, such as cleaning condenser coils, further enhances efficiency. By following the manual’s guidelines, you can ensure your appliance operates within energy compliance while reducing your environmental impact. Proper usage helps maintain energy efficiency and prolongs the appliance’s lifespan.

6.3 Handling and Disposal Instructions

Proper handling and disposal of your GE Monogram refrigerator are crucial for safety and environmental protection. Always follow the manufacturer’s guidelines to avoid damage or personal injury. When moving the appliance, use protective gear and ensure it is securely lifted to prevent scratches or dents. For disposal, recycle responsibly by consulting local regulations or certified e-waste centers. Ensure refrigerant is safely drained by a certified technician to comply with environmental laws. Remove doors and shelves to prevent accidents during disposal. Proper handling ensures eco-friendly decomposition and safety for all parties involved.

Your GE Monogram refrigerator manual is a comprehensive guide to maximizing performance and longevity. By following the installation, maintenance, and troubleshooting tips, you can ensure optimal operation. For further assistance, visit the official GE website or contact customer support for personalized help. Additional resources, such as service manuals and repair guides, are available online. Stay updated with the latest product enhancements and care tips to enhance your appliance experience. Refer to authorized service centers for professional advice and repairs, ensuring your refrigerator continues to deliver exceptional performance.

Guide

guido reni archangel michael

Guido Reni (1575-1642) was a prominent Baroque painter known for his elegant style. His Archangel Michael (1635) depicts the celestial battle, capturing the triumph of good over evil with dramatic flair and religious significance.

Commission and Historical Context

The Archangel Michael was commissioned by Cardinal Antonio Barberini, a prominent figure in 17th-century Rome and brother of Pope Urban VIII, for the Church of Santa Maria della Concezione. Painted in 1635, the work was part of a larger decorative scheme for the church, reflecting the Barberini family’s influence and patronage of the arts during the Baroque era.

Reni’s masterpiece was created during a period of religious and artistic transformation in Italy. The painting’s size, 293×202 cm, and its oil-on-canvas medium, indicate its grandeur and suitability for a public religious space. The artwork was intended to inspire devotion and reinforce Catholic doctrine, depicting a celestial battle between good and evil.

Historically, the painting signifies the cultural and religious values of early 17th-century Rome. Its dramatic composition and emotional intensity captured the spiritual fervor of the time, aligning with the Counter-Reformation’s emphasis on vivid religious imagery. The commission also highlights Reni’s reputation as a leading artist of his era, trusted with significant religious projects.

The painting’s completion in 1635 marks a pivotal moment in Reni’s career, solidifying his legacy as a master of Baroque art. Its enduring presence in the Church of Santa Maria della Concezione underscores its historical and cultural significance, making it a cornerstone of religious art from the period.

Artistic Style and Influences

Guido Reni’s artistic style blended Baroque grandeur with elegant harmonies, influenced by Caravaggio’s dramatic lighting. His refined technique emphasized dynamic compositions and emotional depth, creating a balance of drama and grace in Archangel Michael.

Baroque Elements

Guido Reni’s Archangel Michael embodies the dramatic intensity and emotional depth characteristic of the Baroque style. The painting features strong contrasts of light and shadow, known as chiaroscuro, to heighten the tension between the archangel and Satan. The dynamic composition, with Michael’s poised stance and the swirling drapery, creates a sense of movement and energy. Reni’s use of rich colors and intricate details, such as the textures of Michael’s armor and the folds of his cloak, adds to the painting’s visual splendor. The dramatic struggle between good and evil is a quintessential Baroque theme, emphasizing the triumph of divine order over chaos. Reni’s masterful execution of these elements ensures the painting is both visually striking and emotionally engaging, capturing the viewer’s attention and conveying the spiritual significance of the scene. The Baroque style’s emphasis on grandeur and theatricality is evident throughout the work, making it a compelling example of 17th-century artistry.

Influence of Caravaggio

Guido Reni’s Archangel Michael reflects the influence of Caravaggio, a dominant figure in Baroque art, particularly in its dramatic use of chiaroscuro. While Reni’s style is more refined and classical, the intense emotional depth and dynamic composition in the painting echo Caravaggio’s innovative approach. The stark contrasts of light and shadow, as seen in the illumination of Michael’s figure and the dark, chaotic form of Satan, are reminiscent of Caravaggio’s dramatic lighting. Additionally, the emotional intensity of the scene—Michael’s determined expression and the struggle depicted—aligns with Caravaggio’s ability to convey powerful emotions through his works. However, Reni’s interpretation is softer and more harmonious, blending Caravaggio’s dramatic elements with his own classical ideals. This fusion of styles highlights Reni’s ability to adapt influences while maintaining his unique artistic voice, creating a work that is both emotionally compelling and visually captivating.

Symbolism and Religious Significance

Guido Reni’s Archangel Michael is a profound depiction of the celestial battle between good and evil, rich in religious symbolism. The painting illustrates the Archangel Michael defeating Satan, often interpreted as a representation of divine justice and the triumph of righteousness. Michael, depicted as a strong, radiant figure, embodies protection and divine authority, while Satan, shown as a monstrous, defeated creature, symbolizes evil and chaos. The artwork draws from biblical narratives, particularly the Book of Revelation, where Michael leads the heavenly forces against the dragon, a metaphor for Satan. The scales of justice held by Michael further emphasize the theme of moral judgment. The painting’s religious significance lies in its ability to inspire devotion and reinforce Catholic teachings about the struggle between light and darkness. Its placement in a church underscores its role as a spiritual tool, reminding viewers of the divine protection offered by the Archangel. The work remains a powerful visual sermon, evoking faith and hope in its audience.

Painting Details and Dimensions

Guido Reni’s Archangel Michael is executed in oil on canvas, measuring 293 cm by 202 cm. This large-scale work was specifically designed for the Church of Santa Maria della Concezione in Rome, where it remains a central piece. The painting’s dimensions were chosen to dominate the chapel, creating an imposing visual impact that draws the viewer’s attention upward. The canvas’s size reflects the grandeur and importance of the subject matter, aligning with the Baroque tradition of using scale to convey divine majesty. The oil medium allows for rich, vivid colors and fine details, enhancing the dramatic tension between light and shadow. Reni’s meticulous brushwork and composition ensure that every element, from Michael’s flowing drapery to the defeated form of Satan, is rendered with clarity and precision. The painting’s physical presence complements its spiritual themes, making it a cornerstone of the church’s decorative and devotional program.

Historical Significance and Cultural Impact

Guido Reni’s Archangel Michael holds profound historical and cultural significance as a masterpiece of the Baroque era. Commissioned by Cardinal Antonio Barberini, the painting reflects the religious and artistic ideals of 17th-century Italy. Its depiction of the celestial battle between good and evil resonated deeply with the Catholic Church’s Counter-Reformation themes, emphasizing divine triumph and moral virtue. The work’s dramatic composition and emotional intensity influenced numerous artists, solidifying Reni’s reputation as a leading figure in Baroque art. Beyond its religious context, the painting has become an iconic representation of the struggle between light and darkness, transcending its original purpose to inspire artistic and cultural movements. Today, it remains a cornerstone of art historical studies, celebrated for its technical brilliance and enduring emotional power.

Auction Performance and Market Value

Guido Reni’s Archangel Michael has demonstrated significant auction performance, reflecting its cultural and historical importance. In 2007, the painting was sold at Christie’s for $1.2 million, exceeding its pre-sale estimate of $300,000 ⎼ $400,000. This sale highlighted the artwork’s enduring value and appeal to collectors. The painting’s market value is influenced by its excellent condition, historical provenance, and status as a seminal work of the Baroque period. Its dramatic composition and religious themes continue to attract both private collectors and institutions. The artwork’s cultural significance further elevates its market worth, as it is widely regarded as one of Reni’s most iconic creations. Auction houses and art historians closely monitor its performance, as it remains a benchmark for Baroque art valuation. The painting’s rarity and artistic brilliance ensure its continued relevance in the global art market.


Legacy and Influence in Art History

Guido Reni’s Archangel Michael holds a significant place in art history, showcasing the artist’s mastery of Baroque composition and emotional expression. Reni’s work influenced numerous artists, including those from the Bolognese school, who admired his balance of elegance and dramatic intensity. The painting’s dynamic poses and chiaroscuro techniques became a model for later Baroque artists, emphasizing the triumph of light over darkness. Reni’s depiction of Michael as a Roman soldier combined with angelic grace inspired religious art for centuries, blending spiritual themes with classical aesthetics. His innovative use of color and composition elevated the painting to an iconic status, making it a cornerstone of Baroque art. The artwork’s enduring popularity underscores Reni’s legacy as a leading figure in 17th-century Italian art, ensuring his influence extends to modern artistic interpretations of religious and mythological subjects;

Guido Reni’s Archangel Michael stands as a masterpiece of Baroque art, embodying the era’s dramatic intensity and spiritual depth. The painting’s vivid depiction of the celestial battle between good and evil captivates viewers, blending religious symbolism with artistic brilliance. Reni’s ability to infuse his work with emotional power and technical precision has left a lasting impact on art history. The painting’s enduring popularity reflects its universal themes of triumph and redemption, resonating with audiences across centuries. As a testament to Reni’s skill, Archangel Michael remains a cornerstone of religious and Baroque art, inspiring future generations of artists and art enthusiasts alike. Its legacy underscores Reni’s contribution to the evolution of artistic expression, ensuring his work continues to be celebrated and studied.

PDF

mechanics of materials hibbeler pdf

Mechanics of Materials, led by Russell C. Hibbeler, explores stress, strain, and deformation in solids. It is foundational for engineering, offering clear theory and practical applications.

Overview of Russell C. Hibbeler’s Contribution

Russell C. Hibbeler has made significant contributions to engineering education through his textbooks on mechanics of materials. His works, such as the 10th and 11th editions of Mechanics of Materials, are renowned for their clear presentation, visual aids, and practical examples. Hibbeler’s concise writing style and integration of real-world applications have made his books indispensable for students in mechanical, civil, and aerospace engineering. His approach emphasizes problem-solving, with detailed example problems and solutions, fostering a deep understanding of stress, strain, and material behavior. The PDF versions of his texts are widely sought after for their accessibility and convenience in academic settings.

Key Topics Covered in Hibbeler’s Mechanics of Materials

Axial load, torsion, and bending are core topics, along with stress transformation and Mohr’s Circle. These principles are essential for understanding material behavior under various structural loads.

Axial Load and Normal Stress

The concept of axial load and normal stress is fundamental in mechanics of materials. It involves analyzing forces acting along the length of an object, such as rods or columns, and their impact on material behavior. Normal stress is defined as force per unit area (σ = P/A) and is crucial for understanding material strength and deformation under tension or compression.

Hibbeler’s approach emphasizes clear formulas and examples, such as calculating strain and elastic modulus, ensuring a solid understanding of how materials respond to axial loading in real-world engineering scenarios.

Torsion and Shear Stress

Torsion refers to the twisting of a structural member, like shafts, due to applied torques. It induces shear stress, which deforms the material by sliding adjacent planes. Hibbeler’s text explains the torsion formula (θ = (TL)/(GJ)) and its relevance to engineering components, ensuring students grasp how materials behave under rotational forces.

Through detailed examples and visual aids, Hibbeler illustrates the calculation of shear strain and angle of twist, preparing engineers to design and analyze real-world systems subjected to torsional loading.

Bending and Flexural Stress

Bending occurs when a beam is subjected to transverse loads, causing it to curve. This induces flexural stress, which varies across the cross-section. Hibbeler’s text explains the elastic bending theory, emphasizing the neutral axis and stress distribution. The formula σ = (M * y) / I is central, where M is the bending moment, y is the distance from the neutral axis, and I is the moment of inertia. This chapter is crucial for understanding beam behavior and designing structural components, with Hibbeler providing clear examples and visual aids to aid comprehension.

Stress Transformation and Mohr’s Circle

Stress transformation involves analyzing how stress components change when the coordinate system is rotated. Mohr’s Circle is a graphical tool used to determine the principal stresses and maximum shear stresses from a given stress state. Hibbeler’s text provides a detailed derivation of the stress transformation equations and explains how to construct and interpret Mohr’s Circle. This concept is essential for understanding material failure and designing components under complex loading conditions. Hibbeler’s examples and visuals make this advanced topic accessible to students, emphasizing its practical applications in engineering design and analysis.

Importance of the PDF Version

The PDF version of Hibbeler’s Mechanics of Materials offers portability and searchability, making it easier for students to access and study the material anytime, anywhere, on any device.

Accessibility and Convenience for Students

The PDF version of Hibbeler’s Mechanics of Materials provides unparalleled accessibility and convenience for students. Its digital format allows for easy portability, enabling learners to study on various devices without the need for physical copies. Additionally, features like search functionality and bookmarking enhance the learning experience, making it simpler to locate specific topics and review complex concepts. This flexibility is particularly beneficial for students who prefer self-paced learning or require immediate access to course materials. The PDF also supports offline access, ensuring that students can study even without internet connectivity, making it an indispensable resource for academic success.

Hibbeler’s Approach to Teaching Mechanics of Materials

Hibbeler emphasizes clarity and visual aids, using a concise writing style and stunning four-color photorealistic art to explain complex concepts. His approach integrates real-world applications to enhance understanding and engagement.

Clarity, Visual Aids, and Real-World Applications

Hibbeler’s teaching method combines clarity with visual aids and real-world applications. His concise writing style and photorealistic art program, shaped by student feedback, make complex concepts accessible. Example problems and practical scenarios bridge theory and practice, enabling students to grasp mechanics of materials principles effectively. This approach ensures students can apply their knowledge to real engineering challenges, fostering a deeper understanding of the subject. Hibbeler’s commitment to clarity and engagement has made his resources indispensable for learners worldwide.

Problem-Solving in Mechanics of Materials

Example problems and step-by-step solutions are central to mastering mechanics of materials. These tools help students understand and apply concepts to real-world engineering scenarios effectively.

Example Problems and Their Role in Learning

Example problems in Hibbeler’s Mechanics of Materials are essential for bridging theory and practice. They provide step-by-step solutions to complex scenarios, such as analyzing stress, strain, and deformation. These problems are designed to mirror real-world engineering challenges, enabling students to apply concepts like torsion, bending, and stress transformation. Visual aids and clear explanations accompany each problem, making abstract ideas more tangible. By solving these examples, students develop problem-solving skills and gain confidence in addressing practical engineering tasks, preparing them for professional challenges in mechanics and materials science.

Editions of Mechanics of Materials

Mechanics of Materials by Russell C. Hibbeler is available in multiple editions, with the 11th edition offering updated content, enhanced visuals, and improved problem-solving tools for students.

Differences Between the 10th and 11th Editions

  • The 11th edition of Mechanics of Materials by Russell C. Hibbeler introduces updated content, enhanced visuals, and additional problem-solving examples.
  • New digital tools and interactive features in the 11th edition improve student engagement and understanding of complex concepts.
  • While the 10th edition remains comprehensive, the 11th edition offers streamlined chapters and expanded real-world applications for better clarity.


Role of the Solution Manual

The solution manual complements Hibbeler’s textbook, offering detailed solutions to problems, aiding students in understanding complex concepts and reinforcing their problem-solving skills through structured explanations.

Supplementary Resources for Problem Solving

Supplementary resources, such as solution manuals and online platforms, provide detailed explanations and examples to enhance problem-solving skills. These tools offer step-by-step solutions, enabling students to grasp complex concepts and apply theories effectively. Additional resources include interactive simulations, video tutorials, and practice problems, which reinforce learning and prepare students for real-world engineering challenges; The Hibbeler Mechanics of Materials PDF is often accompanied by these aids, ensuring a comprehensive understanding of the subject matter.

Applications in Engineering Disciplines

Mechanics of Materials is essential for Mechanical, Civil, and Aerospace Engineering, providing foundational principles for designing and analyzing structures, ensuring structural integrity and safety in various applications.

Relevance to Mechanical, Civil, and Aerospace Engineering

Mechanics of Materials is fundamental to Mechanical Engineering for designing machinery and ensuring components withstand stress and strain. In Civil Engineering, it is crucial for analyzing structures like bridges and buildings. For Aerospace Engineering, it aids in developing lightweight, durable materials and understanding stress distributions in aircraft and spacecraft. Hibbeler’s work provides clear explanations and practical examples, making it indispensable across these disciplines for both students and professionals.

Future of Mechanics of Materials Education

The integration of modern technologies, such as simulation software and interactive tools, enhances learning. Online platforms and virtual labs provide immersive experiences, making education more accessible and engaging globally.

Integration of Modern Technologies and Methods

Modern technologies like simulation software and virtual labs are revolutionizing mechanics of materials education. These tools enable real-time analysis of stress and strain, enhancing visual learning. Interactive 3D models and mobile platforms provide flexibility, allowing students to explore complex concepts anytime, anywhere. Such innovations bridge theory and practice, fostering deeper understanding and practical application. They also support personalized learning experiences, catering to diverse student needs and preferences. These advancements ensure that mechanics of materials remains dynamic, relevant, and accessible for future engineers.

Russell C. Hibbeler’s work in mechanics of materials has significantly influenced engineering education. His textbooks and PDF resources provide a comprehensive understanding of stress, strain, and deformation. By integrating modern technologies and real-world applications, Hibbeler bridges theory and practice, making complex concepts accessible. The availability of PDF versions ensures flexibility and convenience for students. As engineering evolves, Hibbeler’s approach remains a cornerstone for learning, equipping future engineers with essential skills. His contributions continue to shape the field, ensuring mechanics of materials remains a vital and dynamic area of study.

PDF

ciwa scale pdf

The CIWA-Ar scale is a widely used tool for assessing alcohol withdrawal symptoms, helping clinicians determine severity and guide treatment effectively․

1․1 What is the CIWA-Ar Scale?

The Clinical Institute Withdrawal Assessment for Alcohol Scale, Revised (CIWA-Ar) is a 10-category assessment tool used to evaluate the severity of alcohol withdrawal symptoms․ It measures symptoms like nausea, tremors, sweating, anxiety, and hallucinations, with each category scored independently․ The total score helps determine the level of withdrawal, ranging from mild to severe․ This scale is widely used in clinical settings to guide treatment decisions and monitor patient progress․ It is not copyrighted and can be freely used by healthcare professionals․

1․2 Purpose and Development of the CIWA-Ar Scale

The CIWA-Ar Scale was developed to provide a standardized method for assessing alcohol withdrawal severity․ Created by Sullivan et al․ in 1989, it aims to ensure consistent evaluation of symptoms across clinical settings․ The scale helps identify patients requiring medical intervention, enabling early treatment to prevent complications․ Its design supports accurate monitoring and adjustment of care plans, making it a cornerstone in managing alcohol withdrawal effectively and safely․

Structure of the CIWA-Ar Scale

The CIWA-Ar Scale consists of 10 symptom categories, each scored from 0 to 7, assessing severity of alcohol withdrawal․ The total score ranges from 0 to 67․

2․1 Categories and Symptoms Assessed

The CIWA-Ar Scale evaluates 10 specific symptoms: nausea/vomiting, tremors, paroxysmal sweats, anxiety, tactile disturbances, hallucinations, disorientation, agitation, and hyperactivity․ Each symptom is rated on a scale from 0 to 7, with higher scores indicating greater severity․ This comprehensive assessment ensures a thorough evaluation of alcohol withdrawal symptoms, aiding in accurate diagnosis and treatment planning․

2․2 Scoring System and Interpretation

The CIWA-Ar Scale uses a scoring system ranging from 0 to 7 for each of the 10 symptoms, with a maximum total score of 67․ Scores below 10 typically indicate mild withdrawal and may not require pharmacological intervention․ Scores of 10 or higher suggest moderate to severe withdrawal, guiding the need for benzodiazepine therapy․ The scale’s interpretation helps clinicians assess symptom severity and tailor treatment plans effectively, ensuring appropriate care for patients experiencing alcohol withdrawal․ The tool is not copyrighted, facilitating widespread use in clinical settings․

Administration of the CIWA-Ar Scale

The CIWA-Ar Scale is administered by trained healthcare professionals, assessing symptoms like nausea, tremors, and anxiety․ It is practical, requiring only 5 minutes to complete, and is widely used in clinical settings to monitor alcohol withdrawal effectively․

3․1 How to Use the Scale in Clinical Settings

The CIWA-Ar Scale is administered in clinical settings to assess alcohol withdrawal severity․ Healthcare professionals evaluate symptoms like nausea, tremors, and anxiety, scoring each on a 0-7 scale․ Assessments are typically conducted every 4-6 hours or as symptoms change․ The total score guides treatment decisions, with scores ≥8 often triggering benzodiazepine therapy․ Regular monitoring ensures timely adjustments to care, improving patient outcomes and preventing complications․

3․2 Required Training for Healthcare Professionals

Healthcare professionals must undergo training to accurately administer the CIWA-Ar Scale․ Training covers symptom evaluation, scoring interpretation, and clinical judgment․ It ensures consistency and reliability in assessments, leading to effective patient care․ Regular training updates are essential to maintain proficiency and incorporate new guidelines․ This structured approach enhances the utility of the CIWA-Ar Scale in clinical practice․

Clinical Application of the CIWA-Ar Scale

The CIWA-Ar Scale is crucial for managing alcohol withdrawal, enabling symptom-triggered therapy and tailored treatment adjustments to ensure patient safety and effective care․

4․1 Symptom-Triggered Benzodiazepine Therapy

The CIWA-Ar Scale guides symptom-triggered benzodiazepine therapy, ensuring medications are administered based on the severity of withdrawal symptoms․ This approach prevents overuse by targeting only necessary interventions․ Scores are monitored regularly, with higher scores prompting immediate action to alleviate severe symptoms․ This method enhances patient safety and efficacy in managing alcohol withdrawal, reducing the risk of complications and improving outcomes significantly․

4․2 Monitoring and Adjusting Treatment Plans

Regular monitoring using the CIWA-Ar Scale allows healthcare providers to adjust treatment plans dynamically․ Symptoms are reassessed at intervals, enabling tailored interventions․ If scores indicate worsening withdrawal, treatment intensity is increased․ Conversely, improving scores may lead to gradual tapering of medications․ This adaptive approach ensures personalized care, minimizes risks, and optimizes patient outcomes by responding promptly to clinical changes․

Scoring Guidelines and Interpretation

The CIWA-Ar Scale evaluates 10 symptoms, each scored 0-7, except disorientation (0-4)․ Total scores range from 0-67, guiding severity assessment and treatment decisions effectively․

5․1 Detailed Scoring for Each Symptom Category

The CIWA-Ar Scale assesses 10 symptoms of alcohol withdrawal, each scored individually․ Nausea and vomiting are rated 0-7 based on patient report and observation․ Tremors are evaluated by observing hand tremors, also scored 0-7․ Paroxysmal sweats, anxiety, and tactile disturbances are similarly rated․ Visual and auditory disturbances are scored based on patient reports․ Disorientation is assessed on a 0-4 scale․ Each symptom score contributes to the total, guiding clinical decisions․

5․2 Thresholds for Mild, Moderate, and Severe Withdrawal

The CIWA-Ar Scale categorizes withdrawal severity based on total scores․ Mild withdrawal is typically below 10, requiring minimal intervention․ Moderate withdrawal (10-15) may need pharmacological intervention․ Severe withdrawal (16 or higher) necessitates close monitoring and aggressive treatment․ These thresholds guide clinicians in tailoring care, ensuring appropriate management strategies for patient safety and symptom relief․

Role of the CIWA-Ar Scale in Alcohol Withdrawal Management

The CIWA-Ar Scale plays a crucial role in standardizing the assessment and management of alcohol withdrawal, ensuring consistent and evidence-based treatment decisions․

6․1 Comparison with Other Assessment Tools

The CIWA-Ar Scale stands out among other assessment tools due to its specificity and sensitivity in evaluating alcohol withdrawal․ Unlike broader scales, it focuses exclusively on alcohol-related symptoms, providing a detailed and actionable score․ This makes it more effective than general assessment tools, offering targeted insights for clinical decisions and treatment plans․

6․2 Advantages Over Alternative Scales

The CIWA-Ar Scale offers several advantages over other assessment tools․ Its detailed scoring system provides precise measurement of symptom severity, enabling early intervention․ Additionally, it is user-friendly, requiring minimal training, and its non-copyrighted status allows free use․ Unlike broader scales, the CIWA-Ar focuses specifically on alcohol withdrawal, ensuring targeted and actionable results․ This specificity enhances clinical decision-making and improves patient outcomes significantly․

Case Studies and Practical Examples

The CIWA-Ar Scale has been effectively used in real-world clinical settings to assess and manage alcohol withdrawal symptoms, providing actionable insights for patient care and outcomes․

7․1 Real-World Applications of the CIWA-Ar Scale

The CIWA-Ar Scale is widely applied in clinical settings to assess alcohol withdrawal severity, guiding symptom-triggered benzodiazepine therapy and monitoring patient progress․ Its practicality lies in its ability to quickly evaluate symptoms like nausea, tremors, and anxiety, enabling healthcare providers to tailor treatment plans effectively․ This tool is particularly valued for its ease of use and effectiveness in busy hospital environments, ensuring timely interventions and improving patient outcomes significantly․

7․2 Patient Outcomes and Success Stories

The CIWA-Ar Scale has significantly improved patient outcomes by enabling early intervention and personalized treatment plans․ Success stories highlight its role in reducing withdrawal-related complications and shortening hospital stays․ Patients treated using CIWA-Ar-guided therapy often experience fewer severe symptoms and faster recovery․ This tool has proven instrumental in enhancing the quality of care for individuals undergoing alcohol withdrawal, demonstrating its clinical utility and effectiveness in real-world scenarios․

Limitations and Challenges

The CIWA-Ar Scale, while effective, requires trained professionals for accurate administration․ Challenges include variability in symptom assessment and reliance on clinical judgment alongside scoring․

8․1 Potential Pitfalls in Administration

The CIWA-Ar Scale requires skilled healthcare professionals for accurate administration․ Potential pitfalls include variability in symptom interpretation, reliance on patient self-reporting, and subjective scoring․ Environmental factors and patient anxiety can influence results․ Additionally, the scale may not account for co-occurring medical conditions or underlying mental health issues, potentially leading to incomplete assessments․ Proper training and clinical judgment are essential to mitigate these challenges and ensure reliable outcomes․

8․2 Challenges in Clinical Practice

Challenges in using the CIWA-Ar Scale include ensuring consistent training among healthcare providers, managing subjective symptom reporting, and accounting for patient-specific factors like anxiety or co-occurring conditions․ Time constraints in busy clinical settings can also hinder thorough assessments․ Additionally, the scale’s reliance on patient self-reporting may reduce accuracy in patients with cognitive impairments․ Addressing these challenges requires ongoing education and clinical expertise to ensure effective implementation and reliable outcomes․


Resources and References

Key resources include the British Journal of Addiction, Sullivan et al․ (1989), and the CIWA-Ar PDF, available online for clinical use and referencing․

9․1 Recommended Reading and Guidelines

Essential resources include the British Journal of Addiction, featuring Sullivan et al․ (1989), which introduced the CIWA-Ar․ The CIWA-Ar PDF is widely available for clinical use․ Additional guidelines from professional organizations like SAMHSA and NICE provide evidence-based practices for alcohol withdrawal management․ These resources ensure accurate assessment and effective treatment, aiding healthcare professionals in delivering optimal care for patients experiencing alcohol withdrawal symptoms․

9․2 Accessing the CIWA-Ar Scale PDF

The CIWA-Ar scale PDF is freely available online, often provided by medical institutions and professional organizations․ It can be downloaded from regional health authority websites, such as Regionstrauma․org, or through academic databases like PubMed․ The scale is not copyrighted, allowing unrestricted use and distribution․ Clinicians can easily access and print the PDF for routine patient assessments in clinical settings, ensuring consistent and reliable evaluations of alcohol withdrawal symptoms․

The CIWA-Ar scale is a cornerstone in managing alcohol withdrawal, offering reliable assessment and guiding symptom-triggered therapy․ Its widespread adoption underscores its clinical value and future relevance in research and practice․

10․1 Importance of the CIWA-Ar Scale in Modern Medicine

The CIWA-Ar scale plays a vital role in modern medicine by standardizing the assessment of alcohol withdrawal symptoms․ Its widespread adoption ensures consistent and reliable evaluation, reducing clinical variability․ The scale’s ability to guide symptom-triggered therapy enhances patient safety and outcomes․ By preventing severe withdrawal progression, it remains a cornerstone in addiction medicine, influencing both clinical practice and research․

10․2 Future Developments and Research Directions

Future research may focus on integrating technology, such as digital tools, to enhance the CIWA-Ar’s real-time monitoring capabilities․ Expanding its application to other substance withdrawal syndromes could broaden its utility․ Additionally, studies may explore adapting the scale for pediatric populations or refining scoring systems to improve accuracy․ These advancements aim to maintain the CIWA-Ar as a leading tool in addiction medicine, ensuring it remains relevant and effective in evolving clinical landscapes․

Manuals

et 300 manual

Welcome to the ET-300 manual, your comprehensive guide to understanding and using the Mini Educator ET-300 remote training collar. This manual covers setup, operation, safety, and troubleshooting to ensure effective training and proper use of the device.

1.1 Overview of the ET-300 E-Collar

The ET-300 E-Collar is a remote training system designed for effective dog training. It features a half-mile range, making it suitable for both home and field use. The collar is lightweight and adjustable, fitting neck sizes from 9 to 25 inches. Its unique design includes a Biothane strap for comfort and durability. The transmitter boasts an LCD display and five control buttons for easy operation. This device is ideal for training one or two dogs, offering flexibility and reliability for pet owners and professional trainers alike.

1.2 Importance of Reading the Manual

Reading the ET-300 manual is essential for understanding its features, proper usage, and safety guidelines. It provides detailed instructions on setup, operation, and troubleshooting, ensuring effective training. The manual helps avoid common mistakes, such as improper collar fitting or stimulation level adjustments. By following the guide, users can maximize the device’s potential while keeping their dogs safe and comfortable. It is a crucial resource for both new and experienced users.

Key Features of the ET-300

The ET-300 boasts a round, stopwatch-like transmitter with an LCD display and adjustable dial. Its lightweight receiver collar fits necks from 9 to 25 inches, offering a 1/2-mile range.

2.1 Design and Build Quality

The ET-300 features a durable, ergonomic design with a round transmitter resembling a stopwatch. The receiver collar is made of sturdy Biothane, adjustable to fit necks from 9 to 25 inches. Its lightweight, compact build ensures comfort for dogs, while the transmitter’s LCD display and intuitive controls enhance user experience. The collar is also waterproof, ensuring reliability in various conditions.

2.2 Technical Specifications

The ET-300 operates with a 1/2-mile range, suitable for one or two dogs. The lightweight receiver collar is made of durable Biothane, fitting necks from 9 to 25 inches. It features an LCD display, five control buttons, and adjustable stimulation levels. The system is waterproof, ensuring reliability in various conditions. Designed for dogs as small as 5 pounds, the ET-300 combines versatility with user-friendly functionality, making it ideal for effective training.

2.3 Unique Functions and Modes

The ET-300 offers unique functions like dual-receiver capability for two-dog training and a Biothane collar for comfort. The transmitter has an LCD display and five buttons for intuitive control. It supports multiple stimulation modes, including tone and vibration, ensuring versatile training options. The system also features an adjustable dial for precise stimulation levels, enhancing customization for different dog temperaments and training needs.

Setting Up the ET-300

Unbox and prepare the ET-300, ensuring all components are included. Charge the transmitter and receiver fully before use. Pair the devices following the manual’s instructions for a seamless connection. Fit the collar correctly on your dog, ensuring comfort and proper placement. These steps ensure the system is ready for effective training and operation.

3.1 Unboxing and Initial Preparation

Upon opening the box, you’ll find the ET-300 transmitter, receiver collar, Biothane strap, charger, and user manual. Inspect all components for damage. The receiver collar features an adjustable strap, fitting neck sizes from 9 to 25 inches. For smaller dogs, the strap can be trimmed to size. Before first use, fully charge both the transmitter and receiver to ensure proper pairing and operation. This step ensures a smooth start to your training journey.

3.2 Charging the Transmitter and Receiver

Both the ET-300 transmitter and receiver come with rechargeable batteries. Locate the USB charging ports on each device. Use the provided charger to plug them in. The transmitter and receiver typically require 2-3 hours for a full charge. Avoid overcharging to maintain battery health. Ensure both devices are fully charged before initial use. Refer to the manual for detailed charging instructions and safety precautions to ensure optimal performance and longevity of the batteries.

3.3 Pairing the Transmitter and Receiver


To pair the ET-300 transmitter and receiver, ensure both devices are powered on. Press and hold the pairing button on the receiver until the LED flashes. Then, press and hold the pairing button on the transmitter. The LED will stop flashing once paired. Confirm the connection by testing the stimulation. Repeat for additional receivers if applicable. This process ensures a secure link between the transmitter and receiver for reliable operation during training sessions. Proper pairing is essential for consistent communication between devices.

Using the ET-300

The ET-300 transmitter features a round, stopwatch-like design with an LCD display and adjustable dial. Press the buttons to activate stimulation or tone. Ensure the receiver collar fits properly and adjust settings as needed for effective training. Always hold the transmitter correctly for optimal range and performance during sessions. Proper use ensures safe and efficient dog training.

4.1 Adjusting Stimulation Levels

Adjusting stimulation levels on the ET-300 ensures a comfortable and effective training experience for your dog. Use the transmitter’s dial to set the stimulation level, starting from low and gradually increasing as needed. The collar offers a wide range of adjustable settings, allowing you to customize the sensation to suit your dog’s sensitivity. Always monitor your dog’s reaction and adjust levels accordingly to avoid discomfort. Proper adjustment is key to successful training outcomes.

4.2 Operating the Remote Transmitter

The ET-300 remote transmitter is user-friendly and designed for intuitive operation. It features five control buttons, an LCD display, and an adjustable dial for customization. To use, turn it on and ensure it’s paired with the receiver collar. Use the buttons to deliver stimulation, tone, or vibration. Adjust settings via the dial for precise control. For optimal range, hold the transmitter like the Statue of Liberty, avoiding antenna contact with objects. This ensures reliable performance during training sessions.

4.3 Fitting the Receiver Collar

The ET-300 receiver collar features a Biothane strap, adjustable to fit necks from 9 to 25 inches. For smaller dogs, the strap can be trimmed to size while maintaining comfort. Ensure the collar is snug but not tight, allowing for proper contact with your dog’s skin. The lightweight design ensures comfort for dogs as small as 5 pounds, making it suitable for sensitive or stubborn pets. Proper fit is essential for effective training.

Safety Guidelines

Ensure proper usage to avoid burns or skin irritation. Always check the collar fit and follow manual instructions. Avoid prolonged use without breaks and keep out of children’s reach.

5.1 Precautions for Use

Always follow the manual’s guidelines to ensure safe and effective use of the ET-300. Avoid prolonged stimulation without breaks to prevent skin irritation. Properly fit the collar to your dog’s neck, ensuring it’s snug but not too tight. Keep the device out of reach of children and pets. Regularly inspect the collar for wear and tear. Never use the ET-300 near water or in extreme weather conditions. Adhere to all safety warnings to protect both you and your dog.

5.2 Avoiding Common Mistakes

To ensure safe and effective use of the ET-300, avoid common mistakes such as misusing the antenna or overstimulating your dog. Never allow the antenna to touch objects, as this reduces range. Avoid using the collar near water or in extreme weather. Do not over-tighten the collar, as this can cause discomfort. Always start with low stimulation levels and gradually adjust. Properly follow the manual’s guidelines to prevent misuse and ensure your dog’s safety and comfort during training.

Training Tips with the ET-300

Start with low stimulation levels and gradually increase as needed. Ensure the collar fits properly and use consistent commands for effective training. Always reward good behavior.

E-collar training is a modern, humane method to guide dogs using gentle stimulation. The ET-300 offers a safe, effective way to communicate with your dog remotely. Proper use ensures clarity and consistency, helping dogs understand desired behaviors. Start with low levels and gradually adjust as needed. Always prioritize positive reinforcement alongside stimulation for a balanced approach. This chapter provides foundational tips for successful e-collar training with the ET-300.

6.2 Effective Training Techniques

Start with clear, consistent commands and use the ET-300 to reinforce desired behaviors. Begin with low stimulation levels, ensuring your dog responds without stress. Use the collar as a secondary cue, following positive reinforcement. Maintain your dog’s focus by keeping sessions short and rewarding good responses. Avoid overuse of stimulation; instead, focus on timing and consistency for effective learning. This approach ensures a humane and efficient training experience with the ET-300.

Troubleshooting

If the ET-300 isn’t functioning properly, check the collar fit, ensure the dog is accustomed to it, and verify stimulation settings. Consult the manual for solutions.

7.1 Common Issues and Solutions

Common issues with the ET-300 include the collar not fitting properly, stimulation levels not adjusting, or the transmitter losing connection. Ensure the collar is snug but not tight, as improper fit can cause discomfort or ineffective stimulation. For connectivity issues, restart both devices and ensure they are paired correctly. If stimulation levels aren’t responding, check the battery levels and charge both components fully. Refer to the manual for detailed troubleshooting steps.

7.2 Maintenance and Repair

Regularly clean the ET-300 collar and transmitter with a soft cloth to prevent dirt buildup. Avoid harsh chemicals, as they may damage the components. Inspect the Contact Points on the collar for debris and ensure they are free from obstruction. Store the device in a dry, cool place when not in use. For repairs, contact E-Collar Technologies directly, as self-repair may void the warranty. Proper maintenance ensures optimal performance and longevity of the device.

Comparison with Other Models

This section explores how the ET-300 stacks up against other e-collar models, highlighting key differences in features, range, and functionality to help users make informed decisions.

8.1 ET-300 vs. ET-302

The ET-300 and ET-302 share similarities in design and functionality, both offering a 1/2 mile range and advanced training features. The ET-302 is tailored for two-dog systems, while the ET-300 is often preferred for its compact design and versatility. Both models feature durable construction, user-friendly interfaces, and adjustable stimulation levels, making them ideal for trainers seeking reliable e-collar solutions. The choice depends on specific training needs and the number of dogs being trained.

User Manual Contents

The ET-300 manual includes detailed sections on setup, features, safety guidelines, training tips, troubleshooting, and accessories, ensuring comprehensive guidance for optimal use of the e-collar system.

9.1 What to Expect in the Manual

The ET-300 manual provides a detailed overview of the e-collar’s features, operation, and maintenance. It includes setup instructions, safety precautions, and troubleshooting tips. Users will find guidance on adjusting stimulation levels, pairing devices, and effective training techniques. The manual also covers technical specifications and compatible accessories, ensuring users have all the information needed for proper and safe use of the ET-300 system.

Accessories and Compatibility

The ET-300 is compatible with various accessories, including the Biothane strap and additional receivers, ensuring versatility and compatibility with other models like the ET-302.

10.1 Recommended Accessories

The ET-300 is compatible with a range of accessories, including the Biothane strap for the receiver collar, which is durable and adjustable. Additional receivers can be purchased for training multiple dogs or sensitive pets. The remote transmitter features a distinctive round design with an LCD display and adjustable dial for precise control. Accessories like extra collars and chargers are available to enhance functionality and ensure seamless training experiences for both the trainer and the dog.

Customer Support

E-Collar Technologies offers dedicated customer support to assist with any questions or issues regarding the ET-300. Contact their team via phone, email, or through their official website for help.

11.1 Contacting E-Collar Technologies

To contact E-Collar Technologies for support with the ET-300, visit their official website or call their customer service team. They offer assistance via phone, email, or live chat. The support team is available during business hours to address questions, troubleshooting, or repair requests. For more detailed inquiries, use the contact form on their website. Ensure to have your product serial number ready for efficient service. Their knowledgeable team is ready to assist with any ET-300-related needs.

The ET-300 manual provides a comprehensive guide to effective e-collar training. By following the manual, owners can ensure safe, humane, and successful training outcomes for their dogs.

12.1 Final Thoughts on the ET-300

The ET-300 stands out as an innovative, user-friendly e-collar designed for effective dog training. Its ergonomic design, adjustable features, and clear instructions make it a top choice for pet owners. By adhering to the manual’s guidelines, users can maximize its potential, ensuring a safe and positive training experience for their dogs. This tool is a valuable asset for fostering better communication and understanding between you and your pet.

PreviousNext

You Want To Have Your Favorite Car?

We have a big list of modern & classic cars in both used and new categories.