Manuals

ferrari california manual

The Ferrari California Manual is a comprehensive guide for drivers and enthusiasts, offering insights into the car’s unique manual transmission, performance, and maintenance.

1.1 Overview of the Ferrari California

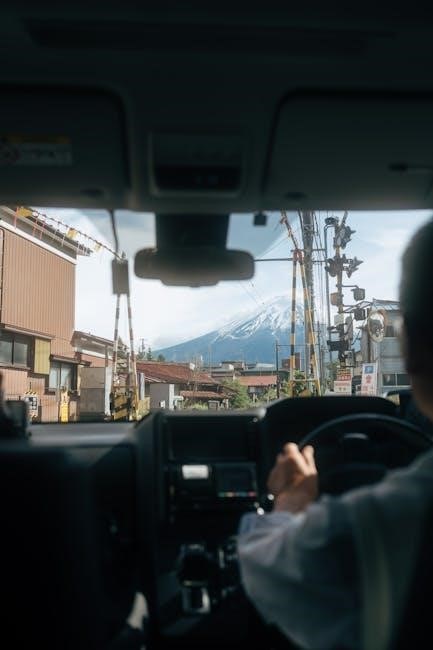
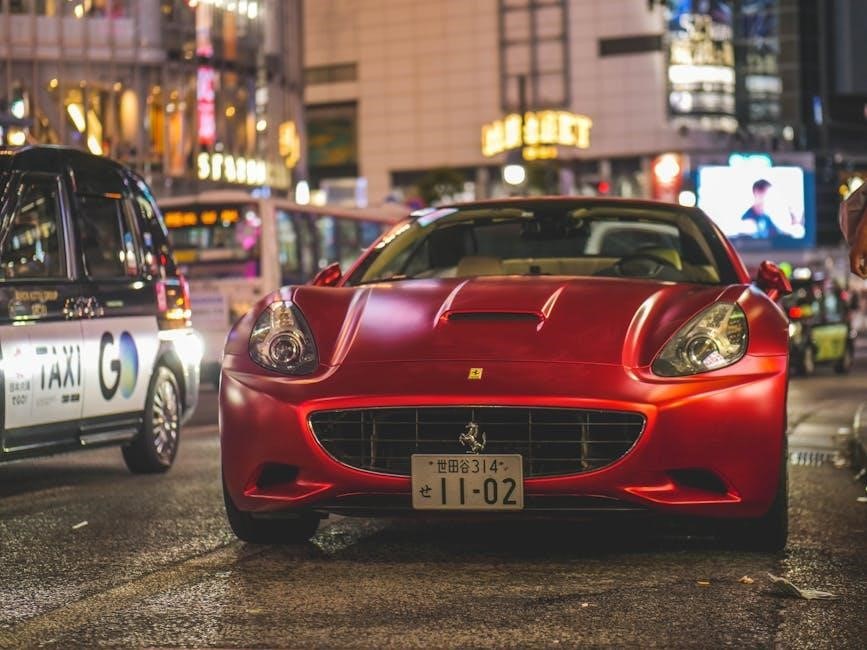
The Ferrari California is a sleek grand tourer that combines elegance with power. Introduced in 2008, it revived a classic nameplate, offering a unique blend of luxury and performance. Known for its retractable hardtop, the California features a front-engine layout and rear-wheel drive, making it a versatile choice for both daily driving and spirited adventures.

1.2 Importance of the Manual Transmission in the Ferrari California

The manual transmission in the Ferrari California enhances driver engagement, offering precise control and a tactile connection to the car’s performance. It appeals to purists who value the traditional driving experience, distinguishing it from automatic counterparts and adding exclusivity to this already iconic vehicle.

History of the Ferrari California

The Ferrari California traces its lineage to the 1950s, with the original model embodying elegance and performance. Revived in 2008, it became a modern icon, blending heritage with innovation.

2.1 Origins and Evolution of the Ferrari California

The Ferrari California originated in the 1950s as a sleek, high-performance roadster. Revived in 2008, it became a modern grand tourer, blending classic elegance with advanced technology. The manual transmission model, introduced in 2009, added a driving purist’s touch, making it a unique offering in Ferrari’s lineup before production ended in 2017.

2.2 Revival of the California Nameplate in 2008

In 2008, Ferrari revived the California nameplate, debuting a new model at the Paris Motor Show. This modern iteration featured a retractable hardtop and a 4.3L V8 engine. The reintroduction marked a strategic move to appeal to a broader market while maintaining Ferrari’s legacy of performance and style, setting the stage for the manual transmission option.

2.3 Production Run and Discontinuation

The Ferrari California was produced from 2008 to 2017. Initially offered with a manual transmission, production of manual models ceased in 2012. The California was discontinued to make way for the Portofino, marking the end of an era for Ferrari’s manual transmission lineage, leaving only two manual California units ever produced, enhancing their exclusivity.

Features of the Ferrari California Manual

The Ferrari California Manual combines a powerful engine with precise manual transmission, offering a blend of performance, handling, and timeless design, appealing to driving purists and enthusiasts.

3.1 Engine and Performance Specifications

The Ferrari California Manual is equipped with a 4.3L V8 engine, delivering 453 horsepower and 358 lb-ft of torque. It accelerates from 0-60 mph in 4.0 seconds, with a top speed of 193 mph. The engine’s direct injection and flat crankshaft enhance performance, ensuring a responsive and exhilarating driving experience.

3.2 Transmission and Gearbox Details

The Ferrari California Manual features a 6-speed manual gearbox, offering precise control and a tactile driving experience. Its aluminum construction reduces weight, enhancing agility. The manual transmission is a rare feature in modern Ferraris, making it a sought-after option for purists. The gearbox is designed for seamless shifting, ensuring effortless acceleration and a connected driving experience.

3.3 Handling and Suspension System

The Ferrari California Manual features an adaptive suspension system with magnetorheological damping, ensuring precise handling and stability. This technology adjusts to driving conditions, providing a balance between comfort and performance. The system minimizes body roll during corners, delivering a responsive and engaging driving experience. It also adapts to road surfaces, maintaining optimal traction and control.

Maintenance and Repair Guide

The Ferrari California Manual provides essential maintenance tips, repair guidelines, and diagnostic tools to ensure optimal performance and longevity of the vehicle, following recommended schedules.

4.1 General Maintenance Tips for the Ferrari California

Regular oil changes, tire rotations, and inspections are crucial. Ensure timely software updates and check fluid levels. Refer to the manual for specific intervals and procedures to maintain performance and reliability, ensuring your Ferrari operates at peak condition. Follow recommended schedules to prevent issues and extend the vehicle’s lifespan.

4.2 Repair Manual and Diagnostic Tools

The Ferrari California Workshop Manual provides detailed repair procedures and wiring diagrams. Utilize diagnostic tools like OBD-II scanners for troubleshooting. The manual includes ECU testing instructions, ensuring accurate diagnoses. Regularly update software and use specialized tools to maintain performance and address issues promptly, keeping your Ferrari in optimal condition.

4.3 Common Issues and Solutions

Common issues with the Ferrari California Manual include electrical system glitches and transmission synchronization problems. Solutions involve updating software, checking wiring connections, and recalibrating the gearbox. Regular servicing and using genuine parts ensure optimal performance. Addressing these issues promptly prevents major repairs, maintaining the car’s reliability and driving experience over time.

Troubleshooting the Ferrari California Manual

Troubleshooting the Ferrari California Manual involves diagnosing issues like electrical glitches and transmission problems. Regular checks and software updates help resolve these issues effectively.

5.1 Identifying Common Problems

Common issues in the Ferrari California Manual include electrical glitches, transmission hesitations, and software malfunctions. Drivers often report problems with the ECU and ignition system. Regular diagnostics and updates help identify these issues early, ensuring smooth performance and preventing major repairs. The manual provides detailed troubleshooting steps to address these common problems effectively.

5.2 Step-by-Step Troubleshooting Guide

The Ferrari California Manual provides a detailed step-by-step guide for diagnosing issues. Start by checking the ignition system and ECU for faults. Consult the repair manual for specific codes and procedures. Perform visual inspections of wiring and connections. Test components like sensors and actuators to isolate problems. Regular diagnostics and updates are crucial for maintaining optimal performance and resolving issues promptly.

5.3 Electronic Control Unit (ECU) Testing

Testing the ECU involves connecting specialized diagnostic tools to the Ferrari California’s system. Use approved software to monitor engine parameters and error codes. Ensure all wiring connections are secure and free from damage. Refer to the repair manual for specific ECU testing procedures to diagnose and resolve electronic issues efficiently.

Comparison of Manual vs. Automatic Transmission

The manual transmission in the Ferrari California offers a more engaging driving experience, while the automatic provides convenience and smoother acceleration, catering to different driver preferences.

6.1 Performance Differences

The manual transmission in the Ferrari California delivers precise control and quicker shifts, enhancing acceleration and responsiveness. The automatic, while slightly faster in shifting, offers seamless power delivery but lacks the tactile engagement of the manual, making it a trade-off between driving dynamics and convenience.

6.2 Driver Engagement and Experience

The manual transmission in the Ferrari California fosters a tactile connection, offering a more immersive and engaging driving experience. It allows drivers to feel the car’s responsiveness and precision, creating a deeper emotional bond. This setup appeals to purists who value the traditional driving experience, making every drive feel more personal and rewarding.

6.3 Market Demand and Exclusivity

The Ferrari California Manual is highly sought after due to its rarity. Only two manual transmission models were ever produced, making it a exclusive choice for collectors. Ferrari ceased manual production in 2012, further enhancing its exclusivity. This rarity, combined with its appeal to purists, drives strong market demand and elevates its resale value significantly.

Collectibility and Market Value

The Ferrari California Manual is highly collectible due to its rarity. Ferrari ceased manual production in 2012, making it a sought-after piece for purists and collectors, enhancing its market value.

7.1 Rarity of the Manual Ferrari California

The manual Ferrari California is exceedingly rare, with only two units reportedly produced. This scarcity stems from Ferrari’s decision to discontinue manual transmissions in 2012, making these cars highly exclusive and desirable among enthusiasts and collectors.

7.2 Investment Potential

The manual Ferrari California holds strong investment potential due to its rarity and historical significance. With only two manual models produced, their value is expected to appreciate, making them a sought-after asset for collectors and Ferrari enthusiasts seeking exclusive and unique additions to their portfolios.

7.3 Factors Affecting Resale Value

Resale value of the manual Ferrari California is influenced by rarity, condition, and historical significance. Low mileage, original components, and proper maintenance enhance value. Market demand, especially from collectors, also plays a role, as does Ferrari’s legacy in producing exclusive, high-performance vehicles with unique features like manual transmissions.

Technical Specifications

The Ferrari California Manual features a 4.3L V8 engine producing 460 horsepower. It includes a 6-speed manual transmission, rear-wheel drive, 47% front weight distribution, and carbon-ceramic brakes.

8.1 Engine and Powertrain Details

The Ferrari California Manual is equipped with a 4.3-liter V8 engine, delivering 460 horsepower and 358 lb-ft torque. Paired with a 6-speed manual transmission, it offers precise control and exceptional performance, featuring rear-wheel drive and a 47% front weight distribution for optimal handling and driving dynamics.

8.2 Transmission and Drivetrain

The Ferrari California Manual features a 6-speed manual gearbox, offering direct driver engagement. Its rear-wheel-drive layout ensures precise power delivery, while the limited-slip differential enhances traction and stability during dynamic driving conditions, making it a standout choice for enthusiasts seeking a pure driving experience.

8.3 Suspension and Braking System

The Ferrari California Manual features adaptive magnetorheological dampers, ensuring precise handling and ride comfort. The braking system includes high-performance carbon-ceramic brakes, providing exceptional stopping power and heat dissipation. These components work in harmony to deliver superior control and responsiveness, making the California a thrilling drive on both road and track.

Legacy of the Manual Ferrari California

The manual Ferrari California stands as a rare and exclusive model, cherished by collectors for its unique driving experience and historical significance in Ferrari’s lineup.

9.1 Impact on Ferrari’s Lineup

The manual Ferrari California introduced a unique driving experience, influencing Ferrari’s strategy to cater to purists. Its exclusivity reinforced the brand’s reputation for craftsmanship and performance, appealing to enthusiasts seeking a classic driving feel amidst increasing automation in the automotive industry.

9.2 Appeal to Enthusiasts and Collectors

The Ferrari California Manual captivates enthusiasts with its exclusive manual transmission, offering a unique, engaging driving experience. Its rarity, combined with Ferrari’s legacy of high-performance luxury, makes it a sought-after collector’s item, blending nostalgia with modern sophistication.

9.3 Historical Significance

The Ferrari California Manual holds a unique place in automotive history, marking a rare blend of classic manual transmission with modern Ferrari innovation. Its limited production and revival of the California nameplate make it a standout model, symbolizing Ferrari’s commitment to driver engagement and its heritage of creating exceptional driving machines.

The Ferrari California Manual is a rare gem, blending classic driving with modern performance, leaving a lasting legacy for enthusiasts and collectors of exclusive Ferrari models.

10.1 Final Thoughts on the Ferrari California Manual

The Ferrari California Manual represents a harmonious blend of traditional driving engagement and contemporary engineering. Its rarity and exclusivity make it a cherished possession for purists, offering unparalleled driving experiences and long-term value for enthusiasts and collectors alike.


10.2 Future Prospects for Manual Transmissions in Ferrari

While Ferrari has shifted focus to automatic transmissions, the manual remains a niche option cherished by enthusiasts. Limited production and rising demand suggest that manual models like the California may become highly sought-after collector’s items, preserving their legacy in Ferrari’s heritage.

10.3 Final Recommendations for Owners and Enthusiasts

Owners should prioritize regular maintenance and use genuine parts to preserve their Ferrari California’s performance. Enthusiasts seeking a unique driving experience are encouraged to explore the manual variant, as its rarity and exclusivity make it a standout choice for collectors and driving purists alike.

Guide

call of duty modern warfare trophy guide

Welcome to the Call of Duty: Modern Warfare Trophy Guide, your ultimate resource for unlocking all achievements in this thrilling game․ Discover how to earn each trophy efficiently, with tips for campaign completion, multiplayer achievements, and hidden collectibles․ This guide is designed to help both new players and experienced completionists secure the coveted Platinum Trophy with ease and confidence․

1․1 Overview of the Game and Trophy System

Call of Duty: Modern Warfare features a trophy system with 27 achievements, including one Platinum Trophy․ The game offers a mix of story-driven campaign trophies, multiplayer accomplishments, and hidden collectibles․ Trophies are categorized into Bronze, Silver, Gold, and Platinum, with most tied to specific in-game actions or mission completions․ The system is designed to reward both casual players and completionists, with many achievements obtainable through natural gameplay․ This guide breaks down each trophy, providing strategies to unlock them efficiently and earn the coveted Platinum Trophy․

1․2 Importance of Trophies for Completionists

Trophies in Call of Duty: Modern Warfare serve as a badge of honor, rewarding dedication and skill․ For completionists, earning all trophies is a significant achievement, showcasing mastery of the game․ Trophies add depth and challenge, encouraging players to explore every aspect of the game, from campaign missions to multiplayer modes․ The journey to unlock these achievements enhances gameplay satisfaction, with the ultimate goal of obtaining the prestigious Platinum Trophy, symbolizing a player’s commitment and excellence in the game․

Campaign-Related Trophies

Earn trophies by completing specific campaign missions like Fog of War and Hunting Party․ Many are story-related, while others require precise actions, offering varied challenges for all skill levels․

2․1 Trophies in Early Missions

The early missions in Call of Duty: Modern Warfare introduce players to the trophy system․ Missions like Fog of War and Piccadilly offer story-related trophies that unlock naturally․ For example, completing Fog of War on Veteran difficulty rewards the A Bad Situation trophy․ Other early trophies, such as Good Samaritan, require specific actions like sparing civilians․ These trophies are straightforward, making them ideal for new players to build momentum toward the Platinum Trophy․

2․2 Trophies in Mid-Campaign Missions

In mid-campaign missions like The Wolf’s Den and Clean House, trophies become more challenging․ For instance, completing The Wolf’s Den on Veteran without dying earns the Stay Frosty trophy․ In Clean House, using a smoke grenade to disorient enemies unlocks Smoke Screen․ Other missions, such as The Embassy, offer story-related trophies․ Focus on completing these missions on Veteran difficulty for efficient Platinum progress․

2․3 Trophies in Late-Game Missions

In late-game missions like Going Dark and Highway of Death, trophies require precise execution․ For example, in Going Dark, shutting off power in four buildings unlocks the Lights Out trophy․ In Highway of Death, destroying enemy vehicles with a drone earns the Highway to Hell achievement․ These missions often demand stealth and strategy, especially on Veteran difficulty․ Completing them flawlessly is crucial for progression toward the Platinum Trophy․ Stay focused and utilize gadgets like night vision to overcome challenges efficiently․

Special Trophies and Achievements

Explore unique challenges like the Daredevil and Nessie trophies, requiring precise actions such as killing enemies while blinded or eliminating foes without taking damage․ These achievements test skill and strategy, offering exclusive rewards for completionists seeking the ultimate challenge in Call of Duty: Modern Warfare․

3․1 Daredevil Trophy Guide

Earning the Daredevil Trophy requires killing two enemies while blinded by a flashbang grenade․ To unlock this achievement, play through campaign missions where flashbangs are available, such as The Embassy or Highway of Death․ Equip a flashbang, toss it near enemies, and quickly take them out with precise shots or melee attacks․ Repeat this process until the trophy unlocks․ This challenging trophy tests your reflexes and accuracy under disorienting conditions, making it a memorable achievement for completionists․

3․2 Nessie Achievement Unlock

The Nessie Achievement in Call of Duty: Modern Warfare requires eliminating 15 enemies without being detected during a specific mission․ To unlock this, focus on stealth tactics, utilizing silenced weapons and strategic positioning․ Completing this challenge showcases mastery of covert operations and contributes to your journey toward the Platinum Trophy․

3․3 Practice Makes Perfect Trophy

The Practice Makes Perfect Trophy in Call of Duty: Modern Warfare is unlocked by successfully shooting all targets in the training area during the Ghost mission․ This challenge tests your accuracy and speed, requiring precise aim and quick reflexes․ Completing this achievement demonstrates your mastery of the game’s shooting mechanics and brings you closer to earning the Platinum Trophy․ Focus on hitting each target swiftly and avoid missing to secure this trophy efficiently․


Veteran Difficulty Tips

Mastering Veteran Difficulty in Call of Duty: Modern Warfare requires strategic play, precise aiming, and smart use of cover․ Utilize grenades, drones, and other tools effectively to overcome challenges․ Stay patient, manage resources wisely, and learn enemy patterns to progress smoothly through missions and unlock achievements․

4․1 General Strategies for Veteran Mode

Succeeding in Veteran Mode requires a combination of skill, patience, and strategic play․ Always prioritize cover and use the environment to your advantage․ Enemies are aggressive, so precise aiming and quick reflexes are essential․ Utilize grenades and drones to clear out groups or locate hidden foes․ Stay mobile to avoid taking unnecessary damage, and manage your resources wisely․ Learn enemy patterns and take a methodical approach to each encounter․ These strategies will help you navigate even the toughest missions and unlock achievements efficiently․

4․2 Mission-Specific Tips for Veteran Difficulty

Each mission in Veteran Mode presents unique challenges, requiring tailored strategies․ For example, in “Going Dark,” use night vision and silenced weapons to avoid detection․ In “The Wolf’s Den,” rely on grenades and claymores to clear rooms efficiently․ Stay alert in “Clean House,” as enemies spawn unpredictably․ Practice checkpointing after critical sections to avoid repetition․ Use drones to scout ahead in “Highway of Death” and focus on headshots to conserve ammo․ Adapt your approach to each mission’s layout and enemy behavior to progress smoothly․

Multiplayer Trophies

Earn exclusive multiplayer achievements like the Test Drive trophy by dominating matches and completing specific objectives․ Master various playstyles and modes to unlock all multiplayer-related trophies efficiently․

5․1 Test Drive Achievement Guide

The Test Drive achievement requires you to shoot the driver of a suicide truck in the single-player campaign․ This can be done during specific missions where enemy trucks appear․ Use a scoped weapon for precision and aim for the driver’s head to unlock this trophy․ Ensure you act quickly, as the truck will explode shortly after spawning․ Replay missions on Veteran difficulty if needed, and pair this with other achievements to maximize progress toward the Platinum Trophy․

5․2 Other Multiplayer-Related Trophies

Beyond the Test Drive achievement, several other multiplayer-related trophies await․ These include Winning Streak for earning multiple wins in a row and Objective Mastery for excelling in objective-based modes like Domination or Search and Destroy․ Certain trophies, like Triple Threat, require securing three kills in a single match without dying․ Focus on consistent play, teamwork, and completing daily challenges to unlock these efficiently․ Each trophy contributes to your journey toward the Platinum, so diversify your playstyle to tackle them all․

Collectible and Hidden Trophies

Collectible and hidden trophies add an extra layer of challenge and depth to the game․ These require careful exploration of missions and multiplayer modes to unlock․

6․1 Trophies Related to Campaign Completion

Campaign-related trophies are unlocked by completing specific objectives or achieving milestones during the story mode․ These include trophies like Fog of War, earned by completing the first mission, and Double Time, awarded for completing a level without dying on Veteran difficulty․ Other trophies, such as Headhunter, require defeating specific enemies or completing challenges within missions․ These achievements add depth to the campaign, encouraging players to explore different playstyles and master the game’s mechanics․ Earning these trophies is a key step toward the Platinum Trophy․

6․2 Hidden Intel and Collectibles Trophies

Hidden Intel and Collectibles Trophies challenge players to locate specific items throughout the campaign․ These include Intel Pieces, which are scattered across missions, and other hidden items like weapons or documents․ Earning these trophies requires careful exploration and attention to detail․ For example, finding all 50 Intel pieces unlocks the Full Intel trophy, while discovering hidden weapons rewards players with unique achievements․ These collectibles add replay value and depth to the game, making completionism rewarding for dedicated players․

Platinum Trophy Guide

Secure the Platinum Trophy by completing all campaign missions, earning hidden trophies, and mastering multiplayer achievements․ This guide simplifies the journey to unlock the ultimate achievement․

7․1 Roadmap to Platinum Trophy

To achieve the Platinum Trophy in Call of Duty: Modern Warfare, follow a structured approach․ Start by completing the campaign on Veteran difficulty, earning story-related trophies along the way․ Next, focus on hidden collectibles and intel in each mission․ Dedicate time to multiplayer mode to unlock online achievements․ Finally, tackle any remaining miscellaneous trophies, such as the Daredevil or Nessie achievements․ By systematically addressing each category, you’ll efficiently progress toward the coveted Platinum Trophy․ Plan your playthrough carefully to minimize repeat missions and maximize efficiency․

7․2 Final Tips for Achieving Platinum

Staying persistent and patient is key to securing the Platinum Trophy․ Replay missions to clean up missed trophies and use guides for challenging achievements․ Focus on tracking progress to avoid missing hidden collectibles or intel․ Utilize multiplayer boosts if needed, and don’t hesitate to revisit campaign missions on Veteran difficulty for any overlooked rewards․ With careful planning and dedication, you’ll unlock the Platinum Trophy and complete your journey in Call of Duty: Modern Warfare․

Congratulations! You’ve reached the end of the Call of Duty: Modern Warfare Trophy Guide․ Earning the Platinum Trophy is a significant achievement, and with persistence and the right strategies, you’ve successfully unlocked it․ This guide has provided you with a comprehensive roadmap to conquer every trophy, from campaign missions to multiplayer achievements․ Enjoy the satisfaction of your hard work and the prestige of completing one of the most accessible Platinum Trophies in the franchise․ Happy gaming!

Manuals

dometic air conditioner user manual

Safety Precautions and Warnings

Always follow safety guidelines to minimize risks. Read the manual carefully before installation or operation. Ensure all warnings are understood to prevent accidents and injuries. Proper installation by qualified personnel is essential for safe operation. Regular maintenance and adherence to instructions will help maintain efficiency and safety.

1.1 Recognizing Safety Information

Recognizing safety information is crucial for safe operation. Symbols and labels on the unit indicate potential hazards. Always read and understand warnings in the manual to avoid accidents. Safety guidelines are provided to protect users and ensure efficient performance. Compliance with these instructions is essential for maintaining safety and preventing injuries. Regularly review safety information to stay informed.

1.2 Reducing the Risk of Accidents and Injuries

Proper installation and operation are key to safety. Always follow the manual’s instructions to minimize risks. Ensure the unit is installed by qualified personnel and adhere to electrical safety guidelines. Regularly inspect the system for damage or wear. Avoid operating the unit in hazardous conditions‚ such as extreme weather or improper ventilation. Use genuine parts to maintain safety and efficiency.

1.3 Important Safety Instructions for Installation and Operation

Always follow the manual’s safety guidelines for installation and operation. Ensure the unit is installed by qualified personnel‚ adhering to electrical and structural safety standards. Turn off the power supply before servicing. Follow local regulations and manufacturer recommendations to avoid hazards. Properly secure the unit to prevent movement during operation; Regularly inspect electrical connections and components for damage or wear. Unauthorized modifications can lead to safety risks and system malfunction.

Understanding the Components and Scope of Delivery

The scope of delivery includes the roof air conditioner unit and the air outlet unit (Chillout ADB or ADB). Accessories are provided for installation and operation.

2.1 Overview of the Roof Air Conditioner

The Dometic roof air conditioner is designed for motorcaravans‚ providing efficient cooling and heating. It includes a roof-mounted unit and an air outlet for distributing conditioned air. The system ensures comfort in various climates‚ with features like fresh air intake and humidity control‚ making it ideal for recreational vehicles. Proper installation ensures optimal performance.

2.2 Air Outlet Unit (Chillout ADB or ADB)

The Air Outlet Unit‚ either Chillout ADB or ADB‚ distributes conditioned air throughout the vehicle. It connects to the roof air conditioner‚ ensuring even air circulation. The unit is designed for compatibility with Dometic systems‚ enhancing comfort in motorcaravans. Proper installation of the ADB is crucial for efficient operation and optimal performance of the air conditioning system.

2.3 Scope of Delivery and Accessories

The scope of delivery includes the roof air conditioner unit‚ air outlet unit (Chillout ADB or ADB)‚ and necessary mounting hardware. Accessories may vary but typically include installation kits‚ gaskets‚ and screws. Ensure all components are accounted for before installation. Additional accessories like remote controls or filters may be purchased separately for enhanced functionality and performance.

Installation and Maintenance

Proper installation ensures optimal performance and safety. Follow the installation manual for step-by-step guidance. Regular maintenance‚ such as cleaning filters and checking connections‚ is essential for efficiency.

3.1 Pre-Installation Checklist

Before starting‚ ensure the roof is suitable for installation. Check for existing holes or modify the roof as needed. Verify compatibility with your vehicle’s electrical system. Gather all necessary tools and accessories from the scope of delivery. Ensure the area is clear and safe for installation. Follow the manual’s guidelines strictly to avoid complications. Proper preparation ensures a smooth and secure installation process.

3.2 Step-by-Step Installation Guide

Begin by removing the air conditioner from its packaging. Position the unit over the roof hole‚ aligning it with the gasket. Secure the unit using the provided bolts. Connect the electrical components as per the wiring diagram. Install the air outlet unit inside‚ ensuring proper sealing. Test the system to ensure all functions operate correctly. Follow the manual for detailed steps to avoid errors.

3.3 Maintenance Tips for Optimal Performance

Regularly clean the air filters to ensure efficient airflow and cooling. Inspect and clear debris from the condenser coils to maintain proper heat dissipation. Check the drain system to prevent water accumulation. Lubricate moving parts as specified in the manual. Schedule annual professional inspections to identify potential issues early. This will extend the unit’s lifespan and maintain peak performance.

Operating Modes and Controls

Understand the modes: cooling‚ heating‚ and fan. Use controls to adjust temperature and airflow. Refer to the manual for optimal mode selection and operation.

4.1 Air Conditioning Modes

The Dometic roof air conditioner offers multiple operating modes‚ including cooling‚ heating‚ and fan-only. Cooling mode reduces temperature and humidity‚ while heating provides warmth in colder conditions. The fan mode circulates air without cooling or heating. Each mode is designed to optimize comfort and energy efficiency. Use the mechanical controls to select the desired mode based on your needs for optimal performance.

4.2 Heating and Cooling Functions

The Dometic air conditioner features both heating and cooling functions‚ providing year-round comfort. In cooling mode‚ it efficiently lowers the temperature and removes humidity. The heating function offers warm air during colder months without replacing the vehicle’s heating system. For optimal performance‚ operate in High Fan/Cooling mode during high humidity or extreme heat. Follow these guidelines to maintain efficiency and comfort.

4.3 Mechanical Controls and Operation

The Dometic air conditioner features straightforward mechanical controls for easy operation. Use the control panel to select modes such as cooling‚ heating‚ or fan-only operation. Adjust settings for temperature and airflow to achieve desired comfort levels. The system operates efficiently in High Fan/Cooling mode during high humidity or extreme heat. Regular operation ensures optimal performance and comfort in various conditions.

Troubleshooting Common Issues

Identify and resolve common problems with your Dometic air conditioner. Check for issues like low airflow‚ water leakage‚ or unusual noises. Refer to the manual for step-by-step solutions to enhance efficiency and restore proper function.

5.1 Diagnosing Common Problems

Identify issues by observing symptoms like low airflow‚ water leakage‚ or unusual noises. Check filters for blockages and ensure proper drainage. Verify electrical connections and settings. Consult the manual for specific diagnostic steps to address issues effectively and restore optimal performance. Regular checks can prevent major malfunctions and ensure efficient operation of your Dometic air conditioner.

5.2 Solutions for Improved Efficiency

To enhance performance‚ ensure filters are clean and unblocked. Check electrical connections for stability and proper voltage. Regularly inspect and clean the condenser coils to maintain airflow. Ensure drain hoses are clear to prevent water buildup. Adjust settings to optimize cooling or heating based on external conditions. Addressing these areas can significantly improve efficiency and extend the unit’s lifespan.

Technical Specifications

Check the unit’s performance ratings and compatibility requirements. Ensure the system matches your vehicle’s specifications for optimal operation. Verify power consumption and installation standards before setup.

6.1 Performance and Efficiency Ratings

The Dometic FreshJet roof air conditioner offers high-performance cooling and heating capabilities. With energy-efficient ratings‚ it ensures optimal comfort while minimizing power consumption. The unit’s advanced design provides consistent air flow and temperature control‚ making it suitable for various vehicle sizes and climates. Always refer to the technical specifications for detailed efficiency ratings and operational parameters. Proper installation enhances overall performance and energy efficiency.

6.2 Compatibility and Installation Requirements

Ensure the Dometic air conditioner is compatible with your vehicle’s roof size and structure. Proper installation requires a pre-existing or cut-out hole‚ aligned with the unit’s dimensions. Use the provided gasket and mounting hardware for secure fitting. Installation must comply with local regulations and safety standards. Always follow the manufacturer’s guidelines for optimal performance and safety. Consult the manual for specific requirements and recommendations.

Environmental Considerations

Ensure energy-efficient operation and eco-friendly use of your Dometic air conditioner. Proper disposal and recycling of components minimize environmental impact‚ adhering to local regulations and guidelines.

7.1 Energy Efficiency and Eco-Friendly Use

The Dometic air conditioner is designed with energy efficiency in mind‚ minimizing environmental impact. Eco-friendly features reduce energy consumption while maintaining performance. Always follow operational guidelines to maximize efficiency. Using the unit responsibly contributes to sustainable energy use. Ensure proper maintenance to optimize eco-friendly operation and reduce environmental footprint.


7.2 Proper Disposal and Recycling Guidelines

Ensure the Dometic air conditioner is disposed of responsibly. Follow local regulations for appliance disposal. Recycle components whenever possible to minimize environmental impact. Properly handle refrigerants and hazardous materials to prevent contamination. Check with certified recycling centers for guidance. Eco-friendly disposal helps protect the environment and conserve resources. Always prioritize sustainable practices when retiring the unit.

Warranty and Support

Dometic air conditioners are backed by a comprehensive warranty. For details‚ refer to the warranty section in this manual. Contact Dometic customer service for support and inquiries.

8.1 Warranty Information

Dometic air conditioners are covered by a limited warranty. The standard warranty period varies by product‚ typically covering parts and labor for defects in materials and workmanship. Proper registration and adherence to installation and maintenance guidelines are required to validate the warranty. Refer to the product manual or contact Dometic support for specific terms and conditions.

  • Warranty periods differ for components like compressors and motors.
  • Valid warranty claims require proof of purchase and proper installation.

Exclusions apply for misuse‚ neglect‚ or unauthorized modifications. Contact customer service for detailed warranty information and assistance.

8.2 Contacting Dometic Customer Service

For assistance‚ contact Dometic customer service at 1-800-366-3684 or visit dometic.com/support. Email inquiries can be sent to customer.service@dometic.com. Include your product model‚ serial number‚ and a detailed description of your issue for prompt support. Service centers are located across the US and Canada for repairs and maintenance needs. Operating hours are Monday–Friday‚ 8 AM–5 PM EST.

Additional Resources

Access online manuals and guides at dometic.com/manuals. Visit user forums and FAQ sections for troubleshooting and tips to enhance your air conditioner experience.

9.1 Online Manuals and Guides

Visit dometic.com/manuals for comprehensive installation‚ operation‚ and maintenance guides. Access troubleshooting tips‚ technical specifications‚ and user manuals for optimal performance. These resources provide detailed instructions and diagrams to ensure safe and efficient use of your Dometic air conditioner. Regularly updated‚ they offer 24/7 support for all your HVAC needs.

9.2 FAQs and User Forums

Explore the FAQ section for answers to common questions about your Dometic air conditioner. Join user forums to share experiences‚ get tips‚ and troubleshoot issues with other owners. These resources provide valuable insights and solutions to ensure optimal performance and address any concerns you may have about your unit.

PDF

lumhs past papers pdf download

LUMHS past papers are essential resources for students preparing for exams, offering insights into exam patterns and question types. They help assess readiness and boost confidence for university entrance tests.

These documents provide valuable practice, enabling students to familiarize themselves with the exam format and improve time management skills, crucial for success in competitive academic environments.

Overview of LUMHS and Its Significance

Liaquat University of Medical and Health Sciences (LUMHS) is a premier institution in Pakistan, renowned for its excellence in medical and health sciences education. Established to address the growing need for skilled healthcare professionals, LUMHS has become a cornerstone for academic and research endeavors.

The university offers a wide range of programs, including medicine, surgery, dentistry, and nursing, catering to the diverse needs of students aspiring to enter the healthcare field. Its curriculum is designed to meet international standards, ensuring graduates are well-equipped to contribute to global healthcare challenges.

LUMHS’s significance lies in its commitment to fostering innovation, research, and practical learning. The institution is recognized for producing competent professionals who play a vital role in advancing healthcare services in Pakistan and beyond.

By emphasizing evidence-based learning and hands-on experience, LUMHS prepares students to excel in their future careers, making it a trusted name in medical education and a hub for academic excellence.

Importance of Past Papers in Exam Preparation

Past papers are indispensable tools for exam preparation, offering students a clear understanding of exam patterns, question types, and content emphasis. They provide practical insights into the structure and difficulty level of tests, helping students gauge their readiness.

By solving past papers, students can identify recurring themes and focus their study efforts on high-weightage topics. This targeted approach enhances retention and reduces exam anxiety, as learners become familiar with the format and timing requirements.

Additionally, past papers serve as self-assessment tools. Students can evaluate their performance, identify weak areas, and refine their strategies. Regular practice with past papers fosters time management skills and boosts confidence, which are critical for success in competitive exams.

Moreover, past papers are readily available in PDF format, making them accessible for convenient study. They are invaluable resources that complement textbooks and notes, offering a comprehensive preparation framework for achieving academic goals.

How to Find LUMHS Past Papers Online

To find LUMHS past papers online, visit the official university website or reliable educational platforms. Use search terms like “LUMHS past papers PDF download” to locate and access these resources efficiently.

Step-by-Step Guide to Locating Past Papers

To locate LUMHS past papers, start by visiting the official university website. Navigate to the “Examinations” or “Students” section, where past papers are often archived.

  • Use specific search terms like “LUMHS past papers PDF download” to find relevant results quickly.
  • Filter results by year or subject to narrow down your search and access the most relevant documents.
  • Check reliable educational platforms or forums where students often share past papers and study materials.
  • Utilize Google Scholar or academic databases by searching with keywords like “LUMHS past papers” to find downloadable PDFs.
  • Ensure you download from trusted sources to avoid unauthorized or outdated content.
  • Verify the authenticity of the papers by cross-referencing with official university resources.

By following these steps, you can efficiently locate and download LUMHS past papers in PDF format, aiding your exam preparation effectively.

Official Sources for Downloading Past Papers

The most reliable way to obtain LUMHS past papers is through the university’s official website. The “Examinations” or “Academics” section typically hosts a dedicated archive of past papers for various programs and years.

Additionally, the LUMHS library often provides access to past exam papers, either in digital format or as physical copies. Students can visit the library’s official portal with their credentials to download these resources.

The university may also distribute past papers through its Learning Management System (LMS) or student portal. Regularly checking these platforms ensures access to the most recent and relevant study materials.

For specific courses or departments, reaching out to professors or academic advisors can yield direct links to past papers. They often maintain repositories of exam materials to aid student preparation.

By relying on these official sources, students can ensure the authenticity and relevance of the past papers, which are invaluable for effective exam preparation;

Downloading Past Papers in PDF Format

Downloading LUMHS past papers in PDF format is convenient, ensuring easy access and portability. Official sources provide these files, which are compatible with various devices and support effective offline study sessions.

Best Practices for PDF Downloads

When downloading LUMHS past papers in PDF format, ensure you use reliable sources to maintain authenticity. Always verify the source before downloading to avoid counterfeit or outdated materials.

Use a stable internet connection to prevent file corruption during the download process. Opt for Wi-Fi over mobile data for larger files to ensure faster and uninterrupted downloads.

Organize your downloaded PDFs by creating dedicated folders and naming conventions. This helps in easy access and efficient study planning, reducing time spent searching for files.

Ensure your device has a compatible PDF reader installed to view and annotate the files. Regularly update your PDF software to maintain compatibility and security.

Review the downloaded papers thoroughly and annotate important sections. This active engagement enhances understanding and retention of the study material.

Tools and Software for Managing PDF Files

Managing LUMHS past papers in PDF format requires the right tools for efficiency. Adobe Acrobat Reader is a top choice for viewing and annotating PDFs, while Foxit Reader offers similar functionality with a user-friendly interface.

For advanced editing, tools like PDF-XChange Editor or Smallpdf allow users to highlight, underline, and add notes, enhancing study preparation. Online platforms like Kami Extension enable browser-based annotation, ideal for quick reviews.

Converters like ILovePDF or Online-Convert can transform PDFs into editable formats like Word or Excel for further customization. Tools like PDF Splitter & Merger help organize large files by splitting or combining documents.

Cloud storage services such as Google Drive or Dropbox are excellent for storing and accessing PDFs across devices. Ensure your tools are updated regularly to maintain compatibility and security for seamless file management.

By leveraging these tools, students can efficiently organize, annotate, and review LUMHS past papers, streamlining their study process and improving productivity.

Using Past Papers for Effective Study

Past papers help students understand exam patterns, improve time management, and identify weak areas. Regular practice enhances problem-solving skills and boosts confidence for academic success.

Strategies for Utilizing Past Papers

Effective use of LUMHS past papers involves regular practice to familiarize yourself with exam formats and question types. Start by simulating real exam conditions to improve time management and reduce anxiety.

Begin with unsolved papers to assess your understanding and identify weak areas. After attempting questions, review the solutions thoroughly to learn from mistakes and refine your problem-solving techniques.

  • Focus on analyzing patterns in frequently asked questions to prioritize your study topics.
  • Use past papers to create mock tests, ensuring you cover all syllabus areas systematically.

  • Highlight and revisit challenging questions to strengthen your grasp of difficult concepts.

Regularly reviewing past papers helps build confidence and enhances your ability to approach exams strategically. By integrating past papers into your study routine, you can achieve a comprehensive understanding of the subject matter.

Common Mistakes to Avoid When Using Past Papers

When utilizing LUMHS past papers, avoid the mistake of treating them as mere reading material. Many students overlook the importance of actively engaging with the questions, which limits their preparatory benefits;

Another common error is neglecting to simulate real exam conditions during practice. Failing to adhere to time limits can lead to poor performance, as time management is crucial for completing exams successfully.

  • Do not skip difficult questions; instead, attempt to solve them to identify and address knowledge gaps.
  • Avoid relying solely on past papers without consulting textbooks or notes, as this may leave critical areas unexplored.
  • Do not ignore reviewing solutions and explanations, as this step is vital for understanding concepts and avoiding repeated mistakes.

By avoiding these common pitfalls, students can maximize the effectiveness of past papers in their study routine and ensure a well-rounded preparation for their exams.

PDF

life book pdf

The Life Book PDF is a versatile tool designed to help individuals organize and reflect on their lives. Available in digital and print formats‚ it offers a structured approach to documenting essential life details‚ making it a valuable resource for personal growth and everyday organization.

Overview of the Concept

The Life Book PDF is a digital resource designed to help individuals organize and document essential life details‚ memories‚ and goals in a structured format. It serves as a comprehensive guide for personal reflection‚ offering sections for recording important information‚ such as contacts‚ financial details‚ and life milestones. This concept emphasizes the importance of having a centralized digital repository for life’s critical aspects‚ making it easier to access and share when needed.

The Life Book PDF also incorporates inspirational content‚ providing motivation and wisdom for navigating life’s challenges. It is often used by students‚ graduates‚ and anyone seeking clarity and organization in their personal or professional journeys. By combining practical tools with thoughtful prompts‚ the Life Book PDF becomes a versatile companion for self-improvement and daily planning.

Importance of Life Books in Modern Life

In today’s fast-paced world‚ the Life Book PDF serves as a vital tool for organization‚ reflection‚ and personal growth. It helps individuals keep track of essential details‚ such as financial information‚ passwords‚ and life milestones‚ in one accessible place. This centralized system reduces stress and saves time‚ making it indispensable for modern lifestyles.

Additionally‚ the Life Book PDF encourages mindfulness and self-awareness‚ allowing users to reflect on their experiences and goals. It also provides a sense of security‚ ensuring that critical information is readily available for emergencies or future planning. By combining practicality with personal development‚ the Life Book PDF has become a must-have resource for navigating life’s complexities with clarity and confidence.

Structure and Content of a Life Book

A Life Book PDF typically includes sections for personal goals‚ reflections‚ and life milestones. It often features templates for organizing daily tasks‚ budgeting‚ and long-term planning‚ ensuring a holistic approach to life management.

Key Features of a Life Book

A Life Book PDF offers customizable templates for organizing life details‚ such as personal goals‚ financial records‚ and memories. It often includes sections for daily reflections‚ budget tracking‚ and long-term planning. Digital versions provide accessibility across devices‚ while printed editions offer a tactile experience. Many Life Books feature inspiring quotes‚ motivational content‚ and practical advice to enhance personal growth. They also include privacy features to protect sensitive information‚ making them a secure and comprehensive tool for managing one’s life effectively. The structured format ensures clarity and ease of use‚ catering to individuals seeking to streamline their personal and professional lives.

How to Organize Your Life Book

Organizing a Life Book PDF begins with categorizing content into sections such as personal goals‚ financial records‚ and life memories. Start by defining clear categories and subcategories. Use tabs or color-coding for easy navigation. Prioritize important information‚ ensuring quick access when needed. For digital versions‚ utilize bookmarks and hyperlinks to streamline navigation. Regular updates and reviews are essential to maintain relevance and accuracy. Consider adding an index for quick reference. Tailor the structure to suit personal preferences‚ whether digital or printed‚ ensuring it remains a practical and accessible tool for daily life and long-term planning. This systematic approach ensures your Life Book remains a valuable resource for years to come.

Benefits of Using a Life Book

A Life Book PDF enhances organization‚ reduces stress‚ and improves productivity. It serves as a centralized hub for personal and practical information‚ fostering clarity and peace of mind.

Practical Advantages for Everyday Life

A Life Book PDF offers numerous practical benefits‚ simplifying daily life by serving as a centralized hub for essential information. It allows users to quickly access details like insurance policies‚ passwords‚ and important contacts‚ saving time and reducing stress. The digital format ensures accessibility on smartphones or tablets‚ making it easy to update and reference on the go. Additionally‚ it helps organize personal goals‚ schedules‚ and tasks‚ fostering a more structured and efficient lifestyle. By keeping everything in one place‚ a Life Book PDF minimizes clutter and enhances productivity‚ making it an invaluable tool for modern living.

How It Can Improve Personal Productivity

A Life Book PDF significantly enhances personal productivity by streamlining organization and prioritization of tasks. It provides a structured format for setting and tracking goals‚ ensuring clarity and focus. By consolidating important information‚ such as schedules‚ deadlines‚ and key contacts‚ it reduces time spent searching for details. The digital accessibility of the PDF allows for easy updates and quick reference‚ making it ideal for busy individuals. Additionally‚ it fosters accountability by enabling users to monitor progress and stay aligned with their objectives. This tool not only boosts efficiency but also helps maintain a balanced and organized approach to daily life‚ ultimately leading to greater productivity and satisfaction.

Popular Life Book Formats

Life Book PDF is widely appreciated for its digital convenience‚ while printed editions offer a tactile experience. Both formats cater to diverse preferences‚ ensuring accessibility and ease of use.

Digital Versions (PDF)

Digital versions of the Life Book‚ particularly in PDF format‚ have gained immense popularity for their convenience and accessibility. These files can be easily downloaded and stored on various devices‚ such as smartphones‚ tablets‚ or computers‚ making them portable and space-saving. The PDF format ensures that the content remains consistent across different platforms‚ preserving the layout and design. Many authors‚ like Jon Butcher‚ offer their Life Book in digital form‚ allowing readers to access it instantly. Additionally‚ digital versions reduce the environmental impact compared to printed books‚ appealing to eco-conscious individuals. They also enable easy sharing and readability‚ making them a practical choice for modern audiences seeking flexibility and convenience in their personal development tools.

Printed Editions and Their Convenience

Printed editions of the Life Book offer a tangible and user-friendly format‚ ideal for those who prefer physical copies. These books provide a convenient way to organize and access important life details without relying on digital devices. The printed format ensures that crucial information‚ such as insurance details or personal records‚ is readily available‚ offering peace of mind. Additionally‚ printed editions serve as a reliable backup‚ complementing digital versions. Their structured layout makes it easy to navigate and update information‚ enhancing the overall experience of maintaining a life book. This traditional format remains a popular choice for its simplicity and practicality in everyday life.

Creating Your Own Life Book

Creating your own Life Book is a simple yet meaningful process that allows you to tailor it to your personal needs and preferences‚ ensuring it remains a valuable and organized resource for years to come.


Step-by-Step Guide to Making a Life Book

Define Your Purpose: Start by understanding why you want to create a Life Book. Is it for personal reflection‚ organization‚ or future planning? This will guide your content selection.

Gather Materials: Choose between a digital or physical format. For digital‚ use a PDF editor or note-taking app. For physical‚ select a notebook and writing tools.

Organize Content: Divide your Life Book into sections like personal information‚ goals‚ memories‚ and important documents. Use templates if available.

Write Down Details: Include essential information such as contact details‚ medical history‚ and financial data. Add stories or reflections for a personal touch.

Add Personal Touches: Incorporate photos‚ mementos‚ or artwork to make your Life Book unique and meaningful.

Update Regularly: Schedule periodic reviews to update your Life Book as your life evolves.

Share with Trusted Individuals: Inform a trusted person about your Life Book’s location for easy access when needed.

By following these steps‚ you can create a comprehensive and personalized Life Book that serves as a valuable resource for years to come.

Tips for Customizing Your Life Book

Customizing your Life Book PDF allows you to tailor it to your unique needs and preferences. Start by selecting a theme or design that resonates with your personality. Add photos‚ artwork‚ or quotes to make it visually appealing. Use templates for consistency‚ but feel free to modify them to suit your style. Incorporate mementos like ticket stubs or letters for a personal touch. Set aside time to reflect and write about your goals‚ aspirations‚ and life lessons. Experiment with colors and fonts to enhance readability and aesthetics. Consider adding a table of contents for easy navigation. Most importantly‚ make it a habit to update your Life Book regularly to capture your growth and milestones. This personalized approach ensures your Life Book remains a meaningful and lasting resource.

The Life Book PDF is a valuable resource for organizing life‚ reflecting on growth‚ and inspiring personal development. It serves as a lasting guide for self-improvement and fulfillment.

Final Thoughts on the Value of Life Books

Guide

ffxi drg gear guide

Welcome to the DRG Gear Guide, a comprehensive resource for optimizing your Dragoon’s equipment in Final Fantasy XI. This guide covers weapons, armor, and accessories for all levels and playstyles.

Weapons

Weapons are crucial for a Dragoon, with polearms being the primary choice. Key options include Bronze Spear (early levels), Mezraq (mid-game), and Gungnir (endgame). Optimize for damage and compatibility with your playstyle.

Weapon Progression

Weapon progression for Dragoons is vital, with key upgrades at specific levels. Start with the Bronze Spear at level 1, progressing to the Brass Spear or Spark Spear by level 14. At level 20, the Platoon Lance offers improved stats, while the Military Spear at level 28 provides even greater enhancements. Reaching level 30 unlocks more advanced options like the Mezraq, which remains effective into the mid-game. For endgame content, the Gungnir (obtained at level 119) is a top-tier choice, offering exceptional damage and compatibility with high-level weapon skills. Upgrading every 5-10 levels ensures consistent DPS growth. Always prioritize weapons that complement your current gear and playstyle, balancing accuracy, attack power, and weapon skill damage.

Best Weapon Skills

For Dragoons, weapon skills are a cornerstone of dealing maximum damage. Drakesbane and Impulse Drive are standout choices, offering high damage output and utility. Drakesbane excels against dragon-type enemies, making it invaluable for content like Hectacomb. Impulse Drive not only deals significant damage but also provides a speed boost, enhancing mobility in combat. At higher levels, Geirskogul becomes the ultimate weapon skill, delivering devastating area-of-effect damage, perfect for endgame encounters. Accuracy is crucial, as missing attacks can negate the benefits of these powerful skills. Always ensure your gear balances attack power and accuracy to maximize weapon skill effectiveness. Additionally, testing and confirming STR modifiers for each weapon skill can help optimize your setup, ensuring you’re making the most of your Dragoon’s offensive capabilities.

Armor


Armor is crucial for a Dragoon’s defense. Pieces vary by level and content, ensuring protection while allowing for offensive capabilities. Upgrade every 10-20 levels to maintain effectiveness.

Head

The head slot for Dragoons offers various options to balance defense and offensive stats. Early levels start with Bronze Bandana 1 and Leather Bandana 1, while Royal Footman’s Bandana becomes available around level 10. Mid-tier options include Askar Zuchetto and Homam Headpiece, providing increased strength and attack bonuses. For endgame, Homam Head is a popular choice, offering high defense and versatility. Other notable pieces include Gletis Cuirass for its balanced stats and Thalassocrat Helm for its unique bonuses. When choosing headgear, prioritize pieces that complement your overall set and playstyle, ensuring a balance of strength, attack, and defense. Pairing with other Homam pieces can enhance set bonuses, making them ideal for advanced content. Always consider your current level and the specific stats needed for your build or content type.

Body

The body slot is crucial for Dragoons, providing significant defense and enhancing various stats. Early levels utilize Leather Vest 1 and Royal Footman’s Vest, while Scale Cuisses offer improved defense mid-level. The Homam Body is a standout choice for endgame, offering excellent defense and versatility. Other notable options include Gletis Cuirass for balanced stats and Thalassocrat Cuirass for unique bonuses. When selecting body armor, consider your current level, desired stats, and set bonuses. Pairing with other Homam pieces can enhance overall performance, making them ideal for advanced content. Always adapt your choice to your playstyle and the specific demands of your content type, ensuring a balance of defense, strength, and attack.

Hands

Choosing the right gloves for your Dragoon is essential for balancing defense and offense. Early on, Bronze Mittens and Vagabond’s Gloves provide reliable defense and dexterity. At higher levels, Royal Footman’s Gloves and Legionnaire’s Mittens offer improved stats. The Homam Hands are a top-tier choice for endgame content, offering excellent strength, dexterity, and defense. Additionally, Gletis Gauntlets and Askar Korazin are strong alternatives, providing unique bonuses like increased critical hit rate or magic defense. When selecting gloves, prioritize pieces that enhance your primary stats while maintaining a balance of defense and offensive capabilities. Pairing Homam Hands with other Homam pieces can yield powerful set bonuses, making them ideal for advanced players. Always consider your playstyle and the specific demands of your content when making your choice.

Accessories

Accessories play a crucial role in enhancing your Dragoon’s performance. Earrings like the Pel. Earring 2 and Brutal Earring boost accuracy and attack power, while belts such as the Virtuoso Belt enhance magic defense. Choose wisely to complement your gear setup and optimize your stats for superior combat effectiveness.

Earrings

Earrings are essential accessories for a Dragoon, enhancing key stats like attack, accuracy, and evasion. The Brutal Earring is highly recommended for its significant attack boost, making it a cornerstone of many DRG setups. The Assault Earring is another strong option, providing a balance of attack and accuracy, which is crucial for maintaining high DPS. For those with access to premium gear, the Pel. Earring 2 offers exceptional accuracy and attack bonuses, making it a top-tier choice. When choosing earrings, consider your playstyle and current gear setup to maximize synergy. Accuracy and attack power are vital for a Dragoon, as they directly impact weapon skill damage and overall effectiveness in combat. Ensure your earrings complement your weapon and armor choices to optimize your performance in both solo and party play scenarios.

Belts

Belts play a crucial role in enhancing a Dragoon’s performance by providing additional stats such as accuracy, attack, and defense. The Virtuoso Belt is a top-tier choice, offering excellent accuracy and attack bonuses, making it ideal for weapon skill damage and overall DPS. Another strong option is the Coiste Bodhar, which provides a balanced mix of defense and attack, making it suitable for both physical and magical defense scenarios. For those focusing on magic evasion, the Flamma Belt, obtained from the Odyssey, is a solid pick; Belts are often overlooked but can significantly enhance your setup when chosen wisely. Ensure your belt complements your overall gear to maximize its effectiveness in various content, whether it’s solo play or party-oriented setups.

Grips and Ammo

Grips and ammo are essential components for a Dragoon, enhancing both offensive and defensive capabilities. The Pole Grip is a standout choice, offering exceptional stats that boost attack and accuracy, making it a cornerstone of any DRG setup. For ammo, Smart Bombs are highly recommended, as they provide a significant increase in weapon skill damage, complementing the Dragoon’s reliance on powerful strikes. Additionally, Tiphia Sting and Angon are excellent alternatives, offering balanced stats that enhance overall performance. When selecting grips and ammo, consider your playstyle and the specific needs of your build, whether focusing on raw damage, accuracy, or survivability. These accessories play a critical role in optimizing your Dragoon’s effectiveness in both solo and party play, ensuring you remain a formidable force on the battlefield.

Wyvern and Pet Gear

Optimizing your Wyvern and pet gear is crucial for maximizing their effectiveness. Homam gear is highly recommended for the Wyvern, while accessories like Patroclus’s Helm and belts enhance pet abilities, boosting attack and defense stats for improved performance in battles.

Wyvern Gear

Equipping your Wyvern with the best gear significantly enhances its performance. The Homam Head, Homam Legs, Homam Hands, and Homam Feet are considered BiS (Best in Slot) for Wyvern gear, offering exceptional attack and defense boosts. These pieces are highly sought after due to their balanced stats, which improve both the Wyvern’s offensive and defensive capabilities. If obtaining Homam gear is challenging, Barone Cosciales is a strong alternative. Additionally, Patroclus’s Helm is a popular choice for Wyverns, providing increased accuracy and attack power. When selecting gear for your Wyvern, prioritize pieces that enhance its attack and defense while maintaining a balance between accuracy and evasion. Properly gearing your Wyvern ensures it remains a formidable ally in battle, complementing your Dragoon’s abilities effectively. Always aim for gear that aligns with your playstyle and the content you are tackling.

Pet Abilities

Optimizing your Wyvern’s abilities is crucial for maximizing its effectiveness in battle. The Wyvern’s Healing Breath ability is particularly valuable, as it restores HP to the Dragoon when their health falls below a certain threshold. This ability is automatically triggered and can be a lifesaver in challenging content. Additionally, the Wyvern’s offensive capabilities can be enhanced through specific gear choices. For instance, equipping your Wyvern with Homam Hands or Homam Feet not only boosts its attack power but also enhances its overall performance. Furthermore, certain armor pieces like Patroclus’s Helm can improve the Wyvern’s accuracy and attack power, making it a more formidable ally. Ensuring your Wyvern is well-equipped and its abilities are utilized effectively significantly enhances your Dragoon’s combat efficiency and survivability in both solo and party play scenarios.

Endgame Content

Preparing for endgame content as a Dragoon requires careful attention to gear optimization to maximize damage output and survivability. Key pieces such as the Gletis Cuirass, Homam Hands, and Homam Feet are highly recommended for their exceptional stats and versatility. Augmenting your weapon with STP and Haste is crucial for maintaining a high level of performance. Additionally, ensuring your armor set provides a balance of PDT and MDT will significantly enhance your durability in challenging encounters. For weapons, the Gungnir or Obelisk paired with a Pole Grip is an excellent choice for endgame content. Always prioritize gear that complements your playstyle while maintaining a balance between offense and defense. With the right setup, your Dragoon will excel in high-level missions, dynamis, and other endgame activities, making you a valuable asset to any party or alliance.

Manuals

2008 honda accord owners manual

Welcome to the 2008 Honda Accord Owners Manual, your comprehensive guide to understanding and maintaining your vehicle. This manual provides essential information on operation, maintenance, and safety features to ensure optimal performance and longevity. Designed to help you maximize your driving experience, it covers all models of the Accord Sedan, including details on controls, features, and recommended maintenance schedules. Keep this manual in your vehicle for quick reference to ensure you get the most out of your investment.

Importance of Reading the Manual

Importance of Reading the Manual

Reading the 2008 Honda Accord Owners Manual is crucial for understanding your vehicle’s features, maintenance needs, and troubleshooting tips. It provides detailed guidance on operating controls, optimizing performance, and ensuring safety. By following the manual, you can prevent costly repairs, enhance fuel efficiency, and prolong your car’s lifespan. This resource is essential for both new and experienced owners to maximize their driving experience and maintain their vehicle effectively.

Overview of the Manual’s Structure

Overview of the Manual’s Structure

The 2008 Honda Accord Owners Manual is organized into clear sections, making it easy to navigate. It begins with an introduction, followed by maintenance schedules, features and controls, driving tips, troubleshooting, and warranty information. Each section provides detailed explanations and guides, ensuring owners can efficiently understand and maintain their vehicle. This structured approach helps users quickly find the information they need to optimize performance and care for their Accord effectively.

Maintenance Schedule and Recommendations

Regular maintenance is crucial for your 2008 Honda Accord’s longevity. This section provides essential schedules and guidelines, including oil change intervals and tire care recommendations, to ensure optimal performance and extend the life of your vehicle.

Oil Change Intervals and Fluid Checks

Oil Change Intervals and Fluid Checks

Regular oil changes are vital for your 2008 Honda Accord’s engine health. The recommended oil change interval is typically every 5,000 to 7,500 miles, depending on driving conditions. Use the electronic oil life monitor to determine when an oil change is needed. Additionally, check coolant, brake, and transmission fluids regularly. Proper fluid levels ensure optimal performance and prevent potential damage. Always refer to the manual for specific guidelines.

Tire Pressure and Rotation Guidelines

Tire Pressure and Rotation Guidelines

Proper tire pressure and rotation are crucial for your 2008 Honda Accord’s performance and safety. Check tire pressure monthly and before long trips, inflating to the recommended levels found in the manual. Rotate tires every 5,000 to 8,000 miles to ensure even tread wear. Use the pattern specified in the manual for optimal results. Regular checks help improve fuel efficiency and extend tire life.

Features and Controls of the 2008 Honda Accord

The 2008 Honda Accord features a user-friendly instrument panel with controls for climate, audio, and navigation. Optional upgrades include a touchscreen interface and premium sound system. The layout is designed for driver convenience and accessibility, ensuring easy operation of all vehicle functions. This section explains each control and feature in detail.

Instrument Panel and Dashboard Explanation

Instrument Panel and Dashboard Explanation

The 2008 Honda Accord’s instrument panel is designed for driver convenience, featuring controls for climate, audio, and navigation systems. The dashboard includes a central display screen, gauges for speed and engine performance, and buttons for adjusting settings. The layout prioritizes accessibility, ensuring drivers can operate functions without distractions. This section details the location and purpose of each control, enhancing your driving experience.


Infotainment and Navigation System Overview

Infotainment and Navigation System Overview

The 2008 Honda Accord features an advanced infotainment system with AM/FM radio, CD player, and auxiliary input for external devices. The optional navigation system provides voice-command functionality, ensuring safe and convenient route planning. Steering wheel-mounted controls allow seamless operation of audio and navigation functions. This system enhances your driving experience by integrating entertainment and guidance seamlessly.

Driving Tips for Optimal Performance

To enhance your driving experience, focus on smooth acceleration and braking to improve fuel efficiency. Use cruise control on highways and maintain consistent speeds for better performance.

Fuel Efficiency and Eco-Driving Modes

The 2008 Honda Accord features an Eco-Driving Mode that enhances fuel efficiency by optimizing engine and transmission performance. Activating this mode adjusts throttle response and gear shifts for better mileage. Maintaining a steady speed, accelerating smoothly, and avoiding sudden movements also improves fuel economy. Regular maintenance, such as proper tire inflation and oil changes, further supports eco-friendly driving. Follow these tips to maximize your Accord’s efficiency and reduce fuel consumption.

Safe Driving Practices and Vehicle Handling

The 2008 Honda Accord emphasizes safe driving practices through features like anti-lock brakes and electronic stability control. Always wear seatbelts, follow traffic laws, and adjust driving to road conditions. Avoid aggressive maneuvers and maintain a safe distance. Proper vehicle handling involves smooth steering and braking. The manual highlights these practices to ensure a secure and confident driving experience for all occupants. Regular checks of tire pressure and brakes are essential for optimal safety.

Troubleshooting Common Issues

The manual helps identify and resolve common issues like coolant leaks and dashboard warning lights. It provides step-by-step guidance for diagnosing problems and suggests solutions. Always consult the manual or a professional for accurate repairs to ensure safety and maintain your vehicle’s performance. Regular checks can prevent many issues from escalating.

Identifying Dashboard Warning Lights

Identifying Dashboard Warning Lights

The 2008 Honda Accord Owners Manual explains dashboard warning lights to help drivers recognize issues promptly. These lights include oil life monitors, temperature alerts, and tire pressure indicators. Understanding their meanings ensures timely maintenance and prevents potential damage. Consult the manual for detailed descriptions of each light and recommended actions to address alerts effectively. Regular checks can help prevent issues from escalating.

Solving Common Problems Like Coolant Leaks

The 2008 Honda Accord Owners Manual provides guidance for addressing common issues like coolant leaks. If a coolant leak is suspected, inspect the radiator, hoses, and water pump for signs of damage or corrosion. Consult the manual for detailed repair procedures or seek professional assistance if necessary. Regular inspections can help prevent such issues, ensuring your vehicle runs smoothly and efficiently.

Warranty Information and Coverage

The 2008 Honda Accord’s factory warranty provides coverage for parts and labor during the initial ownership period. Extended warranty options are available for added protection and peace of mind.

Understanding the Factory Warranty

Understanding the Factory Warranty

The factory warranty for the 2008 Honda Accord covers repairs and replacements of parts due to manufacturing defects for a specified period or mileage. It typically includes a basic warranty and a powertrain warranty, ensuring protection against unexpected repair costs. Details about coverage duration, mileage limits, and excluded components can be found in the manual, providing clarity for owners.

Extended Warranty Options and Coverage Details

Extended Warranty Options and Coverage Details

Extended warranty options for the 2008 Honda Accord offer additional protection beyond the factory warranty, covering repairs for a longer period or higher mileage. These plans can be purchased through Honda dealerships or third-party providers, often including coverage for major components like the engine and transmission. They provide peace of mind and financial protection against unexpected repair costs, ensuring your vehicle remains protected for years to come.

Digital Versions of the Owners Manual

The 2008 Honda Accord Owners Manual is available in digital formats, including downloadable PDF versions, for easy access and convenience. Honda also offers a dedicated Digital Owners Manual section on their website, allowing owners to view and download the manual online. This digital access ensures you can always reference the guide, even without a physical copy.

How to Download the PDF Version

How to Download the PDF Version

To download the PDF version of the 2008 Honda Accord Owners Manual, visit Honda’s official website and navigate to the Digital Owners Manual section. Select your vehicle’s model year and type, then click the download link. Ensure you have a PDF reader installed to view the file. This convenient option allows you to access the manual anytime, making it easy to reference on your device.

Navigating Honda’s Digital Owners Manual Section

Navigating Honda’s Digital Owners Manual Section

Visit Honda’s official website and locate the Digital Owners Manual section. Select your vehicle’s model year (2008) and type (Accord). Choose between Sedan or Coupe to access the specific manual. Click on the PDF link to download. Ensure you have a PDF reader installed to view the document. This section provides easy access to all manual content, allowing you to search and reference information efficiently.

Community and Forums for 2008 Honda Accord Owners

Join online communities like Our8thGens to connect with other 2008 Honda Accord owners. These forums provide valuable resources, tips, and troubleshooting advice from experienced owners and enthusiasts.

Joining Online Communities and Forums

Joining Online Communities and Forums

Joining online communities and forums dedicated to the 2008 Honda Accord allows owners to connect with enthusiasts, share experiences, and access valuable resources. Platforms like Our8thGens offer a wealth of information, including troubleshooting tips and maintenance advice. These communities foster collaboration, helping owners resolve common issues and enhance their vehicle’s performance. Active participation can lead to a better understanding of your Accord.

Benefits of Owner-Driven Support Groups

Benefits of Owner-Driven Support Groups

Owner-driven support groups offer invaluable insights and solutions for 2008 Honda Accord owners. These communities provide real-world advice, troubleshooting tips, and DIY maintenance guidance from experienced owners. Sharing knowledge reduces repair costs and enhances driving experiences. Active participation fosters camaraderie and ensures access to reliable information, making ownership more enjoyable and hassle-free.

DIY Repairs and Maintenance Tips

Empower yourself with essential DIY tips for your 2008 Honda Accord. Learn simple, cost-effective repairs and maintenance tasks to keep your vehicle running smoothly and efficiently.

Simple Repairs You Can Do at Home

Performing simple repairs at home can save time and money. Tasks like oil changes, air filter replacements, and bulb installations are straightforward with basic tools. Always refer to your 2008 Honda Accord manual for specific instructions and safety precautions. DIY maintenance fosters a deeper connection with your vehicle while ensuring optimal performance and longevity;

Tools and Resources Needed for DIY Projects

For DIY repairs on your 2008 Honda Accord, essential tools include a socket set, screwdrivers, wrenches, and a multimeter. Resources like the downloadable PDF manual provide detailed instructions and torque specifications. Online forums and communities offer valuable tips and guides from experienced owners. Always refer to the manual for specific part numbers and troubleshooting sections to ensure accurate and safe repairs.

Accessories and Customization Options

The 2008 Honda Accord offers various accessories to enhance functionality and style, such as alloy wheels, spoilers, and interior upgrades. Customize your vehicle to suit your preferences with genuine Honda parts or aftermarket options, ensuring compatibility and quality. Explore the manual for recommendations on approved accessories that maintain performance and warranty compliance.

Recommended Accessories for the 2008 Honda Accord

Recommended Accessories for the 2008 Honda Accord

The 2008 Honda Accord supports various accessories to enhance functionality and style. Popular options include alloy wheels, spoilers, and interior upgrades like premium floor mats. Cargo organizers and bike racks are ideal for practicality. Performance-enhancing accessories such as air filters and exhaust systems can also be installed. Ensure all additions are compatible with your vehicle’s specifications for optimal performance and safety.

Customization Ideas to Enhance Your Vehicle

Customization Ideas to Enhance Your Vehicle

Personalize your 2008 Honda Accord with accessories that reflect your style. Consider adding alloy wheels, spoilers, or a performance exhaust system for a sporty look. Interior upgrades like leather seat covers or ambient lighting can enhance comfort and aesthetics. For functionality, add roof racks or cargo organizers. Custom decals or paint jobs can also give your vehicle a unique touch, making it stand out on the road.

Canada

toshiba e studio 3508a manual

The Toshiba e-Studio 3508A manual provides comprehensive guidance for setup, configuration, and troubleshooting, ensuring users can maximize functionality and efficiency of this advanced multifunction printer.

Overview of the Toshiba e-Studio 3508A

The Toshiba e-Studio 3508A is a high-performance multifunction printer designed for efficient document management. It offers advanced printing, scanning, and copying capabilities, ideal for busy workgroups. With robust security features and eco-friendly options, this device ensures productivity while minimizing environmental impact. Its intuitive interface and compatibility with various operating systems make it a versatile solution for modern office needs, supported by comprehensive manuals and drivers.

Importance of the Manual for Users

The Toshiba e-Studio 3508A manual is essential for users to optimize device functionality and troubleshoot issues effectively. It provides clear instructions for installation, configuration, and maintenance, ensuring smooth operation. The manual also highlights security features, eco-friendly settings, and advanced options, helping users make informed decisions. Access to detailed guides enhances productivity and minimizes downtime, making the manual an indispensable resource for both novice and experienced users.

Installation and Setup

The manual guides users through downloading drivers from Toshiba’s support site and installing them, ensuring proper setup for first-time use and seamless functionality.

Downloading and Installing Toshiba e-Studio 3508A Drivers

Visit Toshiba’s official support website to download the latest drivers for the e-Studio 3508A. Ensure compatibility with your operating system and follow the installation prompts carefully. Proper installation guarantees optimal performance and functionality of the device, allowing users to access all features seamlessly. Always verify driver authenticity to avoid potential security risks and ensure smooth operation of the multifunction printer.

Setting Up the Device for First-Time Use

Unbox and carefully unpack the Toshiba e-Studio 3508A, ensuring all components are included. Connect the power cord and any necessary cables to the appropriate ports. Turn on the device and follow the on-screen instructions for initial setup, including language selection and network configuration. Refer to the manual for detailed guidance to ensure a smooth and proper initialization process.

Configuration and Settings

Configure network settings, device preferences, and user permissions to optimize performance and security, ensuring the Toshiba e-Studio 3508A aligns with your office requirements and workflow needs.

Basic Configuration Options for the Toshiba e-Studio 3508A

The Toshiba e-Studio 3508A offers straightforward configuration options, including network settings, device preferences, and user permissions. Users can easily set up print and scan
functions, adjust display settings, and configure connectivity options like Wi-Fi or Ethernet. The manual provides step-by-step guidance for customizing default settings, such as paper size,
resolution, and toner usage, to optimize performance for specific office needs.

Advanced Settings for Network and Security

The Toshiba e-Studio 3508A manual outlines advanced network and security configurations, such as encrypted data transmission, secure print settings, and access control. Users can enable firewall settings, configure SNMP for network management, and set up user authentication. The manual also provides guidance on encrypting stored data and securing wireless connections to ensure maximum device and document security.

Printing and Scanning

The Toshiba e-Studio 3508A supports high-speed printing and scanning with versatile options, including duplex printing and multiple scan destinations, ensuring efficient document handling and workflow integration.

Printing Options and Settings

The Toshiba e-Studio 3508A offers versatile printing options, including high-speed output and duplex printing. Users can customize settings such as color mode, resolution, and layout. The device also supports advanced scan-to-folder and scan-to-email features, enabling efficient document management. These settings ensure high-quality prints and scans, catering to diverse office needs while maintaining productivity and efficiency.

Scanning Modes and Destinations

The Toshiba e-Studio 3508A supports multiple scanning modes, including scan-to-email, scan-to-folder, and scan-to-USB. Users can configure destinations such as network folders or cloud services for seamless document sharing. Advanced security features ensure scanned data is encrypted, while the intuitive control panel simplifies navigation. These options enhance productivity, making it easy to manage and store scanned documents securely and efficiently.

Control Panel and Help Button

The control panel offers an intuitive interface for managing settings, while the Help Button provides instant access to explanations and troubleshooting guidance directly from the manual.

Navigating the Control Panel


The Toshiba e-Studio 3508A’s control panel is user-friendly, featuring a touchscreen interface for easy access to print, scan, and copy functions. Users can navigate through menus using directional buttons and the Home button for quick access to primary settings. The panel also displays real-time status updates and allows customization of frequently used settings for enhanced productivity.

Using the Help Button for Instant Support

The Help Button on the Toshiba e-Studio 3508A provides instant access to detailed explanations and troubleshooting guides directly from the manual. This feature ensures users can quickly resolve issues without navigating through complex menus. It offers step-by-step solutions for common problems, making it an essential tool for maintaining productivity and ease of use. The Help Button is always accessible, ensuring support is just one touch away.

Maintenance and Troubleshooting

This section covers essential maintenance tasks and troubleshooting steps for common issues, helping users ensure optimal performance and minimize downtime effectively with the Toshiba e-Studio 3508A.

Cleaning and Maintaining the Toshiba e-Studio 3508A

Regular cleaning of the drum unit and toner cartridge is essential for optimal performance. The manual provides step-by-step guidance on maintaining the printer, including cleaning cycles and replacing parts. Proper maintenance ensures high-quality prints and prevents common issues. Refer to page 611 for detailed cleaning procedures and tips to extend the device’s lifespan and efficiency effectively.

Troubleshooting Common Issues

The manual provides solutions for common issues such as error codes, paper jams, and print quality problems. It guides users through checking connectivity, updating drivers, and resolving toner-related errors. Detailed troubleshooting steps ensure quick fixes, minimizing downtime. The Help Button also offers instant support, linking directly to relevant manual sections for easy resolution of technical difficulties.

Driver and Software Information

Drivers and software for the Toshiba e-Studio 3508A can be downloaded from official Toshiba support websites. Regular updates ensure optimal performance and compatibility with operating systems.

Where to Find and Download Drivers

Drivers for the Toshiba e-Studio 3508A can be found on the official Toshiba support website. Visit the site, select your model, and download the appropriate drivers. Ensure compatibility with your operating system for optimal performance. Regularly check for updates to maintain functionality and security. Always use official sources to avoid unauthorized software.

Installing and Updating Software

Install the Toshiba e-Studio 3508A software by downloading the latest version from the official Toshiba support website. Run the installer, follow on-screen instructions, and restart the device. Regular software updates ensure compatibility, security, and optimal performance. Always use official Toshiba sources to avoid unauthorized or outdated software, which could compromise functionality and security.

Security Features

Secure print and scan features ensure data protection. Access controls, encryption, and compliance protocols safeguard sensitive information, providing robust advanced security for the Toshiba e-Studio 3508A.

Data Security and Access Control

The Toshiba e-Studio 3508A employs robust data security measures, including encryption and secure authentication protocols. Access controls ensure only authorized users can perform sensitive operations. Features like secure print and scan, along with compliance with industry standards, protect confidential information. The device supports role-based access, allowing administrators to customize permissions, ensuring enhanced security and minimizing risks of unauthorized data breaches.

Secure Print and Scan Features

The Toshiba e-Studio 3508A offers secure print and scan features to safeguard sensitive documents. Secure Print holds jobs until authenticated at the device, while encrypted scanning ensures data remains confidential. SSL/TLS protocols protect scanned files during transmission, and role-based access controls restrict scan destinations. Additionally, user authentication is required for secure scanning, ensuring only authorized individuals can access or print sensitive information.

Technical Specifications

The Toshiba e-Studio 3508A is a multifunction printer designed for fast and efficient printing and scanning, offering secure access and high-quality output, compatible with various operating systems.

Key Features and Capabilities

The Toshiba e-Studio 3508A offers fast printing and scanning, high-quality output, secure access control, and advanced multitasking capabilities. It supports wireless connectivity, intuitive touch screen navigation, and eco-friendly energy-saving modes. Designed for efficiency, it integrates seamless document management and robust security features to meet modern office demands.

Compatibility with Operating Systems

The Toshiba e-Studio 3508A is compatible with a wide range of operating systems, including Windows, macOS, and Linux. It also supports mobile printing from Android and iOS devices, ensuring seamless integration across diverse environments. The manual provides detailed setup instructions for each OS, enabling users to connect and operate the device effortlessly.

User Manual Structure

The Toshiba e-Studio 3508A manual is organized into clear sections for easy navigation, covering installation, configuration, printing, scanning, and troubleshooting to help users quickly find the information they need.

Navigating the Manual Effectively

The Toshiba e-Studio 3508A manual is designed for easy navigation, with clear sections and detailed explanations. Users can quickly locate information on installation, configuration, and troubleshooting. Key features like the Help Button provide instant access to guidance, ensuring seamless operation. The manual’s structured layout helps users find solutions efficiently, making it an essential resource for maximizing the device’s functionality and resolving issues promptly.

Understanding the Layout and Content

The Toshiba e-Studio 3508A manual is structured to provide clear, organized information, making it easy for users to locate specific details. The manual includes detailed sections on installation, configuration, and troubleshooting, with visual guides and step-by-step instructions. Content is divided into logical chapters, ensuring quick access to essential information for optimal device operation and maintenance. This clear layout enhances user understanding and efficiency.

Environmental Considerations

Toshiba e-Studio 3508A promotes eco-friendly practices with energy-efficient modes and recyclable materials, aligning with environmental standards for sustainable office solutions.

Energy Efficiency and Eco-Friendly Features

The Toshiba e-Studio 3508A incorporates energy-saving technology to minimize power consumption while maintaining high performance. Its eco modes reduce energy use during standby or low-activity periods. Designed with recyclable materials, this MFP supports environmental sustainability. Toshiba’s commitment to eco-friendly practices ensures the device meets global energy efficiency standards, making it a responsible choice for modern workplaces aiming to reduce their ecological footprint.

Recycling and Disposal Guidelines

The Toshiba e-Studio 3508A is designed with recyclable materials to promote sustainability. Proper disposal involves separating electronic components and following local recycling regulations. Toshiba recommends using authorized recycling centers to ensure environmentally responsible disposal. Users can also check Toshiba’s official website for specific recycling programs or guidelines tailored to the e-Studio 3508A, ensuring compliance with eco-friendly practices and reducing environmental impact.

The Toshiba e-Studio 3508A manual serves as an essential resource for optimizing device performance and troubleshooting. Thank you for utilizing this guide to enhance your experience.

Final Thoughts on the Toshiba e-Studio 3508A Manual

The Toshiba e-Studio 3508A manual is a vital resource for users, offering detailed guidance on installation, configuration, and troubleshooting. It ensures optimal performance and security, making it an indispensable tool for maximizing the device’s capabilities. By following the manual, users can unlock advanced features and maintain efficiency. Refer to it regularly to get the most out of your Toshiba e-Studio 3508A experience.

Encouragement to Explore and Utilize the Manual Fully

Take the time to thoroughly explore the Toshiba e-Studio 3508A manual, as it is packed with valuable insights and practical guidance. From setup and configuration to advanced security features, the manual empowers users to unlock the device’s full potential. Regularly reviewing its content ensures optimal performance, efficiency, and troubleshooting. Embrace the manual as your go-to resource for mastering the Toshiba e-Studio 3508A and enhancing your printing experience.

Guide

guide by wire

Fly-by-wire systems are computerized systems that replace mechanical flight controls with electronic interfaces, enhancing safety, precision, and efficiency in aircraft operation.

History and Evolution of Fly-by-Wire Technology

Fly-by-wire systems emerged in the mid-20th century, transitioning from mechanical to electronic controls, reducing weight and enhancing safety and performance in aerospace engineering.

Early Developments in Aviation

The concept of fly-by-wire emerged in the mid-20th century, driven by the need to reduce mechanical complexity and enhance aircraft performance. Early systems were rudimentary, relying on analog electronics to replace bulky mechanical controls. The 1950s and 1960s saw initial experiments with electronic flight control systems, particularly in military aircraft. These systems improved responsiveness and reduced pilot workload. By the 1970s, the first digital fly-by-wire systems were introduced, offering greater precision and reliability. The Apollo program showcased the potential of electronic controls, paving the way for their adoption in commercial aviation. This evolution marked a significant shift from mechanical to electronic systems, laying the foundation for modern fly-by-wire technology.

Modern Advancements in Fly-by-Wire

Contemporary fly-by-wire systems have evolved significantly, integrating advanced technologies to enhance performance and safety. Modern systems utilize sophisticated software algorithms, real-time data processing, and robust redundancy. The adoption of fiber-optic cables and digital data buses has improved signal transmission speed and reliability. Additionally, modern fly-by-wire systems incorporate fly-by-wireless technologies, reducing weight and increasing system agility. These advancements have enabled more precise control, better fault tolerance, and enhanced pilot interfaces. Modern systems also integrate with other avionics, such as autopilot and autothrottle, to provide seamless flight management. These innovations continue to push the boundaries of aviation technology, ensuring safer and more efficient flight operations across various aircraft types.

Key Components of Fly-by-Wire Systems

Fly-by-wire systems rely on sensors, actuators, and redundant computers to process and execute flight commands, ensuring precise control and safety in aircraft operations.

Hardware Components

The hardware components of fly-by-wire systems include sensors, actuators, and communication systems. Sensors, such as accelerometers and position sensors, monitor aircraft movements and conditions. Actuators convert electronic signals into mechanical movements, controlling flaps, elevators, and rudders. The system relies on a data bus for high-speed communication between components. Redundant hardware ensures continued operation in case of failures. These physical elements work together to execute flight commands precisely, maintaining aircraft stability and responsiveness. The hardware is designed for durability and reliability, operating in harsh environments. Advanced materials and engineering ensure long-term performance. Together, these components form the backbone of modern fly-by-wire technology, enabling efficient and safe aircraft control.

Software Components

The software components of fly-by-wire systems are critical for processing data and executing flight commands. These include advanced algorithms that interpret sensor data and pilot inputs, translating them into precise control signals. The software also manages redundancy, ensuring seamless operation even if hardware fails. Flight control laws, embedded in the software, define how the aircraft responds to inputs, optimizing performance and stability. Additionally, the software handles communication protocols, enabling data exchange between components. Regular updates and certifications ensure the system remains reliable and secure. The software is designed to adapt to various flight conditions, providing real-time adjustments for safe and efficient operation. These digital elements are the intelligence behind fly-by-wire systems, enabling modern aircraft to achieve unparalleled levels of performance and safety.

Redundancy and Fail-Safe Mechanisms

Fly-by-wire systems incorporate multiple redundancies to ensure reliability. Critical components, such as sensors, actuators, and control units, are duplicated or triplicated to maintain functionality in case of failure. Fail-safe mechanisms automatically switch to backup systems if primary components malfunction. This redundancy ensures uninterrupted operation and prevents catastrophic failures. The system also employs fault-tolerant algorithms to detect and isolate faulty components, allowing the aircraft to continue safe operation. Redundant communication channels further enhance reliability, ensuring data integrity. These mechanisms are designed to handle hardware, software, or communication failures seamlessly. By integrating these safeguards, fly-by-wire systems achieve exceptional reliability, protecting both aircraft and passengers in all flight scenarios. This layered approach to redundancy and fail-safes is central to the system’s robustness and safety.

How Fly-by-Wire Systems Work

Fly-by-wire systems translate pilot inputs into digital signals, processed by flight control computers, which command actuators to move aircraft surfaces, ensuring precise and automated flight control.

System Architecture

The system architecture of fly-by-wire systems is a sophisticated network of interconnected components designed to ensure seamless communication and control. At its core, the architecture comprises sensors, flight control computers, actuators, and feedback mechanisms. Sensors gather real-time data about the aircraft’s state, such as altitude, speed, and orientation. This data is transmitted to flight control computers, which process the information and execute programmed algorithms to determine the appropriate control responses. The computers then send digital commands to actuators, which convert these signals into physical movements of flight surfaces like ailerons, elevators, and rudders. Feedback mechanisms, such as position sensors, continuously monitor the actuators’ movements and relay this information back to the computers, ensuring precise and adaptive control. This closed-loop system enables highly accurate and responsive aircraft operation, adapting to changing conditions and pilot inputs seamlessly.

Pilot Interface and Feedback Mechanisms

The pilot interface in fly-by-wire systems is designed to provide intuitive control and real-time feedback, ensuring seamless communication between the pilot and the aircraft. Modern systems feature sidesticks or control yokes that translate pilot inputs into digital commands. These interfaces are augmented by visual and tactile feedback mechanisms, such as flight displays and force-feedback systems, which help pilots understand the aircraft’s responses. For instance, tactile feedback may simulate resistance to alert pilots of control limits, while visual cues on cockpit displays provide critical flight data. This bidirectional interaction enhances situational awareness and precision, allowing pilots to make informed decisions quickly. The integration of these feedback mechanisms ensures that pilots remain in control while leveraging the system’s advanced capabilities, thereby improving overall flight safety and efficiency.

Advantages of Fly-by-Wire Technology

Fly-by-wire systems enhance safety, improve efficiency, and offer design flexibility by replacing mechanical controls with electronic interfaces, enabling precise control and reducing pilot workload during flights.


Enhanced Safety

Fly-by-wire systems significantly enhance safety by reducing reliance on mechanical components, which are prone to failure. Automated controls minimize human error, ensuring precise and consistent flight operations. Redundant systems and fail-safes prevent catastrophic failures, while real-time monitoring detects anomalies early. These advancements reduce accidents caused by mechanical malfunctions or pilot mistakes, creating a safer flying environment for passengers and crew. Additionally, adaptive flight control systems adjust to changing conditions, improving stability and responsiveness during emergencies. Overall, fly-by-wire technology has revolutionized aviation safety, making modern aircraft more reliable and resilient to potential hazards.

Improved Efficiency

Fly-by-wire systems significantly enhance aircraft efficiency by optimizing performance through precise electronic control. By eliminating heavy mechanical linkages, these systems reduce overall weight, leading to better fuel economy and lower operational costs. Automated flight control systems streamline operations, reducing pilot workload and enabling more efficient flight paths. Additionally, real-time data processing and adaptive control algorithms ensure optimal engine performance, reducing fuel consumption. The use of digital interfaces also simplifies maintenance, as diagnostics can be performed electronically, identifying issues before they escalate. Overall, fly-by-wire technology improves operational efficiency, making aircraft more cost-effective and environmentally friendly while maintaining high performance standards.

Design Flexibility

Fly-by-wire systems offer unparalleled design flexibility, enabling aircraft manufacturers to create innovative and adaptive designs. By replacing mechanical controls with electronic interfaces, these systems allow for more streamlined and lightweight aircraft structures. This flexibility extends to the integration of advanced avionics and automation, enabling customized solutions for various aircraft types and missions. The modular architecture of fly-by-wire systems simplifies the incorporation of new technologies, such as artificial intelligence and machine learning, to enhance performance. Additionally, the digital nature of these systems facilitates easier upgrades and reconfigurations, making them highly adaptable to evolving aviation needs. This design flexibility not only improves aircraft performance but also supports the development of next-generation aerospace technologies.

Challenges and Limitations

Fly-by-wire systems face challenges like connectivity issues, system complexity, and reliance on electronic components, which can lead to errors if not properly maintained or integrated.

Technical Complexity

Fly-by-wire systems present significant technical challenges, including complex software integration, reliability requirements, and cybersecurity risks. The interconnected nature of these systems demands precise engineering to ensure fault tolerance and real-time data processing. Additionally, the reliance on advanced sensors and actuators introduces potential failure points if not meticulously maintained. The complexity of system architecture requires continuous updates and validation to adapt to evolving aviation standards. Furthermore, the need for redundancy in critical components adds layers of sophistication, increasing development and operational costs. Cybersecurity concerns also escalate due to the vulnerability of digital systems to potential breaches or sabotage. Addressing these challenges necessitates cutting-edge technology and rigorous testing protocols to maintain safety and performance.

Cybersecurity Concerns

Fly-by-wire systems are highly vulnerable to cybersecurity threats due to their reliance on digital communication and software. Hackers can exploit weaknesses in the system’s architecture, potentially disrupting flight operations. The interconnected nature of these systems creates multiple entry points for malicious actors, raising concerns about unauthorized access to critical controls. Cyberattacks could compromise safety by manipulating data or commands, leading to catastrophic outcomes. As cyber threats evolve, protecting fly-by-wire systems requires advanced encryption, firewalls, and intrusion detection mechanisms. Regular software updates and robust authentication protocols are essential to mitigate risks. The aviation industry must prioritize cybersecurity to safeguard against emerging threats and ensure the integrity of fly-by-wire technology.

Guide

native american spirit guide

Native American spirit guides are sacred advisors believed to offer wisdom, protection, and healing, connecting individuals with the spiritual realm and nature’s essence.

1.1 What Are Spirit Guides?

Spirit guides are non-physical advisors believed to provide wisdom, protection, and guidance to individuals. In Native American traditions, they are often seen as spirits of ancestors, animals, or natural elements that offer insight and support. These guides are thought to assist in navigating life challenges, making decisions, and maintaining balance. They are considered messengers between the physical and spiritual worlds, helping individuals connect with their purpose and heritage. Spirit guides are not worshipped but respected as sources of ancient wisdom and strength. Their presence is deeply rooted in Native American beliefs about the interconnectedness of all living beings and the natural world.


1.2 Cultural Significance in Native American Communities

Spirit guides hold profound cultural significance in Native American communities, serving as central figures in spiritual and religious practices. They are often seen as messengers of wisdom, connecting individuals to their ancestors, nature, and the divine. These guides are deeply intertwined with tribal traditions, rituals, and oral histories, playing a vital role in preserving cultural identity. Many Native American communities believe that spirit guides help individuals navigate life challenges and make decisions aligned with their values and heritage. Respect for these guides reflects a broader reverence for the natural world and the interconnectedness of all living beings, fostering balance and harmony within communities.

The Role of Spirit Guides in Native American Spirituality

Spirit guides play a vital role in Native American spirituality by providing wisdom, protection, and healing, fostering spiritual growth and harmony with nature and community.

2.1 Spiritual Guidance and Wisdom

Spirit guides in Native American cultures serve as sources of profound wisdom, offering insights into life’s challenges and teachings. They are believed to impart ancient knowledge, helping individuals navigate their spiritual journeys and make decisions aligned with their higher purpose. Through visions, dreams, and intuitive connections, these guides provide clarity and direction, ensuring harmony with nature and community. Their wisdom is deeply rooted in ancestral traditions and the natural world, fostering a sense of balance and understanding. This spiritual guidance is integral to personal growth, enabling individuals to live in accordance with the principles of their ancestors and the land they inhabit.

2.2 Protection and Healing

Spirit guides in Native American traditions are also believed to offer protection and facilitate healing. They are thought to shield individuals from negative energies and harmful influences, providing a safeguard against spiritual and physical harm. Through their guidance, they help restore balance and wellness, addressing both emotional and physical ailments. Healing is often achieved through rituals, prayers, and ceremonies, with spirit guides acting as intermediaries between the individual and the divine. This protective and restorative role underscores their importance in maintaining harmony and well-being within communities, reflecting the deep connection between spirituality, nature, and health in Native American cultures.

Types of Spirit Guides

Native American spirit guides include animal spirits, ancestor spirits, and nature spirits, each offering wisdom, protection, and healing to individuals seeking guidance and connection.

3.1 Animal Spirit Guides

Animal spirit guides are central to Native American spirituality, representing specific qualities and teachings. Eagles symbolize vision and leadership, while wolves embody loyalty and perseverance. Bears often signify strength and healing, and deer represent gentleness and grace. These spirits are believed to communicate through dreams, visions, or encounters, offering guidance and wisdom. Each animal carries unique attributes, reflecting the diverse aspects of nature and human experience. By honoring these spirit guides, individuals seek balance, courage, and harmony in their lives. The connection with animal spirits fosters a deeper understanding of the natural world and one’s place within it, enriching spiritual journeys and daily life.

3.2 Ancestor Spirits

Ancestor spirits hold a revered place in Native American spirituality, believed to serve as guardians and wisdom-keepers. These spirits are thought to have lived as humans but now exist in the spiritual realm, offering guidance and protection to their descendants. They are often called upon in rituals and ceremonies to seek advice, healing, and strength. Ancestor spirits are considered bridges between the physical and spiritual worlds, providing insights into cultural traditions and moral values. Their presence is deeply felt in communal practices, reinforcing the importance of honoring heritage and maintaining balance within families and communities. They embody the wisdom of the past, ensuring its relevance in the present and future generations.

3.3 Nature Spirits

Nature spirits are integral to Native American spirituality, embodying the essence of natural elements like rivers, forests, and mountains. These spirits are believed to inhabit specific landscapes, holding sacred power and wisdom. They are often associated with particular duties, such as protecting the balance of nature or teaching humans about harmony with the environment. Nature spirits are thought to communicate through natural phenomena, offering guidance to those attuned to their presence. Rituals and ceremonies often honor these spirits to ensure prosperity, health, and respect for the land. Their role underscores the interconnectedness of all living beings, fostering a deep reverence for the natural world and its sacred inhabitants.

How Spirit Guides Are Chosen

Spirit guides are selected through rituals like vision quests, dreams, or significant life events, ensuring a profound spiritual connection and personal guidance for individuals seeking wisdom and protection.

4.1 Vision Quests and Rites of Passage

Vision quests are sacred rituals where individuals isolate themselves in nature to seek spiritual guidance. Through fasting, meditation, and prayer, they aim to connect with spirit guides. Elders often prepare participants, ensuring they are mentally and spiritually ready. These quests mark important rites of passage, such as transitioning to adulthood, and are deeply rooted in Native American traditions. The solitude and focus allow individuals to receive visions, which are believed to reveal their life purpose and spiritual path. Elders interpret these visions, helping individuals understand their significance and role in the community. Vision quests are a cornerstone of spiritual growth and guidance in Native American cultures.

4.2 Dreams and Visions

Dreams and visions are vital channels for receiving guidance from spirit guides in Native American traditions. These experiences often occur during meditation, rituals, or moments of deep reflection. Elders and spiritual leaders interpret the symbolism and imagery in dreams, helping individuals understand the messages from the spirit world. Visions may reveal wisdom, warn of challenges, or provide insight into healing practices. Many believe that spirits communicate through these experiences to offer guidance, comfort, or instruction. Dreams are considered a bridge between the physical and spiritual realms, playing a central role in personal and communal decision-making. They are deeply revered as a source of divine wisdom and direction.

Communication with Spirit Guides

Communication with spirit guides involves meditation, prayer, rituals, and ceremonies, often using sacred objects to connect with the spiritual realm and honor cultural traditions.

5.1 Meditation and Prayer

Meditation and prayer are integral to connecting with Native American spirit guides, fostering a deep, personal relationship. These practices create a sacred space for introspection, allowing individuals to quiet the mind and open their hearts. Through focused intention, one can seek guidance, wisdom, and healing. Meditation often involves breathing techniques and visualizations, while prayer may include chants, songs, or spoken words to honor the spirits. These rituals help bridge the physical and spiritual worlds, enabling communication with guides. Consistency and sincerity in these practices are essential for building trust and understanding. They serve as a pathway to spiritual growth, self-discovery, and harmony with nature and ancestors.

5.2 Rituals and Ceremonies

Rituals and ceremonies are vital for connecting with Native American spirit guides, often conducted by spiritual leaders to honor the divine. These practices may include smudging with sage, drumming, or sacred dances, creating a bridge between the physical and spiritual realms. Rituals are typically communal, fostering unity and shared spiritual growth. Ceremonies often involve offerings like tobacco or feathers to honor the spirits and seek their guidance. They may be performed for specific purposes, such as healing, protection, or celebrating life events. These rituals embody deep cultural traditions, reinforcing the connection to ancestors and the natural world. Through these sacred acts, individuals and communities strengthen their bond with spirit guides, ensuring harmony and balance in life.

5.3 Use of Sacred Objects

Sacred objects play a central role in connecting with Native American spirit guides, serving as tools for spiritual communication. These objects, such as feathers, drums, rattles, and masks, are believed to hold spiritual power and act as bridges to the divine. Feathers, particularly from eagles, are highly revered and often used in rituals to carry prayers to the spirits. Drums and rattles are employed in ceremonies to invoke the presence of spirit guides, while masks may represent ancestral or animal spirits. These objects are treated with respect and care, often passed down through generations; Their use in rituals and meditative practices helps individuals focus their intentions and establish a deeper connection with their guides, fostering harmony and guidance in their lives.

The Importance of Nature and Animals

Nature and animals are central to Native American spirituality, providing spiritual guidance, inspiration, and a deep connection to the natural world, fostering harmony and balance in life.

6.1 Animal Symbolism in Native Cultures

In Native American cultures, animals hold profound symbolic meanings, often representing specific traits like strength, wisdom, or resilience. Each animal is believed to carry spiritual messages, offering guidance and inspiration to individuals. These symbols are deeply woven into stories, rituals, and art, serving as reminders of the interconnectedness of all living beings. For instance, the eagle symbolizes vision and leadership, while the wolf embodies loyalty and perseverance. Such symbolism not only enriches cultural heritage but also provides a framework for understanding life’s challenges and celebrating its beauty. Animals are thus integral to spiritual practices, fostering a deeper connection to the natural world and its wisdom.

6.2 The Role of the Natural World

The natural world plays a central role in Native American spirituality, serving as a spiritual foundation and source of guidance. Forests, rivers, and mountains are considered sacred spaces where spirit guides reside. The interconnectedness of all living beings is deeply respected, with nature seen as a teacher and healer. Rituals and ceremonies often take place outdoors, emphasizing harmony with the land. Animals, plants, and elements are viewed as relatives, offering wisdom and lessons for life. This profound connection to nature fosters a sense of balance and reciprocity, ensuring that spiritual practices remain rooted in the earth’s rhythms and cycles.

Modern Relevance of Spirit Guides

Native American spirit guides remain vital today, offering wisdom for modern challenges, fostering holistic well-being, and providing a connection to ancestral traditions and personal growth.

7.1 Applying Ancient Teachings in Contemporary Life

Native American spirit guides’ wisdom is increasingly relevant in modern life, offering insights into mindfulness, sustainability, and holistic well-being. Their teachings emphasize harmony with nature, fostering eco-friendly practices and a deeper respect for the environment. Meditation and prayer, central to connecting with spirit guides, are now widely adopted for mental health and stress relief. Additionally, the values of community and reciprocity, core to Native American traditions, inspire contemporary movements focused on social justice and collective well-being. By integrating these ancient principles, individuals can navigate modern challenges with resilience and wisdom, creating a balanced and meaningful life. This timeless wisdom bridges the past and present, enriching personal and societal growth.

PreviousNext

You Want To Have Your Favorite Car?

We have a big list of modern & classic cars in both used and new categories.