Manuals

pentax k1000 manual

The Pentax K1000 is a legendary 35mm SLR camera known for its simplicity and durability. This manual provides a comprehensive guide to mastering its operation and features.

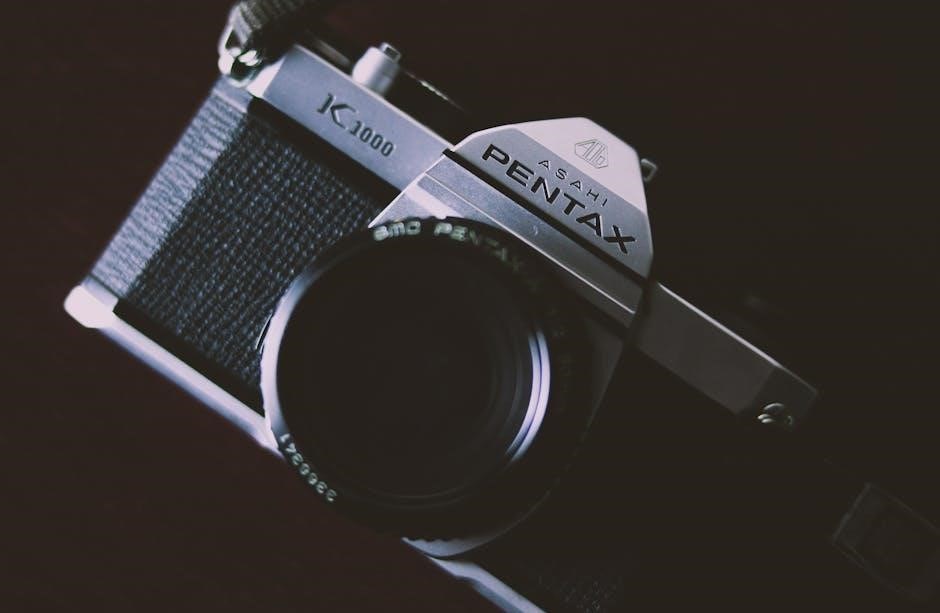
Overview of the Pentax K1000 Camera

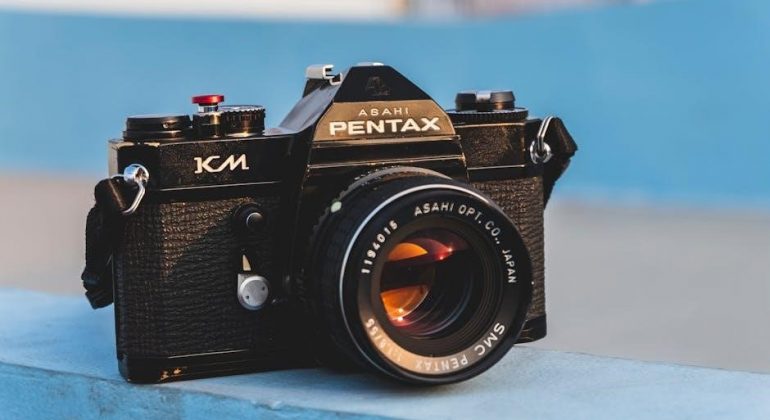
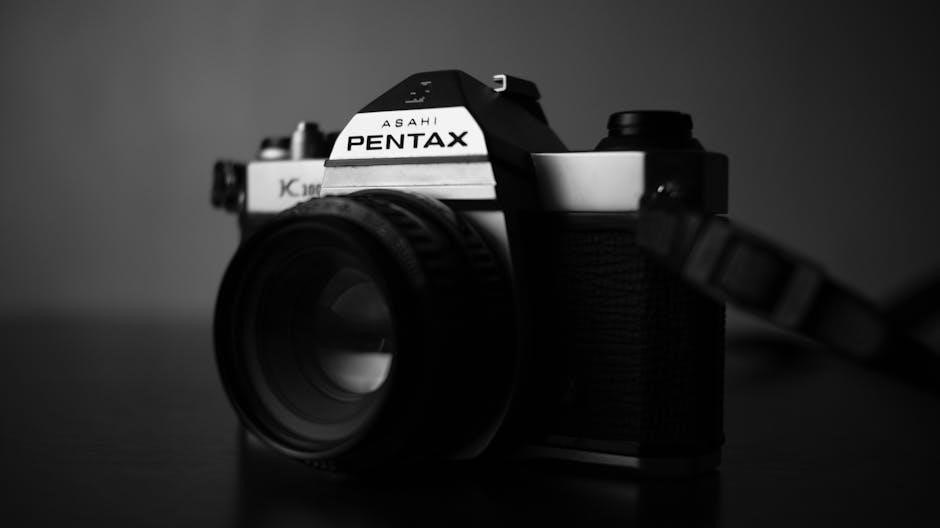
The Pentax K1000 is a fully manual‚ mechanical 35mm SLR camera introduced in 1976. Known for its durability and simplicity‚ it became a popular choice for photography education. The camera features a CdS light meter for exposure measurement and manual controls for aperture‚ shutter speed‚ and focus. Compatible with Pentax K-mount lenses‚ the K1000 offers flexibility for various shooting scenarios. Its straightforward design‚ with no automatic modes‚ makes it an excellent tool for learning fundamental photography skills. Production continued until 1997‚ and it remains a favorite among film photography enthusiasts today.

Importance of the Manual for Beginners

The Pentax K1000 manual is indispensable for beginners‚ offering clear guidance on operating the camera’s manual controls. It explains setting up the light meter‚ loading film‚ and using aperture and shutter speed effectively. The manual introduces basic photography concepts‚ helping new users understand exposure‚ focus‚ and composition. Its step-by-step instructions demystify the camera’s functions‚ enabling learners to grasp fundamental techniques quickly. For those transitioning from automatic to manual photography‚ the manual serves as a foundational resource‚ ensuring a smooth and effective learning curve. It empowers users to take full creative control of their photography journey.

Basic Operating Instructions

Mastering the Pentax K1000’s fundamentals ensures seamless photography. Start by turning on the light meter and setting up the camera for your first shot with ease;

Turning On the Light Meter

To activate the Pentax K1000’s light meter‚ simply remove the lens cap. The CdS cells automatically measure the light passing through the lens‚ enabling accurate exposure readings. This straightforward process ensures the meter is ready for use‚ providing essential data for setting aperture and shutter speed. The system is both efficient and reliable‚ making it easy to achieve well-exposed photographs. Always ensure the lens cap is off to avoid incorrect meter readings. This feature is a testament to the camera’s user-friendly design‚ catering to both beginners and experienced photographers alike. Proper use of the light meter is key to unlocking the K1000’s full potential.

Setting Up the Camera for the First Shot

Before taking your first shot with the Pentax K1000‚ ensure the camera is properly set up. Attach the lens securely‚ load the film according to the guide‚ and set the ISO/ASA dial to match your film speed. Remove the lens cap and ensure the light meter is active. Check the meter reading by pressing the shutter button halfway. Adjust the aperture and shutter speed as needed for proper exposure. Make sure the film advance lever is in its resting position and the mirror tensioning lever is disengaged. These steps ensure your camera is ready for capturing high-quality images with ease and precision.

Camera Controls and Functions

The Pentax K1000 features intuitive‚ fully manual controls. Key functions include aperture‚ shutter speed‚ and focus adjustments‚ allowing photographers to maintain complete creative control over exposures.

Aperture Control

The Pentax K1000 allows precise aperture control through its manual lens ring. Users can adjust the aperture from f/1.4 to f/16‚ depending on the lens‚ to regulate light intake and depth of field. The aperture ring operates smoothly‚ ensuring easy transitions between settings. This feature is essential for achieving desired artistic effects‚ such as background blur or sharp focus. The camera’s design ensures that aperture adjustments are straightforward‚ making it accessible for both beginners and experienced photographers to experiment with creative compositions. Proper use of aperture control enhances image quality and versatility in various shooting conditions. Always refer to the manual for optimal lens compatibility and functionality.

Shutter Speed Control

The Pentax K1000 features a manual shutter speed control dial‚ offering settings from 1/8 to 1/1000 of a second‚ plus a Bulb (B) and Time (T) mode. This dial allows users to regulate exposure duration‚ enabling creative control over motion effects and lighting. The mechanical shutter ensures precise operation‚ while the straightforward design makes it easy to adjust settings. For optimal results‚ the manual recommends selecting faster speeds for bright conditions and slower speeds for low-light scenarios. This feature is essential for mastering exposure and achieving desired visual effects in various photographic situations‚ making it a cornerstone of the K1000’s functionality.

Focus Adjustment

The Pentax K1000 features a manual focus adjustment mechanism‚ designed for precise control over image sharpness. The lens includes a focus ring that rotates smoothly‚ allowing photographers to fine-tune focus for optimal clarity. This manual operation emphasizes the camera’s hands-on nature‚ encouraging photographers to develop their skills in framing and composition. The focus ring works seamlessly with the camera’s viewfinder‚ enabling users to achieve sharp images in various lighting conditions. Mastering focus adjustment is a key part of harnessing the K1000’s capabilities‚ making it an essential skill for both beginners and experienced photographers alike.

Film Loading and Handling

Properly loading and handling film is crucial for the Pentax K1000. Insert the film canister‚ pull the leader‚ align it with the take-up spool‚ advance the film‚ and close the back. Always handle film in low-light conditions to prevent exposure. Use the lens cap when not shooting and store film in a cool‚ dry place to maintain quality. This ensures optimal performance and image clarity with every shot.

Step-by-Step Guide to Loading Film

Open the camera back by pulling the rewind knob. Locate the film canister and pull the leader‚ aligning it with the take-up spool. Ensure the perforations match the sprockets.

Gently advance the film using the rewind knob until it snugly fits into place. Make sure the leader is securely attached to the spool.

Close the camera back firmly and wind the film to the first frame using the shutter release and advance lever.

Set the film speed (ASA/ISO) on the light meter for accurate exposures. Your camera is now ready for shooting.

This process ensures your film is loaded correctly‚ preventing exposure issues and ensuring sharp‚ clear images. Always handle film in low-light conditions to avoid accidental exposure. Proper loading is essential for optimal performance and image quality. By following these steps‚ you can confidently prepare your Pentax K1000 for capturing stunning photographs. The manual emphasizes the importance of careful film handling to maintain the integrity of your shots. This step-by-step guide is designed to help beginners master the film loading process effortlessly. With practice‚ you’ll be ready to shoot in no time.

Exposure Metering System

The Pentax K1000 features a center-weighted CdS light meter‚ providing accurate exposures by measuring light through the lens. It offers manual control for precise adjustments.

Understanding the CdS Light Meter

The CdS (Cadmium Sulfide) light meter in the Pentax K1000 measures light intensity through the lens‚ offering accurate exposures. Activated by removing the lens cap‚ it ensures precise readings. The meter couples with aperture and shutter settings‚ allowing manual adjustments. It uses a center-weighted system‚ focusing on the central area of the frame. This system provides reliable results‚ making it ideal for manual photography. By understanding the CdS meter‚ users can optimize their exposures‚ leveraging the camera’s simplicity for consistent results.


Special Shooting Techniques

Explore advanced photography methods like multiple exposures and infrared shooting with the Pentax K1000. These techniques enhance creativity‚ offering unique visual effects for stunning images.

Multiple Exposure Photography

The Pentax K1000 allows for multiple exposures‚ enabling photographers to create unique‚ layered images. To achieve this‚ ensure the film is wound to the next frame without advancing the counter. This technique is ideal for artistic experimentation‚ blending subjects in a single frame. Proper alignment and lighting balance are crucial for optimal results. Multiple exposure photography with the K1000 is a creative way to push boundaries and explore new visual storytelling methods‚ making it a favorite among enthusiasts seeking manual control and artistic freedom.

Infra-Red Photography Setup

For infra-red photography with the Pentax K1000‚ use specialized infra-red film‚ such as Kodak Aerochrome or Ilford SFX. Attach a deep red or infra-red filter to the lens to block visible light. Load the film in low-light conditions to avoid exposure. The CdS light meter measures visible light‚ so manual adjustments are necessary. Bracket exposures or use an external meter calibrated for infra-red; This technique offers unique creative possibilities‚ capturing images with ethereal tones and unusual textures. Patience and experimentation are key to mastering infra-red photography with the K1000‚ making it a rewarding endeavor for enthusiasts.

Lens Compatibility and Recommendations

The Pentax K1000 is compatible with Pentax K-mount lenses‚ offering a wide range of focal lengths for versatility. Use SMC Pentax-M lenses for optimal performance and clarity.

Using Pentax K-Mount Lenses

The Pentax K1000 is designed to work seamlessly with Pentax K-mount lenses‚ offering compatibility with a wide range of focal lengths. To attach a lens‚ align the red dots on the camera and lens‚ then twist gently until it clicks. For optimal performance‚ use lenses with an aperture ring‚ as they provide full manual control. The K1000 supports both manual-focus and select autofocus lenses‚ though newer lenses without an aperture ring may limit exposure control. Always consult the lens manual for specific compatibility and operation tips. This ensures the best results for your photography needs.

Troubleshooting Common Issues

If the light meter isn’t activating‚ ensure the lens cap is removed and the battery is functional. For inconsistent exposures‚ check the CdS cells for cleanliness. If the shutter sticks‚ inspect the curtains for debris. Lubricate the mechanism if necessary. Jammed film advancement could indicate improper loading or a defective take-up spool. For blurry images‚ verify focus accuracy and ensure the lens is clean. If multiple exposures aren’t working‚ check the mirror tension lever and ensure film advancement is correct. Regular maintenance and cleaning can prevent many of these issues‚ ensuring optimal performance.

Maintenance and Care

Regular maintenance is crucial to ensure the Pentax K1000 operates smoothly. Clean the lens and viewfinder with a soft cloth to prevent dust buildup. Inspect the light meter for accuracy and replace the battery when necessary. Lubricate mechanical components periodically to maintain functionality. Avoid exposing the camera to extreme temperatures or moisture. Store the K1000 in a dry‚ cool place when not in use. Handle the camera gently to prevent damage to the shutter curtains and internal mechanisms. For intricate repairs‚ consult a professional technician. Proper care ensures the longevity and performance of this iconic camera.

The Pentax K1000 remains a timeless‚ reliable choice for photographers. Its durability and simplicity make it a favorite for learning the fundamentals of photography.

Final Tips for Mastering the Pentax K1000

Mastering the Pentax K1000 requires practice and patience. Familiarize yourself with manual controls for aperture‚ shutter speed‚ and focus. Use the light meter for accurate exposures. Experiment with film speeds to understand their effects. Practice film loading to avoid waste. Keep the camera clean and maintained. Shoot regularly to refine skills. Explore techniques like multiple exposures. Study your results to improve. Utilize compatible lenses for versatility. Understand the camera’s mechanics and troubleshoot common issues. By following these tips‚ you’ll unlock the full potential of the K1000 and enhance your photography experience.

Manuals

dish hopper owners manual

Welcome to the official Dish Hopper Owner’s Manual. This guide provides comprehensive instructions for setting up, operating, and troubleshooting your Hopper whole-home DVR system. Designed to enhance your viewing experience, the Hopper offers advanced features like multi-tuner support, Dish Anywhere access, and seamless integration with Joey receivers. Use this manual to unlock all the capabilities of your Dish Hopper and enjoy a personalized entertainment experience.

Overview of the Dish Hopper System

The Dish Hopper system is a cutting-edge whole-home HD DVR solution designed to revolutionize your entertainment experience. With its advanced features, it allows users to record, pause, and play back live TV content across multiple rooms using Joey client receivers. The Hopper system supports up to 16 tuners, enabling simultaneous recording of multiple programs. It integrates seamlessly with Dish Anywhere, providing access to live TV and recorded content on mobile devices. The system also offers enhanced storage capacity, supporting thousands of hours of recording. Compatible with 4K and HDR, the Hopper delivers crystal-clear video quality. Its user-friendly interface and customizability ensure a personalized viewing experience. Whether you’re streaming, recording, or managing content, the Hopper system is built to meet all your entertainment needs.

Installation and Setup

The installation process involves connecting your Hopper to the TV, positioning the satellite dish, and completing initial setup. Follow the manual for detailed guidance.

Connecting the Hopper to Your TV

To connect your Dish Hopper to your TV, start by powering on the Hopper and your television. Locate the HDMI port on your TV and insert one end of the HDMI cable into it. Connect the other end to the HDMI output on the Hopper. Ensure the TV is set to the correct HDMI input channel using the TV remote. If your TV does not have HDMI, you can use composite or component cables, though HDMI is recommended for the best quality. Once connected, the Hopper’s interface should appear on your TV screen. If issues arise, ensure all cables are securely connected and restart both devices. Proper connection ensures optimal viewing and functionality of your Dish Hopper system.

Setting Up the Joey Client Receivers

To set up Joey client receivers, first ensure the Hopper is powered on and connected to your TV. Connect the Joey to a power source and your television using an HDMI cable. Turn on the Joey and your TV, then select the correct HDMI input. The Joey will automatically detect the Hopper system. If prompted, follow on-screen instructions to pair the Joey with the Hopper. Once connected, test the remote control to ensure it functions properly. If issues arise, restart both devices and verify network connectivity. Proper setup allows seamless access to live TV, recordings, and on-demand content across all rooms. Ensure all cables are securely connected for optimal performance.

Operating the Dish Hopper

Operating the Dish Hopper is straightforward. Use the remote to navigate menus, access live TV, recordings, and apps. The on-screen guide simplifies channel surfing and scheduling recordings.

Navigating the On-Screen Menu

Navigating the Dish Hopper’s on-screen menu is intuitive and user-friendly. Press the GUIDE button on your remote to access the Program Guide, which displays channel listings, show descriptions, and scheduling details. Use the arrow keys to scroll through channels and select programs. The MENU button provides access to settings, DVR management, and app integration. Voice control, available through compatible remotes, allows hands-free navigation. Customize your experience by creating favorites lists and setting parental controls. The menu also includes options for adjusting video quality, managing storage, and accessing advanced features like Dish Anywhere. Explore these options to optimize your viewing experience and make the most of your Hopper system.

Using the Remote Control

The Dish Hopper remote control is designed for easy navigation and control of your viewing experience. Key buttons include the POWER button to turn your TV and Hopper on/off, MENU to access settings, and GUIDE to browse channel listings. Use the arrow keys to navigate menus and the SELECT button to make choices. The number pad allows direct channel entry, while RECORD and PLAY control DVR functions. Advanced features include voice control via the VOICE button and customizable shortcuts. Pair the remote with your Hopper by following on-screen instructions. For lost remotes, the REMOTE LOCATOR feature helps you find it quickly. This intuitive design ensures seamless control over your Hopper system, enhancing your entertainment experience.

Accessing Dish Anywhere


Accessing Dish Anywhere allows you to enjoy your favorite shows and movies on the go. Download the Dish Anywhere app on your iOS or Android device to stream live TV and manage recordings. Ensure your Hopper is connected to the internet for seamless access. With Dish Anywhere, you can watch live channels, access your DVR library, and schedule recordings remotely. This feature enhances your entertainment experience by providing flexibility and convenience. Make sure your device is connected to the same network as your Hopper for optimal performance. Dish Anywhere is the perfect solution for staying entertained wherever you are, offering a user-friendly interface and robust functionality to meet all your viewing needs.

Recording and Managing Content

The Dish Hopper allows you to record and manage content effortlessly. Schedule recordings, manage storage, and access your library from any room with Joey receivers. Use the app to organize and delete recordings, ensuring your favorites are always available. The Hopper supports simultaneous recording of multiple shows, making it easy to never miss your favorite programs. Keep track of your storage capacity and optimize your viewing experience with intuitive management tools.

Scheduling and Managing Recordings

The Dish Hopper makes it easy to schedule and manage your recordings. Use the on-screen guide to select shows, set up recurring recordings, and prioritize your favorites. The Hopper allows you to record multiple programs simultaneously, ensuring you never miss an episode. Manage your recorded content by sorting, filtering, and deleting shows directly from the menu. Series recordings can be set up with just a few clicks, and you can customize settings like start and end times. Additionally, the Hopper provides storage alerts to help you optimize space. Access and manage your recordings from any room with Joey receivers or stream them via Dish Anywhere. This system ensures your viewing experience is seamless and tailored to your preferences.

Understanding Storage Capacity

Your Dish Hopper’s storage capacity determines how many recordings you can store. The Hopper system offers varying storage options, depending on the model, with the Hopper 3 supporting up to 16 tuners and the ability to record multiple shows simultaneously. Storage space is calculated based on video quality and duration. High-definition recordings consume more space than standard-definition ones. You can check available storage in the system settings menu and manage recordings by deleting older or less important content. Additionally, you can expand storage by connecting an external hard drive, allowing you to save more shows and movies. Properly managing your storage ensures you can continue recording your favorite programs without running out of space.

Advanced Features

The Dish Hopper system offers advanced features like Hopper with Sling, enabling streaming on mobile devices, and Hopper 3 DVR with 16 tuners for simultaneous recordings. These features enhance your viewing experience with multi-room support and unified search capabilities, ensuring seamless entertainment across all connected devices. Explore these tools to maximize your Hopper’s potential and enjoy a premium, whole-home DVR experience.

Using Hopper with Sling

The Hopper with Sling feature allows you to stream live TV and recorded content directly to your mobile devices, such as smartphones and tablets. This feature is ideal for watching your favorite shows on the go. To use Hopper with Sling, ensure your Hopper is connected to the internet and download the Dish Anywhere app. Once installed, log in with your Dish credentials to access your content. You can stream live TV, DVR recordings, and on-demand titles, all from the convenience of your mobile device. The Hopper with Sling also supports remote scheduling of recordings, giving you full control over your viewing experience, whether at home or away. This feature enhances flexibility and accessibility, making it a must-use for Dish Hopper users.

Hopper 3 DVR Features

The Hopper 3 DVR is the latest advancement in whole-home entertainment, offering unparalleled features for an enhanced viewing experience. With 16 tuners, it allows simultaneous recording of up to 16 shows, eliminating conflicts during prime-time hours. The Hopper 3 supports 4K ultra-high-definition (UHD) playback, delivering crystal-clear visuals. It also features integrated voice control, enabling hands-free navigation of the menu and search functions. Additionally, the Hopper 3 includes AutoHop, which automatically skips commercials during playback of recorded prime-time shows. The DVR also supports integration with Dish Anywhere, allowing you to stream live TV and recordings to mobile devices. Its user-friendly interface and advanced storage capacity make it a cutting-edge solution for modern entertainment needs, ensuring you never miss your favorite programs.

Troubleshooting Common Issues

Troubleshooting common issues with your Dish Hopper system ensures uninterrupted entertainment. If the Hopper isn’t turning on, check the power cord and ensure it’s properly connected. For no signal issues, verify all HDMI connections and restart the device. If recordings fail, review storage capacity and scheduling conflicts. For frozen menus, perform a hard reset by unplugging the Hopper for 10 seconds. Network-related problems? Ensure your Hopper is connected to the internet and restart your router. Remote control issues? Replace batteries or pair it again. If problems persist, visit the Dish support website or contact customer service for assistance. Regular system updates also help resolve bugs and improve performance.

Manuals

hypex fusion amp manual

Welcome to the Hypex Fusion Amp manual․ This guide provides a comprehensive overview of the FusionAmp FA251, detailing its powerful Class D amplification, efficient performance, and versatile features․ Designed for audio enthusiasts and professionals, it covers installation, operation, and troubleshooting for optimal use․

1․1 Overview of the Hypex Fusion Amp Manual

This manual is your comprehensive guide to the Hypex Fusion Amp, covering models like the FA251, FA252, and more․ It details installation, operation, and troubleshooting to ensure optimal performance․ Designed for both novice and advanced users, the manual provides clear instructions for setup, configuration, and maintenance, ensuring you get the most from your amplifier․

Key Features and Specifications

This section highlights the key features and specifications of the Hypex Fusion Amp, including high-power Class D amplification, efficient performance, and compatibility with various speaker systems․

2․1 Power Output and Efficiency

The Hypex Fusion Amp delivers impressive power output, exceeding 500W, with high efficiency thanks to its advanced Class D amplification and SMPS technology, ensuring minimal power loss and optimal performance․

2․2 Compatibility with Various Speakers

The Hypex Fusion Amp is designed to work seamlessly with diverse speaker systems, supporting loads of 4 ohms or higher․ Its robust output stage ensures stable operation across various configurations, making it suitable for home theaters, professional setups, and custom installations with high-quality drivers like Accuton․

2․3 Advanced Cooling System

The Fusion Amp features an advanced thermal management system, incorporating high-efficiency heat sinks and optimized airflow design․ This ensures reliable operation during extended use, maintaining optimal temperatures for internal components, even under demanding loads, thus enhancing durability and performance․

Installation and Setup

Install your Fusion Amp by first unpacking and inventorying all components․ Place the unit in a well-ventilated area, connect your speakers and power source, then follow the setup guide for initial configuration․

3․1 Unpacking and Inventory

Begin by carefully unpacking the Fusion Amp and verifying all components are included․ Check for the amplifier unit, power cable, remote control, and any additional accessories․ Refer to the user manual for a detailed list of items․ Ensure no damage is visible and all parts are accounted for before proceeding with installation․ This step ensures a smooth setup process․

3․2 Placement and Mounting Options

Position the Fusion Amp in a well-ventilated area to prevent overheating․ Use the provided mounting brackets for secure installation in racks or cabinets․ Ensure proper airflow by maintaining a clearance of at least 10 cm around the unit․ Avoid placing it near direct sunlight or moisture to maintain optimal performance and longevity․ Choose a stable, flat surface for reliable operation․

3․3 Initial Power-Up and Configuration

Connect the power cord to a stable outlet and turn on the Fusion Amp․ The unit will enter standby mode, indicated by the LED․ Press the power button to activate it․ Use the front panel controls or remote to navigate the menu for initial setup, including input selection, volume calibration, and gain adjustment․ Ensure all connections are secure before testing audio output․ Follow on-screen prompts for optimal configuration․

Operation and Navigation

Mastering the Hypex Fusion Amp’s operation involves navigating its intuitive front panel controls, utilizing the LED display for real-time feedback, and employing the remote for seamless adjustments and customization․

4․1 Understanding the Front Panel Controls

The Hypex Fusion Amp’s front panel features a power button, volume knob, and LED indicators for power status, output level, and protection modes․ The intuitive layout allows easy access to key functions, while the LED display provides real-time feedback on the amplifier’s operation․ The remote control complements these controls, enabling seamless navigation and adjustments from a distance, including preset selection and input switching․

4․2 Navigating the Menu System

The Hypex Fusion Amp’s menu system is accessed via the front panel buttons or remote control․ Use the up/down arrows to navigate through options like preset selection, input switching, and EQ settings․ The menu is intuitive, allowing quick adjustments to output levels, crossover frequencies, and protection modes․ Press and hold the menu button to exit, ensuring settings are saved․ LED indicators provide feedback on menu selections and confirmations․

4․3 Remote Control Functionality

The remote control offers convenient operation of the Hypex Fusion Amp, enabling adjustments to volume, mute, and input selection․ IR technology ensures reliable control within line-of-sight․ Key functions include preset recall and power management․ LED indicators on the amplifier confirm remote commands․ This feature enhances user experience by allowing seamless adjustments from a distance, ensuring optimal performance and flexibility in various audio setups and environments․

Connectivity Options

The Hypex Fusion Amp offers versatile connectivity options, including numerous inputs, outputs, wireless capabilities, and the ability to link multiple units, ensuring seamless integration into any audio system․

5․1 Input and Output Interfaces

The Hypex Fusion Amp features a variety of input and output interfaces, including balanced XLR inputs, RCA connectors, and Speaker binding posts․ These interfaces ensure compatibility with diverse audio systems․ Additionally, the amplifier supports daisy-chaining, enabling connection of multiple units for expanded setups․ Wireless connectivity modules are also available, enhancing flexibility for modern audio configurations․

5․2 Wireless Connectivity Features

The Hypex Fusion Amp supports advanced wireless connectivity, including Bluetooth and Wi-Fi options, enabling seamless audio streaming from devices․ With integrated aptX HD, it ensures high-quality wireless transmission․ Additionally, the amplifier is compatible with popular multi-room systems, allowing synchronized playback across multiple zones for an immersive audio experience․

5․3 Daisy-Chaining Multiple Units

The Hypex Fusion Amp allows for daisy-chaining, enabling seamless connection of multiple units to expand your audio system․ This feature enhances scalability, simplifying setups for multi-room systems or larger installations․ Daisy-chaining ensures synchronized operation across all connected units, maintaining consistent audio performance and reducing the complexity of individual connections․

Troubleshooting

Identify and resolve common issues with the Hypex Fusion Amp, such as power problems or connectivity issues․ Refer to the manual or contact Hypex support for assistance․

6․1 Common Issues and Solutions

Address common issues like no power or distorted audio․ Check connections and ensure proper setup․ If no power, verify the outlet and internal fuse․ Contact Hypex support for non-user-replaceable parts․ Refer to the manual for detailed solutions and troubleshooting steps to resolve issues efficiently and maintain optimal performance․

6․2 Power Problems and Fuse Replacement

Address power issues by checking the outlet and ensuring connections are secure․ If no power, the internal fuse may be blown․ Note that this fuse is not user-replaceable․ Contact Hypex Electronics for professional service or repair․ Always refer to the manual for guidance on handling power-related problems and fuse replacement procedures to avoid further complications․

6․3 Resetting the Amplifier

To reset the Hypex Fusion Amp, power it off and unplug it from the power source․ Wait 30 seconds to ensure all capacitors discharge․ Plug it back in and turn it on․ This process restores default settings․ If issues persist, contact Hypex support for further assistance or refer to the manual for detailed reset procedures․

Maintenance and Care

Regularly clean the unit with a soft cloth to prevent dust buildup․ Check for firmware updates to ensure optimal performance․ Store in a dry, cool place to maintain longevity and functionality․

7․1 Cleaning the Unit

Regular cleaning is essential to maintain the Hypex Fusion Amp’s performance․ Use a soft, dry cloth to wipe the exterior and vents, ensuring dust and debris are removed․ Avoid liquid cleaners, as they may damage the finish or internal components․ For stubborn dust in vents, use compressed air cautiously․ Inspect for any visible debris that could impede airflow or functionality․ Additionally, check for firmware updates to keep the unit optimized․

7․2 Updating Firmware

To ensure optimal performance, regularly update the Hypex Fusion Amp’s firmware․ Visit the official Hypex website to check for the latest version․ Download the update file and follow the provided instructions for installation․ Use a USB connection to transfer the firmware to the unit․ Avoid interrupting the update process to prevent potential damage or system instability․ Updated firmware enhances functionality and resolves any operational issues․


7․3 Storage and Transportation Tips

Store the Hypex Fusion Amp in a cool, dry environment, away from direct sunlight and moisture․ Use the original packaging for safe transport․ Avoid exposure to extreme temperatures or humidity․ Keep the unit upright to prevent internal component damage․ Secure the amplifier during transport to avoid movement․ Disconnect all cables and store them separately to prevent damage or tangling․

Warranty and Support

Hypex offers a limited warranty covering manufacturing defects for two years․ Contact support via the official website, email, or authorized service centers for assistance or repairs․

8․1 Warranty Coverage and Terms

The Hypex Fusion Amp is covered by a limited two-year warranty from the date of purchase, protecting against manufacturing defects․ The warranty does not cover user-replaceable fuses or damage caused by misuse․ For service, contact Hypex Electronics through their official website, email, or authorized service centers․ Unauthorized repairs void the warranty․

8․2 Contacting Hypex Support

For assistance, visit the official Hypex website or contact their support team via email or phone․ Provide your amplifier model, serial number, and detailed issue description․ Authorized service centers are also available for repair and maintenance․ Ensure to use official channels to avoid unauthorized service, which could void your warranty․

8․3 Authorized Service Centers

Authorized Hypex service centers provide expert repair and maintenance for your FusionAmp․ Locate these centers through the official Hypex website or by contacting support․ Ensure genuine parts and warranty compliance by using these certified services․ Trained technicians handle repairs efficiently, maintaining your amplifier’s performance and longevity․

Design and Build Quality

The Hypex Fusion Amp is built with premium materials, incorporating Class D amplification and SMPS for high efficiency․ Its durable design ensures long-term reliability and optimal performance․

9․1 Internal Components and Circuitry

The Hypex Fusion Amp features high-quality internal components and advanced circuitry․ The Class D amplification technology ensures efficient power delivery, while the SMPS (Switch-Mode Power Supply) provides stable and reliable operation․ These components are carefully selected to minimize noise and maximize performance, ensuring a clean and precise audio output․ The design focuses on thermal management to maintain optimal operating conditions and longevity․

9․2 Thermal Management System

The Hypex Fusion Amp incorporates an advanced thermal management system to ensure optimal performance and reliability․ Heat sinks and ventilation systems effectively dissipate heat, preventing overheating․ The design includes smart fan control for efficient cooling during high-power operation, maintaining stable temperatures and ensuring long-term durability․ This system is crucial for sustaining the amplifier’s performance under various operating conditions․

9․3 Aesthetic Design and Durability

The Hypex Fusion Amp combines sleek, modern aesthetics with robust durability․ Its compact aluminum chassis ensures longevity while maintaining a premium appearance․ The design features a scratch-resistant finish and a sturdy construction, making it both visually appealing and reliable for long-term use in various audio setups․

Applications

The Hypex Fusion Amp is ideal for home theater systems, professional audio setups, and custom installations, offering versatile amplification solutions for diverse audio environments and requirements․

10․1 Home Theater Systems

The Hypex Fusion Amp is a powerful solution for home theater systems, delivering high-quality sound with its efficient Class D amplification․ It integrates seamlessly with surround sound setups, ensuring immersive audio experiences․ With its robust power output and advanced thermal management, it reliably drives speakers in demanding home theater environments, providing clear and dynamic soundscapes for movies and music alike․

10․2 Professional Audio Setup

The Hypex Fusion Amp excels in professional audio setups, offering high-power amplification with precision and reliability․ Its Class D design ensures efficient performance, making it ideal for live sound systems, public address installations, and studio environments․ With robust power handling and advanced thermal management, it delivers consistent, high-fidelity sound even in demanding professional settings, ensuring optimal audio reproduction and system reliability․

10․3 Custom Installation Scenarios

The Hypex Fusion Amp is versatile for custom installations, offering tailored solutions for unique audio setups․ Its compact design and high-power output make it ideal for multi-zone systems, hidden installations, and specialized environments․ With advanced thermal management, compatibility with various speakers, and flexible connectivity options, it ensures reliable and high-fidelity sound in any custom configuration․

The Hypex Fusion Amp delivers exceptional performance and reliability, making it a top choice for both home and professional audio setups․ Its versatility, power, and efficiency ensure lasting satisfaction and future-proof audio solutions․

11․1 Summary of Key Features

The Hypex Fusion Amp manual highlights a powerful Class D amplifier with high-efficiency SMPS, delivering exceptional sound quality and versatile connectivity options․ It supports daisy-chaining, features advanced cooling systems, and ensures compatibility with various speaker configurations․ The unit also includes user-friendly controls, remote functionality, and firmware update capabilities, making it a robust solution for both home and professional audio applications․ Its durable design and reliable performance ensure long-term satisfaction․

11․2 Final Thoughts and Recommendations

The Hypex Fusion Amp stands out as a high-performance, efficient amplifier ideal for both home and professional setups․ Its robust design, advanced features, and reliable operation make it a top choice for audiophiles․ For optimal performance, follow the manual’s guidelines and explore customization options․ Highly recommended for those seeking superior sound quality and versatility in their audio systems․

PDF

miller & levine biology pdf

Overview of Miller & Levine Biology PDF

Miller & Levine Biology PDF is a widely used high school textbook known for its comprehensive coverage of biology topics, including cells, genetics, and evolution. The foundation edition offers embedded reading support and inquiry activities, making complex concepts accessible for students. It is a respected resource in biology education, blending scientific practices with crosscutting concepts to support learning outcomes.

Miller & Levine Biology is a comprehensive textbook authored by Kenneth Miller and Joseph Levine, designed for high school students. It provides a detailed exploration of biological concepts, including cells, genetics, evolution, and ecology. The textbook is structured to promote scientific literacy and critical thinking, making it a popular choice for educators and students seeking a clear and engaging approach to biology education.

1.2 Significance of the PDF Format

The PDF format of Miller & Levine Biology offers enhanced accessibility and convenience for students and educators. It allows for easy downloading and digital access, supporting remote learning and flexible study environments. The PDF preserves the textbook’s layout and interactive features, ensuring readability and engagement. Its digital nature also reduces the need for physical copies, making it an eco-friendly and cost-effective option for learners worldwide.

Features of the Miller & Levine Biology PDF


The PDF includes embedded reading support and inquiry activities to enhance understanding and critical thinking. These features make complex biological concepts engaging and accessible for students.

2.1 Embedded Reading Support

The Miller & Levine Biology PDF incorporates embedded reading support, designed to assist students in understanding complex biological concepts. This feature includes highlighted key terms, summaries, and visual aids, ensuring that learners can grasp challenging material effectively. The support tools are integrated seamlessly within the text, making it easier for students to follow along and retain information without disruption.

2.2 Inquiry Activities for Scientific Thinking

The Miller & Levine Biology PDF includes inquiry activities designed to promote scientific thinking and critical analysis. These activities encourage students to explore biological concepts through hands-on investigations and real-world applications. By blending core ideas with scientific practices, the textbook helps learners develop essential skills in observation, experimentation, and problem-solving. This approach fosters a deeper understanding of biology and prepares students for advanced studies in science.

Authors and Their Contributions

The Miller & Levine Biology PDF includes inquiry activities designed to promote scientific thinking and critical analysis. These activities encourage students to explore biological concepts through hands-on investigations and real-world applications. By blending core ideas with scientific practices, the textbook helps learners develop essential skills in observation, experimentation, and problem-solving. This approach fosters a deeper understanding of biology and prepares students for advanced studies in science.

3.1 Kenneth Miller and Joseph Levine

Kenneth Miller and Joseph Levine are renowned biologists and educators who co-authored the Miller & Levine Biology textbook. Their collaborative work focuses on making complex biological concepts accessible to students. Miller, a prominent evolutionary biologist, and Levine, an expert in biology education, bring a unique blend of scientific expertise and teaching experience. Their contributions have shaped modern biology education, emphasizing critical thinking and scientific literacy through engaging content and innovative teaching methods.

3.2 Their Impact on Biology Education

Kenneth Miller and Joseph Levine have revolutionized high school biology education through their textbook, making it a cornerstone of modern biology instruction. Their work integrates NGSS standards, emphasizing scientific practices and real-world applications. By blending core concepts with inquiry-based learning, they have influenced millions of students, fostering a deeper understanding of biology and its relevance to everyday life, while setting a new standard for science education.

Content and Structure of the Textbook

Miller & Levine Biology PDF covers essential topics like cells, genetics, evolution, and ecology, organized into accessible chapters. The textbook integrates embedded reading support and inquiry activities to enhance student understanding, ensuring a clear and structured approach to learning biology concepts and their real-world applications.

4.1 Chapters and Topics Covered

The Miller & Levine Biology PDF covers a wide range of topics, including cells, genetics, evolution, and ecology. It also delves into Earth and Space science, providing a comprehensive understanding of biological concepts. The textbook is designed for high school students, offering detailed chapters on foundational topics and their practical applications, ensuring a thorough grasp of biology and its relevance to the natural world.

4.2 Organization and Accessibility

The Miller & Levine Biology PDF is meticulously organized, with chapters logically sequenced to build understanding progressively. Embedded reading support and inquiry activities enhance accessibility, ensuring complex concepts are engaging and comprehensible. The PDF aligns with educational standards, making it a valuable resource for both teachers and students, and its digital format allows easy navigation and accessibility across various devices, supporting diverse learning needs effectively.

Remote Learning Resources

Miller & Levine Biology PDF offers free remote learning tools, including digital features and interactive activities, to support student engagement and accessibility in virtual classrooms effectively.

5.1 Free Remote Learning Tools

Miller & Levine Biology PDF provides a variety of free remote learning tools, including interactive simulations, virtual labs, and digital activities. These resources are designed to support NGSS standards and enhance student engagement. Accessible through companion websites, they offer flexible learning options, enabling students to explore biological concepts dynamically from any location, while also fostering a deeper understanding of scientific principles and practices.

5.2 Alignment with NGSS Standards

Miller & Levine Biology PDF aligns with Next Generation Science Standards (NGSS), emphasizing core ideas, scientific practices, and crosscutting concepts. It integrates evolution, ecology, and other key topics to meet NGSS performance expectations. The textbook supports a cohesive understanding of biological principles, preparing students for advanced science education and fostering critical thinking aligned with modern educational standards and practices.

Download Options and Availability

Miller & Levine Biology PDF is available through various online platforms, offering free downloads and paid options. Legality varies, so ensure using authorized sources.

6.1 Legality of Free Downloads

Downloading Miller & Levine Biology PDF for free from unauthorized sites may infringe copyright laws. While some platforms offer free access, legality varies, and using pirated material is illegal. Always verify the source’s authorization to avoid legal consequences. Publishers often provide digital access through official channels, ensuring compliance with copyright regulations. Ethical access supports authors and publishers, promoting educational resources sustainably.

6.2 Platforms Offering the PDF

Various platforms offer the Miller & Levine Biology PDF, including authorized educational sites and third-party repositories. Platforms like eBookLuna, PoetryTranslation.org, and BiologyTextbookMillerLevine provide download options in formats such as PDF and EPub. While some sites offer free access, others may require subscriptions or purchases. Always verify the legitimacy and authorization of the platform to ensure compliance with copyright laws and access high-quality, authentic content safely.

Editions of Miller & Levine Biology

Miller & Levine Biology is available in multiple editions, with the Foundation Edition offering enhanced accessibility. The textbook is widely used in high schools for its comprehensive content.

7.1 Foundation Edition Features

The Foundation Edition of Miller & Levine Biology offers enhanced accessibility with embedded reading support and inquiry activities. These features promote scientific thinking and make complex concepts more understandable for students. The edition maintains the same comprehensive content as the original but presents it in a more approachable format, ensuring inclusivity and effectiveness for diverse learners.

7.2 Comparisons with Other Editions

The Foundation Edition of Miller & Levine Biology is tailored for accessibility, offering enhanced features like embedded reading support and inquiry activities. Compared to other editions, it maintains the same core content but presents it in a more approachable format. This makes it ideal for students who need additional support while still covering essential biological concepts and principles.

The Role of Miller & Levine Biology in Education

Miller & Levine Biology is a leading educational resource, widely adopted in high schools for its comprehensive coverage of biological concepts. Its alignment with NGSS standards ensures it supports modern science education. The textbook’s accessibility features and remote learning resources make it a versatile tool for teachers and students, fostering deeper understanding and engagement in biology.

8.1 Popularity in High Schools

Miller & Levine Biology is widely used in U.S. high schools due to its comprehensive coverage of biological concepts, including evolution and genetics. Its availability as a PDF enhances accessibility, making it easier for students and educators to access the material. The textbook’s clear explanations, engaging activities, and alignment with educational standards contribute to its widespread adoption and popularity among high school programs nationwide.

8.2 Impact on Student Learning Outcomes

Miller & Levine Biology significantly enhances student learning outcomes by providing a structured, inquiry-based approach that fosters critical thinking and scientific literacy. The PDF format allows seamless integration of embedded reading support and interactive activities, ensuring students grasp complex biological concepts effectively. This resource has been shown to improve performance in standardized tests and prepare students for advanced science courses, making it a valuable tool in biology education.

Additional Resources and Supplements

Miller & Levine Biology offers companion websites, interactive features, and digital tools to enhance learning. These resources provide additional study materials, practice tests, and multimedia content.

9;1 Companion Websites and Materials

Miller & Levine Biology is supported by companion websites offering a wealth of materials, including study guides, practice tests, and interactive features. These resources are designed to supplement the textbook, providing students with additional learning tools. The websites often include multimedia content such as videos and simulations to enhance understanding. Many of these materials are available for free, aligning with the NGSS standards and catering to diverse learning styles.

9.2 Interactive and Digital Features

Miller & Levine Biology PDF incorporates interactive and digital features to enhance learning. These include simulations, virtual labs, and interactive diagrams that allow students to explore biological concepts visually. Additionally, the digital version offers personalized learning paths and real-time assessments, providing immediate feedback. These tools engage students and cater to diverse learning styles, making complex topics more accessible and fostering a deeper understanding of biology.

The Miller & Levine Biology PDF is a valuable resource with interactive features that enhance learning, emphasizing the importance of ethical access for all students.

10.1 Final Thoughts on the PDF Version

The Miller & Levine Biology PDF version is a highly accessible and engaging resource, offering embedded reading support and inquiry activities. Its digital format enhances portability and accessibility, making it ideal for remote learning environments. The PDF version aligns with NGSS standards, ensuring comprehensive coverage of biology topics and fostering critical thinking. It remains a cornerstone in modern biology education, providing students with a robust learning experience.

10.2 Importance of Ethical Access

Accessing the Miller & Levine Biology PDF ethically is crucial to uphold copyright laws and support educational integrity. While free downloads may be tempting, they often violate legal standards. Purchasing or using authorized platforms ensures quality and legality. Ethical access promotes fair compensation for authors and publishers, fostering continued development of educational resources. It also guarantees students receive accurate, high-quality materials for their learning journey.

Manuals

aisc steel construction manual

The AISC Steel Construction Manual is a comprehensive guide published by the American Institute of Steel Construction. It provides standardized design practices, specifications, and technical details for structural steel construction, ensuring safety and efficiency in building design. The manual is widely recognized as a cornerstone for engineers, architects, and contractors involved in steel framing projects. It is regularly updated to reflect advancements in materials, codes, and construction methodologies, making it an indispensable resource for the industry.

1.1 Overview of the Manual’s Purpose and Scope

The AISC Steel Construction Manual serves as a primary reference for designing steel structures, providing standardized design specifications, technical details, and best practices. Its purpose is to ensure safety, efficiency, and compliance with current engineering standards. The manual covers a wide range of topics, including beam and column design, connection details, and floor plate specifications. It is intended for structural engineers, architects, and contractors involved in steel construction projects. Regular updates reflect advancements in materials and design methodologies, making it an essential tool for modern steel framing applications.

1.2 Importance of the Manual in Structural Steel Design

The AISC Steel Construction Manual is a cornerstone in structural steel design, offering standardized specifications and design aids that ensure compliance with safety and engineering standards. It simplifies complex calculations and provides detailed tables for efficient design, such as Table 3-17 for floor plates. The manual fosters consistency across projects, reducing errors and enhancing reliability. Its updates, like the 16th edition, reflect industry advancements, making it indispensable for engineers and architects. By adhering to its guidelines, professionals ensure structurally sound and cost-effective steel framing solutions.

History and Evolution of the AISC Steel Construction Manual

The AISC Steel Construction Manual has evolved significantly since its first publication, adapting to advancements in materials, safety standards, and design practices. Each edition reflects industry progress, ensuring the manual remains a vital resource for structural steel professionals.

2.1 Key Editions and Their Significance

The AISC Steel Construction Manual has undergone numerous revisions, with key editions marking significant advancements in steel design. The 15th edition introduced load and resistance factor design (LRFD), revolutionizing structural analysis. The 16th edition updated specifications, codes, and design aids, aligning with modern engineering practices. Each edition reflects industry progress, ensuring the manual remains a cornerstone for engineers and architects. These updates have enhanced safety, efficiency, and innovation in steel construction, making the manual indispensable for professionals worldwide.

2.2 Major Updates in Recent Editions

Recent editions of the AISC Steel Construction Manual have introduced significant updates to align with current engineering practices and standards. The 16th edition notably enhanced design aids, including Table 3-17 for floor plate design, and incorporated revised specifications for materials and connections. New sections on structural analysis and software integration were added, reflecting advancements in computational design. These updates ensure the manual remains a vital resource for engineers, offering practical solutions and adherence to the latest codes. The updates emphasize safety, efficiency, and innovation in steel construction projects.

Key Sections of the AISC Steel Construction Manual

The manual covers essential design elements like beams, girders, columns, and connections, supported by detailed tables and design aids to facilitate accurate structural steel framing calculations.

3.1 Design of Beams and Girders

The AISC Steel Construction Manual provides detailed guidelines for designing beams and girders, addressing load calculations, bending moments, and shear forces. It includes formulas for determining section properties like section modulus and plastic section modulus. Design considerations such as lateral-torsional buckling and deflection limits are also covered. The manual offers tables for selecting appropriate steel sections and includes examples to illustrate practical applications. These design aids ensure engineers can efficiently and safely design structural steel members for various construction projects, from residential to industrial applications.

3.2 Design of Columns and Compression Members

The AISC Steel Construction Manual offers detailed guidelines for designing columns and compression members, focusing on stability and load-carrying capacity. It provides formulas for calculating critical loads and addresses factors like slenderness ratio and material properties. The manual includes design charts and tables to simplify the selection of appropriate steel sections. Engineers can determine the maximum allowable compressive stress and ensure compliance with safety criteria. Additionally, the manual covers design considerations for axial loads and combined axial and bending loads, ensuring columns are safe and efficient in various structural applications.

3.3 Connection Design and Details

The AISC Steel Construction Manual provides extensive guidance on connection design, emphasizing safety and structural integrity. It covers various types of connections, including shear end-plate, single plate shear, and moment connections. Engineers can find detailed specifications for bolts, welds, and other fastening methods. The manual also addresses seismic design considerations and load transfer mechanisms. Design examples and tables are included to aid in selecting appropriate connection details. This section ensures that connections are designed to withstand applied forces, providing a reliable and durable structural system. Proper connection detailing is crucial for overall building performance and safety.

Tables and Design Aids in the Manual

The AISC Steel Construction Manual contains numerous tables and design aids that simplify complex calculations. These tools cover various steel member properties, connection details, and load tables, enabling quick reference for engineers during the design process. The tables are meticulously organized, providing essential data for beams, columns, and connections. Design aids further enhance the manual’s practicality, offering formulas and charts to streamline structural analysis and ensure compliance with industry standards. These resources are invaluable for accurately and efficiently completing steel design projects. The manual’s comprehensive tables and aids are regularly updated to reflect current engineering practices and material specifications.

4.1 Table 3-17: Floor Plate Design Information

Table 3-17 in the AISC Steel Construction Manual provides essential design information for floor plates, including span tables, thickness requirements, and load-bearing capacities. This table is crucial for engineers designing steel floor systems, offering data for various steel grades and plate sizes. It simplifies the selection of appropriate floor plate sizes based on specific load conditions and span lengths. The table is regularly updated to reflect current design standards and material specifications, ensuring accurate and efficient design processes. It serves as a go-to reference for structural engineers and architects working on steel-framed buildings, enabling compliance with industry codes and best practices.

4.2 Other Essential Tables for Steel Design

Beyond Table 3-17, the AISC Steel Construction Manual includes numerous other critical tables that aid in steel design. These tables cover beam sections, column capacities, connection details, and fastener specifications. They provide essential data for selecting appropriate steel members, ensuring compliance with design codes, and optimizing structural performance. Tables for beam design include section properties and maximum allowable loads, while column tables offer axial load capacities and slenderness ratios. Connection tables detail bolt and weld capacities, and fastener tables specify ASTM standards and material properties. These resources collectively enable efficient and accurate steel frame design, catering to diverse project requirements and ensuring structural integrity. Engineers rely on these tables to streamline their workflows and adhere to industry standards, making them indispensable for modern steel construction projects.

Using the AISC Steel Construction Manual for Practical Applications

The manual is invaluable for solving real-world structural steel design problems, offering practical examples and case studies to guide engineers in applying its specifications effectively.

5.1 Design Examples and Case Studies

The AISC Steel Construction Manual includes detailed design examples and case studies to illustrate practical applications of its specifications. These examples cover various structural elements, such as beams, columns, and connections, providing step-by-step solutions for common design challenges. Case studies highlight real-world projects, demonstrating how the manual’s guidelines are applied to ensure safety and efficiency. Engineers can use these resources to refine their skills and adapt solutions to specific scenarios, making the manual an essential tool for both education and professional practice in structural steel design.

5.2 Software Integration for Steel Frame Analysis

The AISC Steel Construction Manual is often integrated with structural analysis software, enhancing the design process. Tools like SCIA Engineer allow engineers to input, analyze, and design 3D steel frames efficiently. The manual’s specifications and tables complement software capabilities, ensuring accurate and compliant designs. By combining manual guidelines with software, engineers can automate calculations, generate detailed reports, and streamline project workflows. This integration supports modern engineering practices, enabling faster and more precise steel frame analysis while adhering to industry standards.

Updates in the 16th Edition of the Manual

The 16th edition introduces revised specifications, updated design aids, and enhanced clarity in steel design standards. It reflects the latest advancements in structural steel construction practices.

6.1 Revised Specifications and Codes

The 16th edition incorporates updated specifications and codes to align with current industry standards. ASTM material specifications have been revised, ensuring compliance with the latest manufacturing and testing requirements. Additionally, design codes have been enhanced to address modern construction challenges, providing clearer guidelines for engineers. These revisions aim to improve constructability, safety, and efficiency in steel design, reflecting advancements in research and practical applications. The updates ensure that the manual remains a reliable and authoritative reference for structural steel construction professionals.

6.2 Enhanced Design Aids and Tools

The 16th edition introduces enhanced design aids and tools to streamline the design process. Updated tables, such as Table 3-17, provide comprehensive data for floor plate design, reducing calculation time. New design charts and equations simplify complex analyses, ensuring accuracy and efficiency. Additionally, digital tools and software integration, like SCIA Engineer, enable 3D steel frame analysis and design. These enhancements empower engineers to tackle modern structural challenges with precision, making the manual an indispensable resource for both novice and experienced professionals in the field of structural steel construction.

Licensing and Accessing the AISC Steel Construction Manual


The AISC Steel Construction Manual is available in digital versions with flexible licensing options, ensuring accessibility for professionals. Past editions are also accessible for reference purposes, and the latest edition can be purchased directly from the AISC website, providing convenient access to essential design resources and standards.

7.1 Digital Versions and Licensing Options

The AISC Steel Construction Manual is available in digital formats, offering enhanced accessibility and convenience. Licensing options include single-user and multi-user agreements, catering to individual professionals and large firms. Subscriptions provide flexible access, while perpetual licenses offer long-term use. Digital versions are compatible with various devices, ensuring portability. The AISC website provides detailed licensing options, allowing users to choose the plan that best fits their needs. Digital copies are regularly updated, reflecting the latest standards and design aids, making them indispensable for modern structural steel design practices.

7.2 Availability of Past Editions

Past editions of the AISC Steel Construction Manual are accessible through the AISC website and authorized resellers. While the latest edition is the primary reference, older versions are available for historical or specific project requirements. Digital archives and physical copies of previous editions can be purchased separately. However, access to outdated editions may require special permission due to updates in design standards. Engineers and designers often reference older manuals for legacy projects or to compare historical design practices. AISC ensures that all editions remain accessible, supporting long-term project continuity and academic research.

The Role of AISC in the Structural Steel Industry

The American Institute of Steel Construction (AISC) is a leader in setting standards and advancing innovation in structural steel design and construction. It advocates for the industry through education, research, and the development of essential resources like the Steel Construction Manual, fostering collaboration and excellence among professionals.

8.1 AISC’s Contribution to Steel Design Standards

AISC plays a pivotal role in shaping steel design standards through its publications and advocacy. The institute develops and updates specifications, such as those in the Steel Construction Manual, to reflect modern engineering practices and material advancements. By incorporating feedback from industry professionals and aligning with the latest codes, AISC ensures that its standards promote safety, efficiency, and innovation in structural steel projects. Its efforts have established it as a trusted authority, influencing design practices worldwide and fostering continuous improvement in the field of structural steel construction.

8.2 Educational Resources and Workshops

AISC offers extensive educational resources and workshops to enhance professionals’ expertise in structural steel design and construction. These programs cover topics like the Steel Construction Manual, design standards, and innovative techniques. AISC’s SteelDays event and online webinars provide hands-on learning opportunities, while their publications and courses ensure engineers stay updated on the latest practices. These resources are designed to support continuous professional development, helping industry professionals maintain high standards of safety and efficiency in their projects. They also foster collaboration and knowledge-sharing within the structural steel community, advancing the field as a whole.

PDF

india learning arabic guide pdf

Learning Arabic in India is gaining popularity due to its cultural and academic significance. With resources like the 75-page Arabic learning PDF guide, beginners can explore the language’s basics, grammar, and cultural nuances. These guides offer structured learning, making Arabic accessible and engaging for Indian learners.

Overview of Arabic Language Importance

The Arabic language holds significant cultural, religious, and intellectual value globally. As the liturgical language of Islam, it is central to understanding the Quran and Islamic traditions. In India, Arabic is recognized for its historical influence on literature, art, and education. Its importance extends to diplomacy, international relations, and academic research. Proficiency in Arabic opens doors to diverse career opportunities and enhances cultural understanding. With its rich script and poetic depth, Arabic remains a vital language for scholars and learners alike, connecting India to the Arab world and beyond.

Why Learn Arabic in India?

Learning Arabic in India offers numerous benefits, from enhancing career prospects to deepening cultural understanding. India’s historical ties with Arab nations highlight Arabic’s significance in diplomacy, trade, and education. Arabic proficiency can open doors to scholarships, research opportunities, and jobs in sectors like translation, international relations, and Islamic studies. Additionally, it bridges cultural gaps, fostering connectivity between India and the Arab world. With accessible resources like the 75-page Arabic learning PDF guide, mastering Arabic in India is both practical and rewarding.

Arabic Language Basics

Mastering the Arabic alphabet is the foundation of learning the language. The 75-page Arabic learning PDF guide emphasizes proper pronunciation of Fus-ha, the formal Arabic used in Quranic texts and official communications. Understanding these basics is crucial for progress.

Understanding the Arabic Alphabet

The Arabic alphabet consists of 28 letters, each with unique shapes and sounds. The 75-page Arabic learning PDF guide provides a crash course on these letters, aiding learners in recognizing and writing them correctly. Mastery of the alphabet is essential for reading and writing in Arabic, forming the building blocks of further language study.

Basic Grammar and Syntax

Mastering Arabic grammar and syntax is crucial for effective communication. The 75-page Arabic learning PDF guide simplifies these concepts, focusing on sentence structure, verb conjugation, and noun cases. Arabic grammar revolves around root systems, with most words derived from three-letter roots. Understanding gender, number, and tense is vital. Fus-ha, the standard Arabic, differs from dialects but is essential for formal writing and comprehension. The guide provides exercises to practice these rules, making grammar accessible for Indian learners.

Resources for Learning Arabic

Discover comprehensive resources like the 75-page Arabic learning PDF guide, offering structured lessons. Explore online courses, language apps, and tools designed to simplify Arabic learning for all levels in India.

Best PDF Guides for Beginners

The 75-page Arabic learning PDF guide is an excellent resource for beginners in India. It provides a comprehensive introduction to the Arabic language, covering the alphabet, basic grammar, and essential phrases. Divided into five parts, the guide offers structured lessons, making it easy to follow and self-study. It emphasizes proper pronunciation and includes exercises to practice writing and speaking. Additionally, the guide highlights cultural aspects, helping learners understand the language’s significance in India. This user-friendly PDF is a must-have for anyone starting their Arabic learning journey.

Recommended Online Courses and Tools

For learners in India, platforms like www.LearnArabicOnline.com offer structured courses tailored for beginners. These courses include interactive lessons, audio clips, and exercises to practice writing and speaking. Additionally, tools like language learning apps provide flashcards and quizzes to reinforce memorization. Many websites offer free resources, including PDF guides and video tutorials, making Arabic learning accessible. These tools are designed to cater to different learning styles, ensuring a comprehensive and engaging experience for those eager to master the language.

Cultural Aspects of Arabic Learning

The 75-page Arabic learning PDF guide highlights the cultural significance of Arabic, helping Indian learners connect with its rich heritage while enhancing their language skills through cultural immersion.

Cultural Significance of Arabic in India

Arabic holds deep cultural and historical significance in India, particularly in Islamic traditions and education. Many Indian scholars and institutions have preserved Arabic literature and Islamic theology. The 75-page Arabic learning PDF guide emphasizes this cultural connection, offering insights into India’s rich Arabic heritage. By learning Arabic, students can explore Islamic texts, literature, and historical documents, fostering a deeper understanding of India’s diverse cultural tapestry and its influence on global Islamic studies and traditions.

Integrating Culture into Language Learning

Learning Arabic in India is enriched by the country’s historical and cultural ties to the language. The 75-page Arabic learning PDF guide highlights how understanding Arabic culture enhances language acquisition. From Islamic traditions to literary works, integrating cultural insights helps learners connect with the language on a deeper level. Engaging with Arabic movies, music, and conversing with native speakers further enriches the learning experience, making it a holistic journey of cultural and linguistic exploration in India.

Practical Tips for Effective Learning

Set clear goals, create a study schedule, and use flashcards to memorize vocabulary. Utilize language apps and practice consistently for effective Arabic learning in India.

Setting Goals and Creating a Study Schedule

Setting clear, achievable goals is essential for effective Arabic learning. Start by defining your objectives, whether it’s mastering the alphabet or conversing fluently. Create a structured study schedule, dedicating specific times to vocabulary, grammar, and listening exercises. Consistency is key; aim to practice daily, even for short periods. Use tools like flashcards for memorization and track your progress. Stay motivated by celebrating small milestones and adjusting your schedule as needed to maintain momentum and enjoy the learning process.

Using Flashcards and Language Apps

Flashcards are an excellent tool for memorizing Arabic vocabulary and phrases. Apps like Anki or Quizlet allow you to create digital flashcards and track your progress. Language apps such as Duolingo, Babbel, and Memrise offer interactive lessons tailored to your learning pace. These tools provide bite-sized exercises, making it easy to practice regularly. Additionally, many apps include audio features to improve pronunciation and listening skills. Incorporating these resources into your study routine enhances retention and keeps learning engaging and accessible, especially for those in India seeking flexible study options.

Opportunities After Learning Arabic

Mastering Arabic opens doors to diverse opportunities, including careers in diplomacy, translation, and international business. It also enhances access to Middle Eastern markets and cultural exchanges.

Career Prospects in India

Learning Arabic in India unlocks diverse career opportunities in translation, interpretation, and international relations. Professionals with Arabic proficiency are in demand in sectors like diplomacy, education, and Middle Eastern trade. Roles such as Arabic teachers, translators, and cultural advisors are increasingly sought after. Additionally, expertise in Arabic enhances prospects in journalism, tourism, and academia, offering a competitive edge in India’s globalizing job market. The 75-page Arabic learning PDF guide equips learners with essential skills, preparing them for these rewarding career pathways.

Cultural and Academic Opportunities

Learning Arabic in India opens doors to rich cultural and academic experiences. It fosters deeper understanding of Arabic-speaking cultures, enabling participation in cultural events and exchange programs. Academically, proficiency in Arabic grants access to scholarships, research opportunities, and collaborations with Middle Eastern universities. The 75-page Arabic learning PDF guide serves as a valuable resource, aiding learners in exploring these avenues effectively. This skill also enhances engagement with India’s diverse cultural fabric, bridging gaps between communities and fostering mutual understanding.

Challenges and Solutions

Learning Arabic in India often involves challenges like pronunciation difficulties and complex script. Solutions include using structured PDF guides and practicing with online tools or language apps.

Common Difficulties Faced by Learners

Learners of Arabic in India often face challenges such as mastering the pronunciation of unique sounds like /ʔ/ and /x/, which don’t exist in Indian languages. The script, written right-to-left, can also be daunting. Additionally, the complexity of Arabic grammar, such as declension patterns and verb conjugations, may overwhelm beginners. Limited exposure to native speakers and dialect variations further complicate the learning process. However, structured resources like the 75-page Arabic learning PDF guide and language apps can help learners overcome these hurdles effectively.


Strategies to Overcome Learning Barriers

Strategies to Overcome Learning Barriers

To overcome learning barriers, learners can use structured resources like the 75-page Arabic learning PDF guide to master the basics. Setting specific goals and creating a study schedule helps maintain consistency. Utilizing flashcards and language apps enhances vocabulary retention. Engaging in language exchange programs or online communities provides exposure to native speakers. Breaking learning into manageable parts, such as focusing on one dialect at a time, simplifies the process. Regular practice and seeking feedback from teachers or native speakers further accelerate progress. Consistency and dedication are key to overcoming challenges.

Final Tips for Continuous Improvement

For continuous improvement in learning Arabic, practice consistently and immerse yourself in the language. Use flashcards and language apps to reinforce vocabulary. Engage with native speakers and watch Arabic media to enhance comprehension. Regularly review grammar rules and practice writing in Arabic. Utilize the 75-page PDF guide for structured learning and explore additional resources like online courses and cultural materials to deepen your understanding.

Encouragement for Further Learning

Embrace the journey of learning Arabic with enthusiasm and dedication. The 75-page Arabic PDF guide offers a comprehensive start, while online courses and cultural resources provide deeper insights. Surround yourself with Arabic media, engage in conversations, and explore the rich cultural heritage tied to the language. Stay motivated, track your progress, and celebrate small achievements. Remember, each step brings you closer to mastering Arabic, opening doors to new opportunities and connections.

Additional Resources

Explore the 75-page Arabic learning PDF guide for comprehensive lessons. Utilize online courses, cultural tools, and language apps to enhance your learning journey. Flashcards and interactive resources are also available for practice.

Free and Paid Materials for Advanced Learning

For advanced learners, numerous resources are available, including the 75-page Arabic learning PDF guide, which offers comprehensive lessons. Paid online courses and premium language apps provide structured, in-depth learning experiences. Additionally, flashcards and interactive tools can enhance vocabulary and grammar practice. These materials cater to diverse learning styles, ensuring a well-rounded approach to mastering Arabic. They are designed to build on foundational knowledge, helping learners achieve proficiency in both spoken and written Arabic.

Instructions

dock plate hold-down assembly instructions for removal

Understanding the proper removal of a dock plate hold-down assembly is crucial for maintaining safety and preventing equipment damage during maintenance or replacement procedures, ensuring smooth operations afterward.

1.1 Overview of the Hold-Down Assembly

The hold-down assembly is a critical component of dock levelers, designed to secure the ramp in place during loading and unloading operations. Typically consisting of a ratchet mechanism, springs, and a straps, it ensures stability and safety by preventing unintended movement. Proper functionality relies on precise alignment and secure anchoring to the dock pit, making it essential for smooth warehouse operations and equipment protection.

1.2 Importance of Proper Removal Techniques

Proper removal techniques for the dock plate hold-down assembly are vital to ensure safety, prevent damage to the dock plate and surrounding structures, and maintain operational efficiency. Improper removal can lead to equipment malfunction, operational delays, and increased maintenance costs. Following step-by-step instructions ensures the process is executed safely and effectively, preserving the integrity of the dock leveler and its components for future use.

Safety Considerations and Preparations

Ensure the dock leveler is securely supported to prevent movement. Wear proper PPE, including gloves and safety glasses. Disconnect power tools and maintain a clear workspace to avoid accidents.

2.1 Ensuring the Dock Leveler is Securely Supported

Before removing the hold-down assembly, ensure the dock leveler is securely supported. Use sturdy jack stands or blocking to prevent sudden movement. Never rely solely on the dock’s springs, as they may release unexpectedly. Ensure the dock is in its parked position and verify that all supports are stable and evenly distributed to maintain safety throughout the removal process. Proper support is critical to avoid accidents and equipment damage.

2.2 Personal Protective Equipment (PPE) Requirements

Wearing proper PPE is essential for safety during the removal process. This includes steel-toe boots to protect feet from heavy tools or falling components, gloves to prevent cuts and abrasions, safety glasses to shield eyes from debris, and a hard hat if working in an area with overhead hazards. Ensuring all PPE is worn correctly minimizes risks and prevents injuries, making it a critical step before starting any removal work.

Tools and Materials Needed


The essential tools include a wrench, screwdriver, and socket set for loosening bolts. Additional materials like lubricants, rags, and safety equipment ensure safe and efficient removal.

3.1 List of Essential Tools for Removal

The essential tools required for removing a dock plate hold-down assembly include a wrench, screwdriver, socket set, and pliers. Additionally, a hacksaw or bolt cutter may be needed for cutting corroded or stubborn bolts. A pry bar can assist in gently disconnecting stuck components. Ensure all tools are in good condition to avoid damaging the assembly or surrounding structures during the removal process. Proper tools are critical for safe and efficient disassembly.

3.2 Additional Materials for Safe Handling

Additional materials for safe handling include jack stands or supporting brackets to stabilize the dock leveler during removal. Wooden blocks or shims can prevent accidental movement. Lubricants may aid in loosening corroded parts, while cleaning solutions can remove dirt and grime. A drip pan can catch debris, ensuring a tidy workspace. These materials enhance safety and efficiency, preventing accidents and damage during the removal process.

Step-by-Step Removal Process

Begin by loosening all bolts and nuts securing the hold-down assembly. Carefully disconnect the assembly from the dock plate, ensuring the leveler is securely supported. Safely lift and remove the assembly, taking note of its weight and components for proper handling.

4.1 Loosening the Hold-Down Assembly Components

Start by loosening all bolts and nuts securing the hold-down assembly using a wrench or socket set. Focus on the components connecting the assembly to the dock plate. Gently release tension on springs or mechanisms without fully removing parts. Ensure the dock leveler remains stable and supported throughout the process. Avoid complete removal of fasteners at this stage. Use a second person if needed to stabilize the assembly during loosening. Double-check all connections before proceeding to the next step.

4.2 Disconnecting the Assembly from the Dock Plate

Once loosened, use a wrench or socket to disconnect the hold-down assembly from the dock plate. Carefully release the release mechanism or spring tension holding the assembly in place. For tie straps, cut or remove them as needed. Ensure the dock leveler remains stable and supported during disconnection. Double-check all connections to confirm they are free from the dock plate before proceeding to the removal step. Safety is paramount to prevent accidental movement or damage.

4.3 Safely Lifting and Removing the Assembly

With the assembly disconnected, use appropriate tools or equipment, such as a hoist or trolley, to carefully lift and remove the hold-down assembly from the dock plate. Ensure the area is clear of obstructions and that the assembly is securely supported during removal. Avoid sudden movements to prevent damage or injury. Once removed, inspect the assembly for any remaining connections or debris and store it safely for further maintenance or replacement.

Reinstallation and Adjustment

Reinstall the hold-down assembly by aligning it with the dock plate and tightening the bolts securely. Adjust the assembly to ensure proper alignment and function, following the manufacturer’s specifications for optimal performance and safety during operation.

5.1 Preparing the Dock Plate for Reinstallation

Clean and inspect the dock plate area to ensure it is free from debris and damage. Verify that all bolts and nuts are intact and properly aligned. Check for any signs of wear or corrosion and address them before proceeding. Ensure the dock plate is securely positioned and level to guarantee a stable base for the hold-down assembly. This step is critical for a safe and efficient reinstallation process.

5.2 Aligning and Securing the Hold-Down Assembly

Align the hold-down assembly with the dock plate, ensuring proper positioning and alignment. Use alignment pins or guides to secure the assembly in place. Tighten the bolts and nuts in a star pattern to avoid misalignment. Double-check the tightness of all fasteners to ensure stability. Verify that the assembly is flush with the dock plate and evenly supported. This ensures optimal functionality and safety during operations.

Troubleshooting Common Issues

Identify and address issues like stuck components or corrosion promptly. Apply penetrating oil to corroded parts and gently tap with a hammer to loosen them safely.

6.1 Addressing Stuck or Corroded Components

When encountering stuck or corroded parts, apply penetrating oil and let it sit to loosen the components. Gently tap with a hammer to break corrosion bonds without causing damage. Avoid forcing parts, as this may lead to breakage. If components remain stubborn, consider using heat or specialized tools to safely dislodge them. Always prioritize careful handling to prevent further damage or safety risks during removal.

6.2 Resolving Misalignment During Reinstallation

If misalignment occurs during reinstallation, ensure the hold-down assembly is properly aligned with the dock plate. Loosen all bolts slightly, then adjust the assembly into correct position. Tighten bolts evenly to avoid further misalignment. Verify alignment by checking the dock leveler’s operation and ensuring smooth movement. If issues persist, refer to manufacturer guidelines or consult a professional for precise adjustments to guarantee proper function and safety.

Maintenance Tips After Removal

Regularly clean and inspect the dock plate area to prevent debris buildup. Lubricate moving parts to ensure smooth operation and prevent corrosion. Schedule routine maintenance to maintain optimal performance and extend equipment lifespan.

7.1 Cleaning and Inspecting the Dock Plate Area

Clean the dock plate area thoroughly, removing dirt, debris, and corrosion. Inspect for wear, damage, or misalignment. Check rollers, hinges, and springs for proper function. Ensure all components are free from obstructions. Use a wire brush to remove rust and apply lubricant to moving parts. Regular inspection helps prevent operational issues and extends the lifespan of the dock plate and hold-down assembly. Maintain a clean environment for safe and efficient operations.

7.2 Lubricating Moving Parts for Smooth Operation

After cleaning, apply a high-quality lubricant to all moving parts, such as hinges, rollers, and springs. Use a silicone-based lubricant for durability and resistance to moisture. Ensure the lubricant is compatible with the materials used in the dock plate and hold-down assembly. Regular lubrication prevents corrosion, reduces friction, and ensures smooth operation. Reapply lubricant periodically, especially in high-traffic or harsh environmental conditions, to maintain optimal functionality and extend the lifespan of the components.

Proper removal and handling of the dock plate hold-down assembly ensure safety, prevent damage, and maintain efficiency. Always follow guidelines for secure reinstallation and future maintenance.

8.1 Summary of Key Steps and Safety Reminders

Always loosen components gradually, ensure the dock leveler is securely supported, and disconnect the assembly safely. Wear PPE, use proper tools, and never leave the assembly unattended during removal. Follow all steps methodically to avoid damage or injury, and double-check all connections before returning to operation. Proper handling ensures a smooth and incident-free process.

8.2 Final Checks Before Returning to Operation

Ensure all bolts and connections are secure, and the hold-down assembly is properly aligned. Verify the dock leveler operates smoothly, with no obstructions or misalignments. Double-check that all moving parts are lubricated and functioning correctly. Conduct a final test operation at a slow pace to confirm everything works as intended before resuming full activity.

PDF

tu mundo 3rd edition pdf

Overview of “Tu Mundo 3rd Edition”

Tu Mundo 3rd Edition is a comprehensive Spanish textbook by Magdalena Andrade, published by McGraw-Hill Higher Education․ It focuses on communication, culture, and real-life context, offering engaging activities for learners․

General Information About the Textbook

Tu Mundo 3rd Edition is a Spanish language textbook authored by Magdalena Andrade and published by McGraw-Hill Higher Education․ Designed for learners seeking to master Spanish, it emphasizes communication and cultural understanding․ The textbook features engaging content, interactive activities, and real-life scenarios to enhance language acquisition․ It caters to students at various proficiency levels, offering a structured approach to grammar, vocabulary, and pronunciation․ Digital resources and study aids complement the material, making it a versatile tool for both classroom and self-study environments․

Authors and Publishers of the 3rd Edition

Tu Mundo 3rd Edition is authored by Magdalena Andrade, a renowned expert in Spanish language instruction․ The textbook is published by McGraw-Hill Higher Education, a leading provider of educational materials․ The ISBN-10 for this edition is 1264369344, and the ISBN-13 is 978-1264369348․ Published on January 18, 2022, this edition offers updated content and resources tailored for effective language learning․ McGraw-Hill ensures high-quality materials, making it a trusted choice for educators and students alike․

Key Features of the 3rd Edition

Tu Mundo 3rd Edition offers enhanced digital resources, interactive study aids, and user-friendly tools for instructors to guide students in intensive communicative practice, fostering language confidence․

Language Learning Tools and Resources

Tu Mundo 3rd Edition provides a range of language learning tools, including interactive exercises, flashcards, and pronunciation guides․ Digital resources are accessible via eTextbook ISBNs, offering flexible learning options․ Supplementary materials like CDs and DVDs are included with new purchases, enhancing practice and cultural exposure․ Study guides and workbooks are also available, providing structured support for learners․ Instructors receive user-friendly resources to guide students in intensive communicative practice, fostering confidence in Spanish language skills․ These tools make Tu Mundo a comprehensive choice for learners․

Cultural Immersion Elements

Tu Mundo 3rd Edition integrates cultural immersion through authentic texts, images, and videos․ It includes stories by authors like Saadat Hasan Manto and adapted tales from Charles Perrault, exposing learners to diverse cultural perspectives․ The textbook also features historical content, such as references to Pizarro, enriching cultural understanding․ Interactive activities and real-life scenarios encourage learners to engage with Spanish-speaking traditions and practices, making cultural immersion a key component of the learning experience․

Where to Find “Tu Mundo 3rd Edition PDF”

Tu Mundo 3rd Edition PDF can be accessed through official sources like McGraw-Hill’s website or authorized sellers․ It is also available on platforms like Quizlet and online marketplaces․

Official Sources for Purchase or Download

The official sources for purchasing or downloading Tu Mundo 3rd Edition PDF include the McGraw-Hill Education website, where you can buy the eTextbook or access it digitally․ Additionally, authorized retailers like Amazon and Barnes & Noble offer the PDF version for sale․ Ensure you purchase from reputable platforms to avoid unauthorized copies and support the publisher․ Digital access codes may also be provided with new textbook purchases, granting access to the PDF and supplementary materials․

Alternative Platforms for Access

For those seeking alternative access to Tu Mundo 3rd Edition PDF, platforms like Quizlet or Reddit may offer shared resources, though caution is advised to avoid unauthorized copies․ Some users have reported finding PDFs through educational forums or study groups, but verifying the source’s legitimacy is crucial․ Additionally, instructors or institutions may provide access through their learning management systems or digital libraries, ensuring compliance with copyright guidelines while supporting student needs․

Benefits of Using “Tu Mundo 3rd Edition”

Tu Mundo 3rd Edition enhances language acquisition through interactive activities, fostering communication and cultural understanding․ Its structured approach supports learners in building confidence and practical skills effectively․

Educational Advantages

Tu Mundo 3rd Edition offers a structured approach to Spanish learning, emphasizing communication and cultural immersion․ It provides interactive activities, real-life contexts, and clear instructions, fostering engagement and understanding․ The textbook builds foundational language skills while introducing learners to diverse cultural perspectives, enhancing their ability to connect with Spanish-speaking communities․ Its comprehensive resources and digital tools support personalized learning, making it an effective choice for both classroom and independent study․

Practical Applications for Learners

Tu Mundo 3rd Edition equips learners with practical language skills applicable in real-life scenarios․ Through interactive exercises and cultural immersion, students gain proficiency in conversing, reading, and writing Spanish․ The textbook’s focus on everyday contexts, such as travel and communication, prepares learners for practical use of the language․ Additional digital resources, like flashcards and study guides, enhance retention and provide tools for continued practice outside the classroom, making it a valuable resource for learners aiming to master Spanish effectively․

Supplementary Materials and Guides

Tu Mundo 3rd Edition offers digital resources, study guides, and instructor materials to enhance learning․ These include flashcards, practice exercises, and interactive tools for effective language practice․

Digital Resources and Study Aids

Tu Mundo 3rd Edition provides a range of digital resources, including interactive activities, flashcards, and multimedia content․ Instructors receive user-friendly materials to guide students in communicative practice․ The textbook also integrates with platforms like Quizlet for additional study support․ Digital tools enhance language learning through engaging exercises and real-life applications․ Supplementary materials, such as CDs or access codes, are available with new purchases, offering further opportunities for practice and review․ These resources aim to build confidence and fluency in Spanish learners․

Additional Study Guides

Tu Mundo 3rd Edition offers supplementary study guides, including workbooks, flashcards, and online resources․ These materials provide structured activities to reinforce language lessons․ A language and cultural connections log is also available, enabling students to track progress․ While the core textbook is essential, these guides enhance learning by offering additional practice opportunities․ They cater to diverse learning styles, ensuring a well-rounded educational experience․ These resources are designed to complement the main content, helping learners master Spanish effectively․ They are available for purchase or download alongside the primary textbook․

Challenges and Considerations

Accessibility and copyright concerns arise with the Tu Mundo 3rd Edition PDF․ Ensuring legal access and addressing content structure feedback are key considerations for users and educators alike․

Accessibility and Copyright Issues

The Tu Mundo 3rd Edition PDF raises concerns about accessibility and copyright infringement․ While digital versions offer convenience, unauthorized downloads violate copyright laws and deprive authors of fair compensation․ Additionally, some users report issues with page formatting and cut-off text due to tight binding, limiting accessibility for visually impaired learners․ Legal access through official sources ensures both compliance and optimal usability, while also supporting the creators and publishers who invest in educational content․

Content and Structure Feedback


Tu Mundo 3rd Edition is praised for its logical chapter structure and engaging activities, which foster communication and cultural immersion․ However, some users find the content overly complex for beginners, with dense grammar explanations․ The lack of supplementary visual aids in the PDF version can hinder comprehension․ Despite these challenges, the textbook remains a valuable resource for learners seeking to connect with Spanish-speaking cultures through practical, real-world applications․

Future Prospects and Updates

Tu Mundo 3rd Edition may see future updates with enhanced digital tools, interactive features, and expanded cultural content, aligning with evolving language learning trends and student needs․

Expected Changes in New Editions

Future editions of Tu Mundo may include enhanced digital tools, expanded cultural content, and more interactive features․ Publishers could incorporate multimedia elements and personalized learning paths to meet modern educational trends, ensuring the textbook remains relevant and engaging for Spanish learners․ These updates aim to deepen language proficiency and cultural understanding while adapting to the evolving needs of students and educators in a digital-first learning environment․

Emerging Trends in Language Learning

Modern language learning emphasizes interactive and immersive experiences, with digital tools playing a central role․ Tu Mundo 3rd Edition aligns with these trends by incorporating online resources and multimedia content․ Gamification, real-time feedback, and personalized learning paths are becoming integral to language acquisition․ Additionally, there is a growing focus on cultural immersion through authentic materials and real-life scenarios, helping learners connect language skills to practical use․ These innovations ensure that textbooks like Tu Mundo remain relevant in a rapidly evolving educational landscape․

Guide

solar panel wiring guide

Solar panel wiring involves connecting panels to create a reliable energy system. Proper installation ensures efficiency, safety, and durability, avoiding electrical hazards and optimizing performance. Understanding the basics is crucial for a successful setup.

1.1 What is Solar Panel Wiring?

Solar panel wiring refers to the process of connecting solar panels, inverters, batteries, and other components to form a functional solar energy system. It ensures the flow of electrical current, enabling energy generation, storage, and distribution. Proper wiring is crucial for system efficiency, safety, and reliability.

1.2 Importance of Proper Wiring

Proper solar panel wiring ensures safety, efficiency, and reliability. Correct connections prevent electrical hazards, optimize energy production, and maintain system longevity. It guarantees smooth operation, avoiding power losses and potential dangers. Proper wiring is essential for a durable and high-performing solar energy system.

Understanding Solar Panel Components

Solar panel systems include key components like panels, inverters, batteries, and wiring. Each part plays a vital role in energy generation, storage, and distribution, ensuring efficient and safe operation.

2.1 Solar Panels

Solar panels are the core of any photovoltaic system, converting sunlight into electricity. They consist of photovoltaic cells made from semiconductors, typically silicon. Panels are designed to withstand weather conditions and are mounted on rooftops or ground racks. Proper installation and wiring ensure maximum energy output and system efficiency over time.

2.2 Inverters

Inverters are essential for converting DC power from solar panels to AC power for home or grid use. They optimize energy production and monitor system performance. Choosing the right inverter ensures compatibility with your solar array and meets electrical requirements, making it a critical component for safe and efficient energy conversion.

2;3 Batteries

Batteries store excess solar energy for nighttime or cloudy days, ensuring a steady power supply. They are crucial for off-grid systems, offering backup solutions. Proper wiring connects batteries to inverters and panels, requiring careful selection based on capacity and voltage to meet energy needs and ensure reliable performance.

2.4 Mounting Structures

Mounting structures securely hold solar panels, ensuring optimal sunlight exposure. Durable materials like aluminum or steel are used to withstand weather conditions. Proper installation involves anchoring to rooftops or ground racks, aligning panels for maximum energy capture. Stability and correct positioning are critical for efficient performance and long-term system reliability.

2.5 Wiring and Connectors

Wiring and connectors are essential for transmitting energy from panels to inverters and batteries. Durable materials like copper wires and PVC insulation ensure longevity. Properly secured connections prevent power loss and electrical hazards. Using high-quality connectors and following installation best practices guarantees safe and efficient energy transfer within the solar system.

Planning Your Solar Panel System Design

Planning involves assessing energy needs, choosing configurations, and creating wiring diagrams. This step ensures efficiency, safety, and compatibility, guiding the installation process effectively.

3.1 Assessing Energy Needs

Assessing energy needs involves evaluating daily power consumption and determining the required solar panel capacity. Load calculation, energy usage patterns, and site conditions are analyzed to optimize system design, ensuring it meets electrical demands efficiently and reliably for both residential and commercial applications; Proper assessment is key to a successful installation.

3.2 Choosing the Right Configuration

Selecting the appropriate configuration involves deciding between series, parallel, or a combination setup. This choice impacts voltage, current, and overall system performance. Factors like available space, energy requirements, and component compatibility guide the decision, ensuring the system operates efficiently and meets specific power needs. Correct configuration is vital for optimal energy production.

3.3 Creating a Wiring Diagram

A wiring diagram is a visual blueprint showing connections between solar panels, inverters, batteries, and other components. It helps plan and execute installations accurately. Symbols represent components, while lines indicate connections. Labels clarify positive and negative terminals; A detailed diagram ensures safe, efficient setup and trouble-free operation, guiding installers through each step clearly.

Step-by-Step Installation Guide

Mount panels securely, install wiring neatly, connect to inverters, and test all connections. Follow safety guidelines and manufacturer instructions for a smooth, efficient installation process.

4.1 Mounting the Panels

Mounting panels requires securing them to a stable structure, ensuring optimal angle and orientation for sunlight exposure. Use durable hardware and follow manufacturer guidelines to prevent damage and ensure longevity. Proper alignment enhances energy efficiency and system performance over time.

4.2 Installing Electrical Wiring

Install electrical wiring by connecting solar panels to the inverter and battery. Ensure all connections are secure, using appropriate connectors and conduit for protection. Follow safety guidelines and local electrical codes to prevent hazards and ensure a reliable energy supply. Proper wiring is essential for system efficiency and longevity.

4.3 Connecting to the Inverter

Connect the solar panel wiring to the inverter, ensuring the positive wire is attached to the positive terminal and the negative to the negative terminal. Secure all connections firmly and configure settings like voltage and charging modes. Always refer to the inverter’s manual for specific instructions. Proper connections ensure safe and efficient energy flow.

4.4 Final Connections and Testing

After connecting all components, ensure secure wiring and test the system. Verify voltage and current output using a multimeter, and check the inverter’s display for proper operation. Test the entire system under load to confirm functionality. Follow safety guidelines during testing to prevent electrical hazards and ensure a reliable energy supply.

Safety Guidelines and Precautions

Always wear protective gear and ensure components are switched off before handling. Follow manufacturer instructions and electrical codes to prevent shocks or fires, ensuring a safe installation process.

5.1 Safety Tips

Safety is crucial when working with solar panel wiring. Always disconnect power sources before starting work. Use insulated tools to prevent electric shocks. Avoid working in wet conditions and ensure proper ventilation. Keep fire extinguishers nearby and wear protective gear, including gloves and safety glasses. Follow all manufacturer guidelines to minimize risks and ensure a safe installation process.

5.2 Handling Electrical Components

When handling electrical components, ensure all power sources are disconnected. Use insulated tools to prevent electrical shocks. Regularly inspect wires and connectors for damage. Never overload circuits, and always ground systems properly. Follow manufacturer instructions for component ratings and compatibility. Proper handling ensures system reliability and personal safety during installation and maintenance.

Series vs. Parallel Wiring: What You Need to Know

Series wiring increases voltage, while parallel wiring boosts current. Understanding these configurations is essential for designing efficient solar systems, ensuring compatibility with inverters and batteries.

6.1 Series Wiring Configuration

In a series wiring setup, solar panels are connected end-to-end, increasing total voltage while maintaining current. This configuration is ideal for higher voltage requirements and reduces the number of connections, improving efficiency and minimizing power loss. It’s commonly used in systems with specific inverter compatibility needs, ensuring optimal performance under consistent conditions.

6.2 Parallel Wiring Configuration

Parallel wiring connects solar panels by linking positive terminals together and negative terminals together, increasing total current while maintaining voltage. This setup offers flexibility, allowing panels to operate independently, reducing shading effects, and ensuring consistent power supply. It’s ideal for systems requiring lower voltage and higher current, making it suitable for various applications and configurations.

6.3 Choosing the Right Configuration for Your Needs

Selecting the right wiring configuration depends on your energy needs, system size, and environmental conditions. Series wiring is ideal for high-voltage systems, while parallel wiring suits low-voltage setups. Combining both offers flexibility and efficiency, ensuring optimal performance and reliability. Assess your requirements to make an informed decision for a tailored solar energy system.

Advanced Wiring Configurations

Advanced wiring configurations involve combining series and parallel setups to enhance flexibility and scalability, optimizing performance and ensuring reliable energy systems for complex solar applications.

7.1 Combination of Series and Parallel

A combination of series and parallel wiring allows for optimal energy production by balancing voltage and current. This setup maximizes flexibility, enabling systems to adapt to varying power needs while maintaining efficiency and minimizing losses in solar panel configurations for both residential and commercial use.

7.2 Adding Multiple Strings

Adding multiple strings involves connecting several parallel branches of solar panels to increase total power output. This configuration enhances scalability and flexibility, ensuring optimal energy production even if one string underperforms. Proper planning and wiring ensure reliability and maximize the system’s overall efficiency while maintaining balance and safety.

Troubleshooting Common Wiring Issues

Troubleshooting wiring issues involves identifying faults, repairing damaged wires, and ensuring secure connections. Regular inspection and testing help prevent electrical failures, ensuring system efficiency and safety.

8.1 Identifying Faults

Identifying faults in solar panel wiring involves checking for loose connections, damaged wires, or malfunctioning components. Use a multimeter to measure voltage and current, ensuring readings match expected values. Look for signs of wear, corrosion, or overheating, which can disrupt energy flow and system performance. Regular inspections help detect issues early.

8.2 Repairing Damaged Wires

Repair damaged wires by stripping ends and soldering or crimping with appropriate connectors. Ensure all connections are secure and weatherproof. Use high-quality materials to prevent future issues. Always disconnect power before starting repairs to avoid electrical hazards. Testing the repaired section is essential to confirm proper functionality and safety.

8.3 Checking Connections

Regularly inspect all connections for tightness and signs of wear. Verify that terminals are clean and free from corrosion. Use a multimeter to ensure proper voltage and current flow. Loose or corroded connections can cause system inefficiency or safety hazards, so addressing them promptly is crucial for optimal performance and reliability.

Maintenance and Upkeep Tips

Regularly clean solar panels to maintain efficiency. Inspect wiring and connections for wear or corrosion. Schedule annual checks and update components as needed for optimal performance.

9.1 Cleaning Solar Panels

Clean solar panels regularly to remove dirt and debris, ensuring maximum sunlight absorption. Use mild soap, water, and a soft cloth or sponge. Avoid harsh chemicals or abrasive materials that might scratch surfaces. Clean during cooler parts of the day to prevent water spots. Regular cleaning boosts energy efficiency significantly.

9.2 Inspecting Wiring Regularly

Regularly inspect solar panel wiring for wear, corrosion, or loose connections. Check for damaged insulation, frayed wires, or signs of overheating. Use a multimeter to verify voltage and current flow. Inspections prevent system failures and ensure optimal energy production. Schedule checks seasonally or after extreme weather events for added safety and reliability.

9.3 Updating System Components

Regularly updating solar panel system components ensures optimal performance and safety. Replace worn-out wiring, inverters, or batteries as needed. Upgrade to newer technologies for better efficiency. Always follow manufacturer guidelines for compatibility and safety standards. Updating components prevents system failures and enhances energy production, ensuring long-term reliability and efficiency.

Solar Panel Wiring Diagrams and Visual Guides

Solar panel wiring diagrams are essential blueprints for installing and understanding connections. They map out how panels, inverters, and batteries link, aiding novices and experts alike in designing efficient systems. Step-by-step visuals simplify complex configurations, ensuring safe and proper setups for optimal energy production;

10;1 Understanding Diagram Symbols

Solar wiring diagrams use standardized symbols to represent components like panels, inverters, and batteries. These symbols simplify system planning and installation. Recognizing them ensures correct connections, preventing errors and enhancing safety. Common symbols include solar panels, batteries, and inverters, each clearly defined to guide users through complex setups effectively and efficiently.

10.2 Examples of Different Configurations

Diagrams illustrate various setups, such as series, parallel, and combination wiring. Off-grid systems may show multiple batteries and inverters, while grid-tied setups highlight direct connections. Examples include configurations for RVs, homes, and commercial use, ensuring clarity in planning and implementing solar energy systems effectively for diverse applications and energy needs.

With proper knowledge and planning, solar panel wiring can be safe and efficient. Start your project confidently, applying the insights gained to harness renewable energy effectively.


11.1 Recap of Key Points

Proper installation and adherence to safety protocols are vital for solar panel wiring. Understanding each component and correct configurations ensures optimal energy efficiency. Always follow established safety guidelines and plan your system thoroughly. Regular maintenance is essential for system longevity and performance. These key principles will guide you in creating a successful solar energy system. Start your project with confidence by adhering to these fundamental guidelines.

11.2 Encouragement to Start Your Project

Embrace renewable energy by starting your solar panel project today! With proper planning and adherence to safety guidelines, you can harness the power of the sun efficiently. Begin with a clear plan, follow the wiring diagrams, and enjoy the environmental and financial benefits of solar energy. Your sustainable future starts now!

Guide

how to use accu chek guide

The Accu-Chek Guide is a user-friendly blood glucose meter designed to help people with diabetes monitor their blood sugar levels accurately and efficiently. It features Bluetooth Low Energy (BLE) connectivity‚ allowing seamless data transfer to the mySugr app for comprehensive diabetes management. With a small blood sample requirement of 0.6 µL and fast results in under 4 seconds‚ it simplifies daily glucose tracking. Its intuitive design and compatibility with the mySugr app make it an ideal choice for managing diabetes effectively.

Overview of the Accu-Chek Guide Blood Glucose Meter

The Accu-Chek Guide blood glucose meter is a sleek‚ user-friendly device designed for accurate blood sugar monitoring. It requires a small blood sample of 0.6 µL and delivers results in less than 4 seconds. The meter features Bluetooth Low Energy (BLE) connectivity‚ enabling seamless data syncing with the mySugr app for digital tracking and management. Compatible with Accu-Chek FastClix lancets‚ it offers a convenient testing experience. Its portability and ease of use make it an ideal solution for daily glucose monitoring.

Importance of Regular Blood Glucose Monitoring

Regular blood glucose monitoring is crucial for managing diabetes effectively. It helps individuals understand their glucose levels‚ make informed decisions about diet‚ exercise‚ and medication‚ and prevent complications. Consistent monitoring provides insights into how daily activities affect blood sugar‚ enabling better control and personalized management strategies. The Accu-Chek Guide supports this by offering accurate‚ quick results and seamless data tracking‚ empowering users to take charge of their health proactively.

Components of the Accu-Chek Guide System

The Accu-Chek Guide system includes the meter‚ test strips‚ lancets‚ and a lancing device. It also requires a battery and is compatible with the mySugr app for data management.

Understanding the Meter and Its Accessories

The Accu-Chek Guide meter is a compact‚ portable device designed for easy blood glucose monitoring. It comes with a lancing device for obtaining blood samples and uses Accu-Chek Performa test strips for accurate readings. The meter requires a CR2032 lithium battery for operation and is compatible with the mySugr app via BLE connectivity. Accessories like lancets and test strips are essential for proper function‚ ensuring reliable results and convenient tracking of blood sugar levels for effective diabetes management.

Test Strips and Lancets: Essential Supplies

Accu-Chek Performa test strips are specifically designed for the Accu-Chek Guide meter‚ ensuring accurate blood glucose readings. Lancets‚ such as those from the Accu-Chek FastClix system‚ are used with the lancing device to obtain blood samples. Always use test strips before their expiration date and handle them correctly to maintain accuracy. These supplies are vital for proper meter function and reliable blood sugar monitoring‚ making them indispensable for effective diabetes management.

Setting Up the Accu-Chek Guide Meter

Insert the CR2032 battery‚ set the date/time‚ and pair the meter with the mySugr app via Bluetooth for seamless data syncing and diabetes management.

Inserting the Battery and Setting the Date/Time

Open the battery compartment on the back‚ insert the CR2032 lithium battery‚ and close it securely. Use the meter’s menu to set the correct date and time. Accurate time and date settings ensure precise tracking of blood glucose readings. Proper battery installation is essential for the meter to function correctly. This step is crucial before performing any blood glucose test to ensure reliable results and data recording.

Pairing the Meter with the mySugr App

Enable Bluetooth on your smartphone and open the mySugr app. Follow the in-app instructions to search for nearby devices and select the Accu-Chek Guide meter. The app will guide you through the pairing process. Once connected‚ your blood glucose readings will automatically sync with the app‚ allowing for seamless tracking and comprehensive diabetes management. This integration enhances data organization and supports better health outcomes.

Preparing for a Blood Glucose Test

Wash your hands thoroughly‚ prepare the lancing device‚ and ensure test strips are within their expiration date. These steps ensure accurate and hygienic testing conditions always.

Washing Hands and Preparing the Lancing Device

Begin by washing your hands with warm soapy water and drying them thoroughly to ensure cleanliness. Next‚ prepare the lancing device according to the manufacturer’s instructions. Check the expiration date on the test strip container and ensure it is not expired. These steps are crucial for maintaining hygiene and accuracy during the blood glucose testing process. Proper preparation helps prevent infections and ensures reliable test results every time.

Choosing the Right Finger for Testing

Selecting the right finger for blood glucose testing is important for comfort and accuracy. Use the fingertips‚ as they contain more capillaries and provide a better blood sample. Avoid using the same finger repeatedly to prevent calluses and discomfort. Rotate fingers to distribute the testing evenly. Ensure the chosen finger is clean and dry before pricking to obtain an accurate reading. Proper finger selection enhances the overall testing experience and ensures reliable results.

Performing a Blood Glucose Test

Performing a blood glucose test with the Accu-Chek Guide involves pricking your finger‚ collecting a small blood sample‚ and applying it to a test strip for quick‚ accurate results.


Pricking the Finger and Collecting the Blood Sample

Prick the side of your fingertip using the lancing device. Gently squeeze your finger to obtain a small blood drop. Avoid squeezing too hard‚ as this can cause discomfort. Use a new lancet each time to ensure hygiene and accuracy. Collect the blood sample on the test strip‚ ensuring it fills the designated area completely. Proper technique ensures a sufficient sample size for an accurate reading without unnecessary pain or complications.

  • Always use a new lancet for safety and hygiene.
  • Avoid squeezing too hard to prevent discomfort.
  • Ensure the blood sample fills the test strip fully.

Applying the Blood Sample to the Test Strip

Gently touch the blood drop to the yellow window of the test strip. Ensure the sample fills the designated area completely. Avoid adding more blood once the strip is applied. The meter will automatically detect the sample and begin processing. Do not add control solution to the test strip. Proper application ensures accurate results and prevents errors during testing. Always use a new test strip for each test to maintain hygiene and reliability.

  • Touch the blood drop to the yellow window gently.
  • Ensure the sample fills the area completely.
  • Avoid adding extra blood after initial application.

Reading and Interpreting Results

The Accu-Chek Guide provides quick and accurate blood glucose readings‚ essential for effective diabetes management. Understanding your results helps you make informed decisions to maintain healthy blood sugar levels.

Understanding Blood Glucose Readings

Your Accu-Chek Guide meter displays blood glucose readings in mg/dL or mmol/L‚ depending on your settings. These readings indicate your current blood sugar levels‚ helping you assess whether they are within target range. Elevated levels may suggest hyperglycemia‚ while low readings could indicate hypoglycemia. Regular monitoring allows you to track trends‚ identify patterns‚ and adjust your treatment plan accordingly for better diabetes control and overall health management.

Logging and Tracking Results for Better Management

Regularly logging your blood glucose readings helps track patterns and trends‚ enabling better diabetes management. The Accu-Chek Guide meter seamlessly connects to the mySugr app‚ allowing automatic data syncing. This integration provides a comprehensive overview of your glucose levels‚ helping you identify trends and understand how diet‚ exercise‚ and medication impact your results. By maintaining accurate records‚ you can make informed decisions to stay within target ranges and improve your overall health outcomes.

Maintaining Your Accu-Chek Guide Meter

Regular cleaning with a soft cloth and ensuring dryness maintain accuracy. Avoid harsh chemicals and store properly for optimal performance. Check for debris regularly.

Cleaning and Caring for the Meter

Regularly clean the Accu-Chek Guide meter with a soft‚ dry cloth to remove dirt or residue. Avoid using harsh chemicals or excessive moisture‚ as they may damage the device. Gently wipe the display and exterior surfaces. Ensure the test strip port and other openings are free from debris for proper functionality. Store the meter in a protective case when not in use to prevent scratches. Proper care ensures accurate readings and extends the meter’s lifespan.

Troubleshooting Common Errors and Issues

Common errors with the Accu-Chek Guide include test strip errors or low battery warnings. If an error occurs‚ turn the meter off and on again. Ensure test strips are not expired and properly inserted. For low battery‚ replace the CR2032 lithium battery promptly. If issues persist‚ consult the user manual or contact customer support for assistance. Regular maintenance and proper handling can prevent most errors and ensure accurate readings. Always refer to the troubleshooting guide for specific solutions.

Replacing the Battery

Open the battery door by pushing the tab and pulling it up. Replace the CR2032 lithium battery‚ ensuring correct orientation. Close the door securely.

Step-by-Step Guide to Changing the Battery

  1. Turn off the meter to ensure no power is running.
  2. Locate the battery compartment on the back of the device.
  3. Open the compartment by sliding or pushing the tab as indicated.
  4. Remove the old CR2032 lithium coin battery carefully.
  5. Insert the new battery‚ ensuring the “+” sign faces upward.
  6. Close the compartment securely to maintain proper function.
  7. Turn on the meter and confirm the time and date are set correctly.

Dispose of the old battery responsibly and test the meter to ensure it’s functioning properly.

Using the Accu-Chek Guide with mySugr App

The Accu-Chek Guide pairs seamlessly with the mySugr app via Bluetooth‚ enabling easy data syncing. This integration allows for comprehensive diabetes management‚ tracking glucose levels‚ and sharing data with healthcare providers for better health outcomes.

Connecting the Meter to the App

Pairing the Accu-Chek Guide with the mySugr app is straightforward. Open the app‚ navigate to the device pairing section‚ and select the Accu-Chek Guide from the available Bluetooth devices. Ensure both the meter and app are updated. Once connected‚ the meter automatically syncs blood glucose readings to the app‚ enabling comprehensive tracking‚ trend analysis‚ and personalized insights for effective diabetes management.

Syncing Data for Comprehensive Diabetes Management

Syncing the Accu-Chek Guide with the mySugr app provides a seamless way to track blood glucose levels‚ food intake‚ and physical activity. The app automatically logs readings from the meter‚ offering detailed graphs and trend analysis. This integration helps identify patterns and provides personalized insights to optimize diabetes care. Users can also share data with healthcare providers‚ enabling better-informed treatment decisions and improved health outcomes.

Safety Precautions and Tips

Handle test strips and lancets with care. Never use expired supplies. Always wash hands before testing. Keep the meter clean and dry. Store components properly as directed.

Proper Storage and Handling of Test Strips

Store test strips in their original container with a tight-fitting lid to protect from moisture and light. Keep them at room temperature‚ avoiding extreme heat or cold. Do not use expired strips‚ as indicated by the expiration date on the container. Handle strips by the non-absorbent edge to prevent contamination. Use a strip immediately after removing it and avoid reinserting it into the container. Always keep strips out of reach of children and pets.

Avoiding Common Mistakes During Testing

Avoid touching the test strip’s pricking area to prevent oil interference. Use test strips before their expiration date. Insert strips correctly into the meter for proper alignment. Replace lancets regularly to ensure sharpness and adequate blood sampling. Apply blood samples promptly after pricking. Calibrate the meter and set date/time accurately. Keep the meter clean and use the correct battery type. Test in a stable environment‚ avoiding extreme temperatures. Ensure hands are clean and dry before testing. Log results consistently and seek help for error messages;

Mastering the Accu-Chek Guide empowers users to monitor blood glucose effectively‚ supporting informed decisions for optimal diabetes management and improved overall health consistently over time.

Maximizing the Benefits of the Accu-Chek Guide

The Accu-Chek Guide offers advanced features like Bluetooth connectivity‚ enabling seamless data syncing with the mySugr app for comprehensive tracking and analysis. Regular use and proper maintenance ensure accurate readings‚ while its intuitive design simplifies daily monitoring. By leveraging these features‚ users can gain deeper insights into their glucose patterns‚ facilitating better decision-making and enhancing overall diabetes care. This meter is a valuable tool for achieving long-term health goals effectively.

Encouraging Consistent Monitoring for Better Health

Consistent blood glucose monitoring with the Accu-Chek Guide is crucial for maintaining optimal health. Its quick results and small blood sample requirement make testing less intrusive‚ encouraging regular use. By tracking glucose levels consistently‚ users can identify patterns‚ make informed decisions‚ and adjust their lifestyle or treatment plans accordingly. Regular monitoring also helps prevent complications and promotes better overall diabetes management‚ fostering a proactive approach to health and well-being.

PreviousNext

You Want To Have Your Favorite Car?

We have a big list of modern & classic cars in both used and new categories.