aeg competence oven instruction manual
AEG Competence Oven Instruction Manual: A Comprehensive Guide
Welcome! This manual provides detailed guidance for your AEG Competence Oven‚ a product of Electrolux Group’s premium brand․
Discover innovative features showcased at recent IFA events (2024 & 2025)‚
and learn how AEG is expanding its presence in markets like China․
AEG‚ a cornerstone of the global appliance industry‚ boasts a rich heritage stemming from its origins as the Deutsche Edison-Gesellschaft für angewandte Elektricität in 1883‚ founded by the visionary engineer Emil Rathenau․ Initially focused on harnessing the power of electric light‚ the company rapidly evolved‚ becoming synonymous with German engineering and innovation․
Today‚ AEG operates as a premium brand within the expansive Electrolux Group‚ a leading global appliance company with over a century of experience shaping modern living․ Electrolux‚ dedicated to Taste‚ Care and Wellbeing‚ strategically positions AEG to deliver cutting-edge appliances that enhance everyday life․
Recent developments‚ highlighted at events like IFA 2024 and 2025‚ demonstrate AEG’s commitment to groundbreaking technology․ The brand unveiled a bold new identity‚ including its first-ever sound identity‚ reflecting a modern expression of its 137-year legacy․ Electrolux Group consistently showcases AEG’s innovations‚ including the quietest and most efficient dishwasher‚ solidifying its position as a leader in the appliance market․ AEG’s expansion into markets like China‚ adopting the Chinese name “”‚ further illustrates its global ambitions․
History of AEG: From Edison-Gesellschaft to Modern Appliances
AEG’s remarkable journey began in 1883 as the Deutsche Edison-Gesellschaft für angewandte Elektricität‚ established by Emil Rathenau after securing the rights to Thomas Edison’s electric light bulb․ This pivotal moment marked the dawn of a new era‚ propelling AEG into the forefront of electrical innovation in Germany․
Initially focused on electric lighting‚ AEG swiftly diversified‚ venturing into electric motors‚ railway technology‚ and household appliances․ Throughout the 20th century‚ AEG became a household name‚ renowned for its quality‚ durability‚ and pioneering designs․ The company played a significant role in shaping the modern German industrial landscape․
Over the decades‚ AEG navigated evolving market dynamics‚ adapting and innovating to remain competitive․ The brand’s commitment to technological advancement continued‚ leading to the development of sophisticated appliances‚ including the Competence Oven․ Today‚ as part of the Electrolux Group‚ AEG leverages its rich heritage and continues to push boundaries‚ showcasing its latest innovations at events like IFA‚ while expanding its global reach‚ notably in the Chinese market since 2018․
AEG’s Brand Identity and Recent Developments (2024-2025)
In 2024‚ AEG‚ a premium brand under the Electrolux Group‚ unveiled a bold new visual identity and its first-ever sound identity․ This rebranding initiative aimed to modernize the 137-year-old German brand‚ reflecting its commitment to innovation and contemporary design – qualities embodied in appliances like the Competence Oven․
The developments of 2025 have further solidified AEG’s position as a leader in appliance technology․ Preceding IFA 2025‚ AEG showcased inspiring previews of its upcoming innovations at the Futurium in Berlin‚ hinting at advancements in cooking and home care․ At IFA 2025 itself‚ AEG presented what is claimed to be the quietest and most efficient dishwasher ever created‚ demonstrating a dedication to both performance and sustainability․
Electrolux Group’s focus on Taste‚ Care‚ and Wellbeing is central to AEG’s strategy․ These innovations are not merely about functionality; they are about enhancing the overall consumer experience‚ a philosophy clearly reflected in the advanced features of the AEG Competence Oven and the brand’s growing presence in markets like China․
Understanding Your AEG Competence Oven
The AEG Competence Oven represents a fusion of German engineering and innovative cooking technology‚ brought to you by the Electrolux Group․ This oven isn’t simply a cooking appliance; it’s a culinary center designed to elevate your kitchen experience․ Understanding its capabilities requires familiarizing yourself with its core features and functionalities․
AEG’s commitment to Taste‚ Care‚ and Wellbeing is directly integrated into the oven’s design․ Expect precision temperature control‚ versatile cooking modes‚ and features like steam cooking and sous vide – all aimed at delivering optimal results․ The oven’s construction prioritizes durability and ease of maintenance‚ ensuring years of reliable performance․
Recent innovations showcased at events like IFA (2024 & 2025) demonstrate AEG’s dedication to pushing boundaries․ While specific features may vary by model‚ the Competence Oven consistently embodies the brand’s commitment to quality and user-friendly design․ This manual will guide you through harnessing the full potential of your AEG appliance․
Key Features of the AEG Competence Oven
The AEG Competence Oven boasts a suite of features designed for both novice and experienced cooks․ Central to its functionality is advanced temperature control‚ ensuring precise and consistent cooking results․ Multiple cooking modes cater to diverse culinary needs‚ from traditional baking to innovative steam cooking and sous vide preparation․
Steam Cooking: This feature preserves nutrients and enhances flavors‚ offering a healthier cooking alternative․ Sous Vide: Achieve restaurant-quality results with precise temperature control for perfectly cooked dishes․ Pyrolytic Cleaning: A self-cleaning function that eliminates the need for manual scrubbing․
AEG’s innovations‚ highlighted at events like IFA 2024 & 2025‚ often include enhanced connectivity and smart features․ The oven’s design prioritizes user experience‚ with an intuitive control panel and clear display․ These features‚ combined with AEG’s commitment to quality‚ make the Competence Oven a standout appliance․
Safety Precautions and Important Warnings
Important: Before operating your AEG Competence Oven‚ carefully review these safety guidelines․ Always ensure the oven is properly installed and grounded․ Never attempt to repair the appliance yourself; contact authorized service personnel for any maintenance or repairs․
Caution: The oven surfaces become extremely hot during and after use․ Avoid touching heating elements or interior surfaces until they have cooled completely․ Use oven mitts or pot holders when handling hot cookware․ Keep children away from the oven during operation․
Warning: Do not use abrasive cleaners or harsh chemicals‚ as they may damage the oven’s surfaces․ Ensure adequate ventilation during pyrolytic cleaning‚ as this process generates high temperatures and fumes․ Disconnect the oven from the power supply before cleaning․ Failure to follow these precautions could result in injury or damage to the appliance․ AEG‚ as part of Electrolux Group‚ prioritizes user safety․

Control Panel Overview and Functions
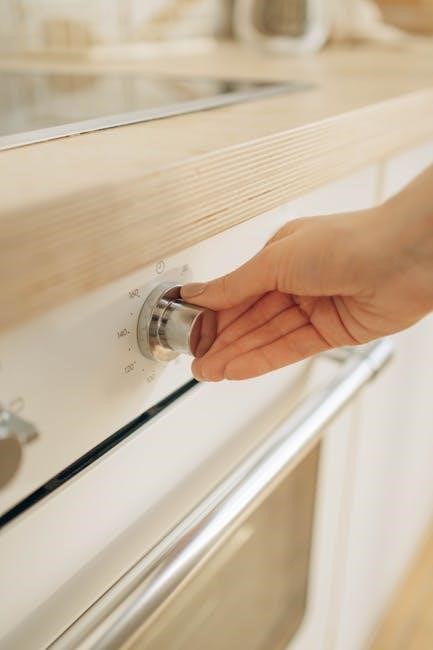
Navigating the Interface: Your AEG Competence Oven features an intuitive control panel designed for ease of use․ The central display provides clear information regarding cooking time‚ temperature‚ and selected functions․ Utilize the touch controls or rotary dial (model dependent) to navigate the menu options․

Key Functions: Explore pre-programmed cooking modes for various dishes‚ including baking‚ roasting‚ grilling‚ and steaming․ Access advanced settings to customize cooking parameters‚ such as temperature probes and humidity levels․ The panel also controls self-cleaning cycles – pyrolytic and steam cleaning – ensuring effortless maintenance․
Special Features: Discover the sous vide functionality for precise temperature control‚ ideal for delicate dishes․ Explore timer settings for delayed start and automatic shut-off․ AEG‚ a brand of Electrolux Group‚ continuously innovates its interface‚ as showcased at events like IFA‚ to enhance user experience and provide cutting-edge control․
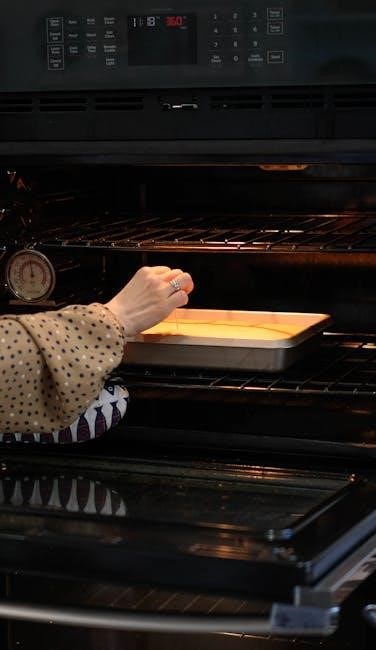
Using the Oven: Basic Cooking Modes
Conventional Baking: Ideal for cakes‚ pastries‚ and general baking‚ this mode utilizes heat from the top and bottom elements․ Preheat the oven thoroughly for consistent results․ Adjust temperature based on your recipe․
Fan Baking: Employing a fan to circulate heat‚ this mode ensures even cooking across all levels‚ reducing cooking time․ Perfect for biscuits‚ cookies‚ and larger batches․ Reduce temperature slightly compared to conventional baking․
Grilling: Utilize the top heating element for browning and searing․ Keep a close watch to prevent burning․ Suitable for meats‚ vegetables‚ and gratins․ Adjust rack position for desired intensity․
Roasting: Designed for larger cuts of meat and poultry‚ this mode provides intense heat for crispy exteriors and juicy interiors․ Consider using a roasting tray with a rack․ AEG‚ part of Electrolux Group‚ continually refines these modes‚ showcasing advancements at events like IFA‚ to deliver optimal cooking performance․
Advanced Cooking Modes & Programs
Steam Cooking: AEG Competence ovens excel in steam cooking‚ preserving nutrients and flavors․ Utilize the steam function for fish‚ vegetables‚ and delicate dishes․ Follow recommended steam cooking times for optimal results․
Sous Vide: Achieve restaurant-quality results with the sous vide program․ Precisely control temperature for perfectly cooked meats and vegetables․ Requires vacuum-sealed food pouches․
Pizza Program: Specifically designed for pizza‚ this mode delivers a crispy crust and perfectly melted toppings․ Adjust the program based on your preferred pizza style․
Slow Cooking: Ideal for tenderizing tough cuts of meat‚ the slow cooking program operates at low temperatures for extended periods․ Perfect for stews and casseroles․ AEG‚ as a premium brand of Electrolux Group‚ consistently introduces innovative programs‚ demonstrated at events like IFA‚ enhancing culinary possibilities․ Explore pre-set programs or customize settings to suit your recipes․
Steam Cooking with Your AEG Oven
Harnessing Moisture: AEG Competence ovens utilize steam to create a moist cooking environment‚ preserving natural flavors and nutrients․ This method is ideal for delicate foods like fish‚ vegetables‚ and pastries‚ preventing them from drying out․
Steam Functions: Your oven offers various steam settings – full steam‚ steam support‚ and proofing․ Full steam is best for pure steam cooking‚ while steam support adds humidity to conventional baking; Proofing creates a warm‚ moist environment for dough rising․
Water Reservoir: Ensure the water reservoir is filled with distilled or filtered water before initiating steam cooking․ Regularly clean the reservoir to prevent mineral buildup‚ maintaining optimal steam generation․
Tips for Success: Cover dishes loosely to retain moisture․ Adjust cooking times slightly‚ as steam cooking is often faster․ AEG‚ a brand showcased at IFA‚ prioritizes innovation‚ and steam technology exemplifies this commitment․ Explore recipes specifically designed for steam cooking to unlock the full potential of your oven․
Sous Vide Functionality Explained
Precision Cooking: Your AEG Competence oven’s sous vide function allows for incredibly precise temperature control‚ a hallmark of AEG’s innovative approach‚ frequently demonstrated at events like IFA․ This technique involves cooking food sealed in a vacuum bag in a water bath held at a consistent‚ low temperature․
Benefits of Sous Vide: Sous vide ensures even cooking throughout‚ resulting in exceptionally tender and flavorful results․ It’s perfect for meats‚ fish‚ and vegetables‚ maximizing moisture retention and preventing overcooking․
Using the Function: Select the sous vide mode on the control panel‚ set the desired temperature and cooking time‚ and ensure the food is properly sealed․ The oven maintains a precise water bath temperature for consistent results․
Safety & Considerations: Always use food-grade vacuum seal bags․ Ensure food is fully submerged in the water bath․ AEG‚ part of Electrolux Group‚ continually refines its technology‚ offering features like sous vide for enhanced culinary experiences․
Self-Cleaning Functions: Pyrolytic and Steam Cleaning
Effortless Maintenance: Your AEG Competence oven offers two convenient self-cleaning options: pyrolytic cleaning and steam cleaning‚ reflecting AEG’s commitment to simplifying kitchen care‚ a focus often highlighted at IFA showcases․ These functions minimize manual scrubbing and effort․
Pyrolytic Cleaning: This high-temperature process reduces food residue to ash‚ which can then be easily wiped away․ Ensure the oven door is securely locked during the cycle․ Remove all accessories before initiating pyrolytic cleaning․
Steam Cleaning: A gentler option‚ steam cleaning uses water to loosen dirt and grime․ It’s ideal for lighter cleaning tasks and can be completed more quickly than pyrolytic cleaning․
Safety & Considerations: Always follow the safety instructions in this manual․ AEG‚ as a premium brand of Electrolux Group‚ prioritizes user safety and convenience with these advanced cleaning features․
Maintaining Your AEG Oven: Cleaning and Care
Preserving Performance: Regular cleaning and care will ensure your AEG Competence oven continues to perform optimally‚ upholding the quality associated with the Electrolux Group’s premium brand․ Consistent maintenance extends the oven’s lifespan and maintains cooking results․
Exterior Cleaning: Wipe the exterior surfaces with a damp cloth and mild detergent․ Avoid abrasive cleaners‚ which can damage the finish․ For stainless steel‚ use a dedicated stainless steel cleaner for a polished look․
Interior Cleaning: After each use‚ wipe down the interior with a damp cloth․ Utilize the self-cleaning functions (pyrolytic or steam) periodically for a more thorough clean․ Remove and wash oven racks and accessories separately․
Door Maintenance: Clean the oven door and glass thoroughly․ Ensure the door seal is free from debris to maintain proper sealing during cooking․ AEG’s innovations‚ often displayed at events like IFA‚ emphasize user-friendly design and ease of maintenance․
Troubleshooting Common Issues
Resolving Everyday Problems: This section addresses common issues you might encounter with your AEG Competence oven‚ a product of the Electrolux Group․ Before contacting customer support‚ review these troubleshooting steps to potentially resolve the problem independently․
Oven Not Heating: Check the power supply and ensure the oven is properly connected․ Verify the cooking mode is selected and the temperature is set correctly․ If the issue persists‚ consult the error code section․
Uneven Cooking: Ensure the oven racks are positioned correctly and food isn’t overcrowded․ Rotate food during cooking for even browning․ AEG’s focus on innovation‚ showcased at events like IFA‚ aims to minimize such occurrences․
Error Codes: Refer to the ‘Error Codes and Their Meanings’ section for specific guidance․ Resetting the oven by disconnecting it from the power supply for a few minutes can sometimes resolve minor errors․ If problems continue‚ contact AEG customer support․
Error Codes and Their Meanings
Decoding Oven Signals: Your AEG Competence oven‚ a product of the Electrolux Group‚ utilizes error codes to communicate potential issues․ This section details common codes and suggested solutions‚ helping you quickly diagnose and address problems․ Remember‚ AEG consistently showcases innovations at events like IFA‚ aiming for reliable performance․
E101 – Temperature Sensor Fault: Indicates a problem with the temperature sensor․ Contact customer support for assistance‚ as this often requires professional repair․
E202 – Heating Element Failure: Suggests a faulty heating element․ Do not attempt to repair this yourself; contact a qualified technician․
E303 – Door Lock Malfunction: The oven door may not be securely locked․ Ensure the door is fully closed․ If the error persists‚ contact support․
E404 – Fan Motor Error: Indicates an issue with the oven’s fan motor․ Resetting the oven may resolve temporary glitches․ If the error remains‚ professional repair is needed․
Important Note: Always disconnect the oven from the power supply before attempting any troubleshooting steps beyond resetting․
Replacing the Oven Lamp
Illuminating Your Cooking Space: Maintaining visibility within your AEG Competence oven‚ a premium appliance from the Electrolux Group‚ is crucial․ Replacing the oven lamp is a straightforward process‚ ensuring optimal cooking conditions․ AEG consistently demonstrates innovation‚ including user-friendly design elements like accessible components․
Safety First: Always disconnect the oven from the power supply before attempting any repairs․ Allow the oven to cool completely․ Locate the oven lamp cover‚ typically found on the rear wall of the oven cavity․
Removal & Installation: Unscrew the cover (usually a single screw)․ Gently remove the old lamp‚ noting its type (typically a standard oven bulb)․ Insert the new bulb‚ ensuring it’s securely fitted․ Replace the cover and tighten the screw․
Bulb Specifications: Refer to your oven’s documentation for the correct bulb wattage and type․ Using an incorrect bulb could damage the oven․ AEG’s presence at events like IFA highlights their commitment to quality and safety․
Understanding Oven Accessories
Enhancing Your Culinary Experience: Your AEG Competence oven‚ a product of the innovative Electrolux Group‚ benefits from a range of accessories designed to expand its functionality․ These accessories‚ often showcased at events like IFA‚ elevate your cooking possibilities․

Baking Trays & Wire Racks: Included are durable baking trays for pastries and roasts‚ and wire racks for optimal air circulation․ AEG’s focus on ‘Taste’ within their innovation areas is reflected in these tools․
Specialized Pans: Consider purchasing specialized pans for specific dishes – pizza stones for crispy crusts‚ or roasting racks for poultry․ These enhance results․
Steam Accessories: For steam cooking‚ utilize the provided steam tray․ AEG’s steam functionality‚ a key feature‚ requires proper accessory use․
Cleaning Tools: AEG also offers specialized cleaning brushes and scrapers to maintain your oven’s pristine condition․ Proper care‚ as emphasized by AEG‚ extends the appliance’s lifespan․ Explore accessories to maximize your oven’s potential!
AEG’s Innovations Showcased at IFA (2024 & 2025)
A Glimpse into the Future of Cooking: AEG‚ a premium brand within the Electrolux Group‚ consistently unveils groundbreaking innovations at the IFA (Internationale Funkausstellung) in Berlin․ These advancements directly influence features within the AEG Competence oven․
IFA 2024 Highlights: At IFA 2024‚ Electrolux Group showcased innovations across ‘Taste‚ Care and Wellbeing’․ AEG’s contributions focused on enhancing cooking precision and user experience․ Expect these features to be integrated into future oven models․
IFA 2025 Previews: Ahead of IFA 2025‚ AEG previewed what’s to come‚ including potentially the quietest and most efficient dishwasher ever created․ While not directly oven-related‚ this demonstrates AEG’s commitment to technological advancement․
Sound Identity & Design: In 2024‚ AEG unveiled a bold new look and its first-ever sound identity‚ reflecting a modern brand expression․ This aesthetic is subtly incorporated into the oven’s design and interface․
Continued Innovation: AEG’s presence at IFA signifies a dedication to pushing boundaries and delivering cutting-edge appliances․

AEG in the Chinese Market: Brand Positioning and Technology
Expanding Horizons: AEG’s entry into the Chinese market began in 2018‚ with a formal brand launch – including the Chinese name “” (Ān yì jiā) – at the 2021 China Household Electrical Appliances & Consumer Electronics Expo in Shanghai․ This expansion influences the technology found within the AEG Competence oven․
Focus on Intelligent Care: AEG’s washing machine product line in China emphasizes intelligent care‚ utilizing a ‘Smart Sensor System’ to precisely adjust washing parameters․ This dedication to intelligent technology translates to the oven’s advanced cooking programs․
Precision and Control: AEG’s Chinese market strategy prioritizes precise control over washing dosage‚ cycles‚ and water temperature‚ adapting to garment dirt levels․ This mirrors the oven’s precise temperature control and customizable cooking settings․
Premium Positioning: AEG positions itself as a premium brand in China‚ focusing on delivering superior cleaning and garment care․ This premium positioning extends to the Competence oven‚ emphasizing quality and performance․
Technological Synergy: The innovations developed for the Chinese market demonstrate AEG’s commitment to advanced technology‚ which is then integrated into its global product lines‚ including the Competence oven․
Warranty Information and Customer Support
Protecting Your Investment: Your AEG Competence Oven is covered by a comprehensive warranty‚ safeguarding against manufacturing defects․ Specific warranty terms – duration and coverage – vary by region and purchase date․ Please retain your proof of purchase for warranty claims․

Registering Your Appliance: We strongly recommend registering your oven online at the official AEG website․ Registration allows us to provide timely updates‚ important safety notifications‚ and streamlined customer support․
Accessing Support Resources: AEG offers multiple channels for customer support․ Visit our website for FAQs‚ troubleshooting guides‚ and downloadable manuals specific to your Competence Oven model․
Contacting Customer Care: For personalized assistance‚ contact our dedicated customer care team via phone or email․ Contact details are available on the AEG website and in the accompanying documentation․
Authorized Service Centers: AEG maintains a network of authorized service centers for repairs and maintenance․ Using authorized technicians ensures your oven is serviced to the highest standards‚ preserving your warranty․
Extended Warranty Options: Consider purchasing an extended warranty for continued peace of mind beyond the standard warranty period․ Details are available at the point of sale or through our customer support channels․