
Mirro Matic Pressure Cooker Manual: A Comprehensive Guide
Discover essential guides for Mirro Matic cookers‚ including parts diagrams and manual downloads. Find replacements like gaskets‚ gauges‚ and handles at Red Hill General Store!

Understanding Your Mirro Matic Cooker
Your Mirro Matic pressure cooker is a versatile kitchen appliance designed for both speed and safety in food preparation. Before first use‚ familiarize yourself with its core components and operational principles. These cookers utilize pressurized steam to significantly reduce cooking times compared to conventional methods‚ while also preserving valuable nutrients.
Identifying your model is crucial for sourcing correct replacement parts and accessing the appropriate manual. Locate the model number‚ typically stamped or etched on the bottom of the pot. This number is key when searching for specific instructions or components. Understanding the function of each part – from the pressure regulator to the sealing gasket – ensures safe and efficient operation.
Mirro Matic cookers are renowned for their durability‚ but regular inspection of parts is vital. A properly maintained cooker will provide years of reliable service. Remember to always refer to the official manual for detailed guidance on operation and safety precautions.
Model Identification and Parts Diagram
Locating your Mirro Matic cooker’s model number is the first step towards successful maintenance and repair. This number‚ usually found stamped or etched on the base of the pot‚ is essential for ordering the correct replacement parts. Without it‚ ensuring compatibility can be challenging.
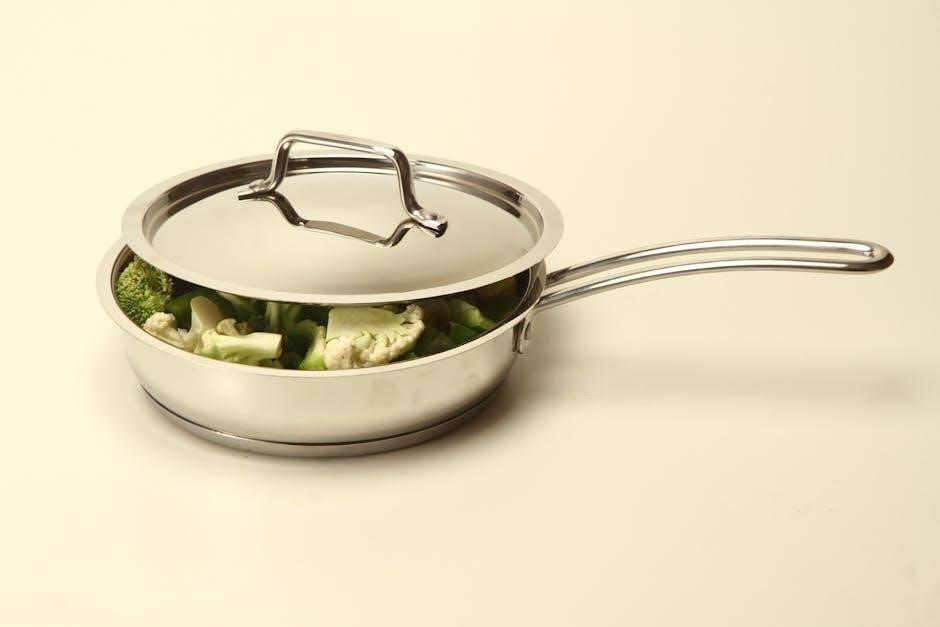
Key components typically include the pot itself‚ a lid with a sealing gasket‚ a pressure regulator (weight or valve)‚ a safety valve‚ and handles. A detailed parts diagram‚ often found within the owner’s manual or online resources like Red Hill General Store‚ visually illustrates each component’s location and function.
Understanding the diagram helps identify worn or damaged parts needing replacement. Common replacements include gaskets‚ gauges‚ and regulators. Referencing the diagram alongside the model number guarantees you select the precise part for your specific Mirro Matic cooker‚ ensuring optimal performance and safety.
Safety Precautions & Important Warnings
Pressure cooking demands strict adherence to safety guidelines. Never attempt to open the cooker while pressure remains inside – this could result in severe burns from escaping steam and hot contents. Always ensure the pressure regulator is functioning correctly before each use‚ and never modify or disable safety features.
Overfilling the cooker can cause food to block the steam vent‚ leading to dangerous pressure buildup. Follow recommended liquid levels for different food types. Regularly inspect the gasket for cracks or damage‚ as a faulty seal compromises safety.
Keep the lid clean and free of debris to ensure a proper seal. Never use the cooker for frying or deep-frying. Always allow the cooker to cool completely before opening‚ and direct the steam away from your face and hands during release.
Component Overview: What’s in the Box?
Upon opening your Mirro Matic Pressure Cooker package‚ you should find several key components. These typically include the main pressure cooker pot‚ constructed from durable aluminum or stainless steel‚ and a securely fitting lid with a sealing gasket. A crucial element is the pressure regulator – often a weighted gauge or spring-loaded valve – responsible for maintaining the correct internal pressure.
You’ll also receive a steam vent/pressure release mechanism‚ essential for safely releasing pressure after cooking. Many models include a rack to elevate food above the liquid‚ preventing sticking and ensuring even cooking.
Check for an instruction manual detailing operation and safety. Depending on the model‚ additional items like recipe booklets or canning guides may be included. Verify all parts are present and undamaged before first use.
Operating Instructions: Basic Pressure Cooking
To begin pressure cooking with your Mirro Matic‚ ensure the cooker is clean and the gasket is properly seated. Add the desired amount of liquid – water‚ broth‚ or juice – and food to the pot‚ adhering to minimum liquid level guidelines. Securely fasten the lid‚ aligning the indicator marks.
Select the appropriate pressure setting based on your recipe‚ typically using the weighted gauge or regulator. Place the cooker on a burner over medium-high heat. As steam builds‚ the regulator will begin to rock or hiss‚ indicating pressure is building.
Once the desired pressure is reached‚ reduce heat to maintain a steady‚ gentle rock or hiss. Cooking time begins when the regulator stabilizes. After cooking‚ safely release pressure before opening.
Water Levels and Food Quantities
Maintaining correct liquid levels is crucial for safe and effective pressure cooking with your Mirro Matic. Generally‚ a minimum of 3 cups of liquid is required for proper steam generation‚ even when cooking small quantities of food. For larger volumes‚ increase liquid proportionally.
Food quantities also impact pressure build-up. Do not fill the cooker more than two-thirds full‚ especially when cooking foods that expand during cooking‚ like beans or grains. For foods like rice or pasta‚ a liquid-to-food ratio of 2:1 is often recommended.
Always consult your recipe for specific liquid requirements. Insufficient liquid can cause scorching‚ while excessive liquid may result in diluted flavors.
Setting the Pressure Regulator
The pressure regulator controls the internal pressure within your Mirro Matic cooker; Ensure it’s clean and properly seated before each use. For most recipes‚ the regulator should be set to the “high” pressure position‚ indicated by a specific weight or marking on the device.
Once the desired pressure is reached‚ the regulator will begin to gently rock or release steam. This is normal operation. Avoid disturbing the regulator during the cooking process‚ as this can affect pressure stability.
Some models offer multiple pressure settings. Refer to your recipe for the appropriate setting. Always allow the cooker to depressurize naturally or follow the manufacturer’s instructions for quick release.
Cooking Times for Common Foods

Pressure cooking significantly reduces cooking times compared to conventional methods. However‚ times vary based on food type‚ quantity‚ and desired tenderness. Generally‚ meats like beef and pork require 30-60 minutes‚ while poultry takes 20-40 minutes.
Vegetables‚ being more delicate‚ cook much faster – typically 5-15 minutes. Dried beans benefit greatly from pressure cooking‚ often needing only 20-30 minutes instead of hours. Remember these are approximate times; always consult a reliable recipe;
Adjust cooking times based on altitude‚ as higher elevations require longer processing. Proper food preparation‚ such as cutting into uniform sizes‚ ensures even cooking. Always ensure food reaches a safe internal temperature.
Advanced Techniques: Pressure Canning
Pressure canning is a method for preserving low-acid foods like vegetables‚ meats‚ and poultry‚ ensuring safety against botulism. It requires precise adherence to guidelines for both jar preparation and processing times. Begin by thoroughly washing jars‚ lids‚ and rings in hot‚ soapy water.
Sterilize jars by boiling them for 10 minutes‚ or running them through a dishwasher cycle with a sanitizing option. Inspect jars for any chips or cracks. Properly vent the pressure canner before adding filled jars‚ ensuring adequate headspace.
Follow recommended processing times based on food type‚ jar size‚ and altitude. Accurate timing and pressure are crucial for safe preservation. Always consult tested recipes from reputable sources.
Preparing Jars and Lids
Successful pressure canning begins with meticulous jar and lid preparation. Thoroughly wash canning jars in hot‚ soapy water‚ rinsing completely to remove any residue. Sterilization is vital; boil jars for 10 minutes‚ or utilize a dishwasher’s sanitizing cycle. Inspect each jar carefully for cracks or chips – discard any damaged ones.
New lids require a brief softening in hot (not boiling) water for five minutes to activate the sealing compound. Do not boil lids‚ as this can compromise their ability to seal properly. Rings should also be washed and are reusable‚ but inspect for rust or damage.
Proper preparation ensures a vacuum seal‚ preventing spoilage and guaranteeing food safety during long-term storage. Always follow these steps precisely before beginning the canning process.
Processing Times for Canning

Accurate processing times are crucial for safe and effective canning. These times vary significantly based on the food being canned‚ jar size (quarts‚ pints‚ or half-pints)‚ and your altitude. Always consult a reliable canning chart – resources are available from the National Center for Home Food Preservation and within Mirro manuals.
Low-acid foods like vegetables‚ meats‚ and poultry require higher processing temperatures and longer times than high-acid foods like fruits and pickles. Processing times are given in minutes‚ and adjustments must be made for altitudes above 1‚000 feet.
Failure to process for the correct duration can lead to spoilage and potentially dangerous botulism. Refer to specific recipes and charts for precise instructions.
Troubleshooting Common Issues
Difficulty sealing: Ensure the gasket is properly seated and clean. Inspect the sealing rim of the pot and jar lids for any damage or debris. A warped lid can also prevent a proper seal.

Pressure not building: Verify the vent pipe isn’t blocked. Confirm the weight or regulator is correctly positioned. Insufficient liquid can also hinder pressure build-up.
Excessive venting: This might indicate overfilling or a faulty gasket. Reduce the liquid level and check the gasket’s condition.
Food burning: Ensure adequate liquid is used and the heat is appropriately adjusted. Stirring occasionally can prevent sticking. Always follow recipe guidelines.
Replacing Worn Parts
Gaskets and Seals: Regularly inspect the rubber gasket for cracks‚ hardening‚ or deformation. Replacement is crucial for maintaining a secure seal and preventing leaks. Ensure the new gasket is properly seated before each use.
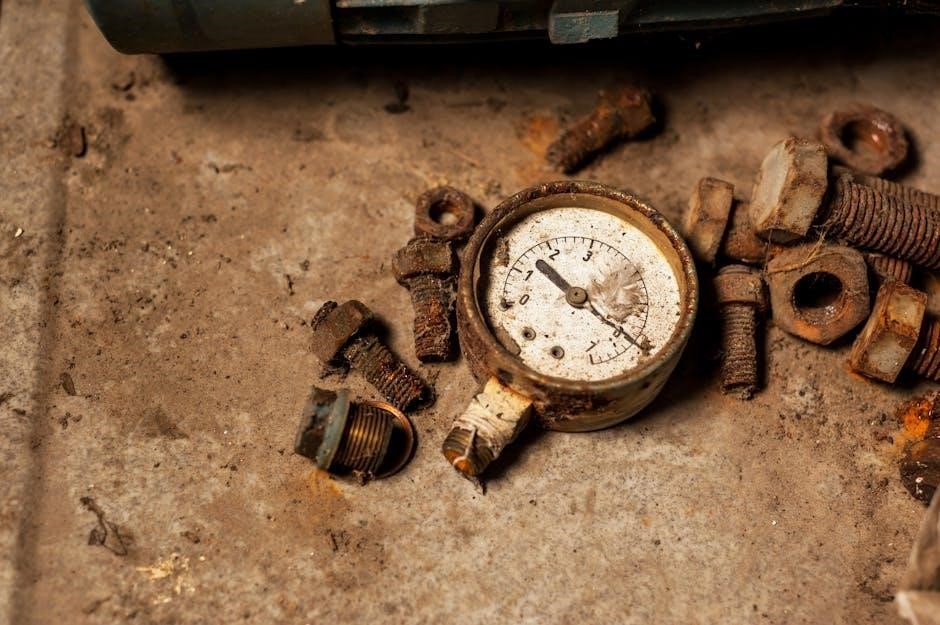
Pressure Gauges and Regulators: If the gauge consistently reads inaccurately‚ or the regulator fails to maintain pressure‚ replacement is necessary. Faulty gauges can compromise safety.
Handles and Other Components: Cracked or loose handles should be replaced immediately to prevent accidents. Inspect all other components‚ like the vent pipe‚ for damage.
Finding Replacements: Red Hill General Store offers a wide selection of Mirro parts. Always use genuine Mirro replacement parts to ensure compatibility and safety.
Gaskets and Seals
Importance of Inspection: The rubber gasket is a critical component‚ requiring regular inspection for any signs of wear and tear. Look closely for cracks‚ hardening‚ or a generally deformed shape. A compromised gasket directly impacts the cooker’s ability to build and maintain pressure safely.
Replacement Frequency: While there’s no fixed schedule‚ gaskets should be replaced annually‚ or more frequently with heavy use. Any visible damage necessitates immediate replacement. Don’t risk a failed seal!
Proper Seating: After installing a new gasket‚ ensure it’s correctly seated within the cooker lid. A properly seated gasket is essential for creating a tight‚ leak-proof seal. Double-check before applying pressure.

Genuine Parts: Always use genuine Mirro replacement gaskets to guarantee compatibility and optimal performance.
Pressure Gauges and Regulators
Gauge Accuracy: Regularly verify the accuracy of your pressure gauge. Inaccurate readings can lead to under or over-pressurization‚ compromising both food safety and cooker integrity. Consider professional calibration if you suspect inaccuracies.
Regulator Function: The pressure regulator maintains the desired cooking pressure. Ensure it moves freely and isn’t clogged with debris. A malfunctioning regulator can cause erratic pressure fluctuations.
Cleaning Procedures: Gently clean the gauge and regulator with a damp cloth. Avoid abrasive cleaners that could damage delicate components. Inspect for corrosion or buildup.
Replacement Indicators: If the gauge consistently displays incorrect readings or the regulator fails to maintain pressure‚ replacement is crucial. Prioritize safety by using only genuine Mirro replacement parts.
Handles and Other Components
Handle Security: Regularly inspect the handles for cracks‚ looseness‚ or damage. Securely attached handles are vital for safe handling‚ especially when the cooker is pressurized and hot. Replace damaged handles immediately.
Lid Locking Mechanisms: Ensure the lid locking mechanism functions correctly. A proper seal is essential for building and maintaining pressure. Verify that the lid locks securely onto the pot.
Steam Vent/Release: Check the steam vent and release mechanisms for obstructions. Clear any blockages to prevent pressure buildup. Understand the difference between the steam vent and pressure release functions.
Component Compatibility: When replacing components‚ always use parts specifically designed for your Mirro Matic model. Incompatible parts can compromise safety and performance. Prioritize genuine Mirro replacements.
Cleaning and Maintenance
Post-Use Cleaning: After each use‚ allow the Mirro Matic cooker to cool completely before cleaning. Wash all removable parts – lid‚ gasket‚ pressure regulator‚ and steam vent – with warm‚ soapy water. Rinse thoroughly and dry.
Pot Cleaning: Clean the cooker pot with a non-abrasive cleaner to avoid damaging the interior surface. Avoid harsh chemicals or scouring pads. For stubborn food residue‚ soak the pot in warm‚ soapy water.
Gasket Care: Inspect the gasket for cracks‚ hardening‚ or deformation. Replace the gasket if it shows signs of wear. Proper gasket maintenance ensures a tight seal.
Regular Inspection: Periodically inspect all components for damage or wear. Address any issues promptly to maintain safe and efficient operation. Proper maintenance extends the life of your cooker.

Finding Replacement Parts Online
Locating Parts: If your Mirro Matic cooker requires replacement parts‚ several online retailers specialize in pressure cooker components. Red Hill General Store is a key resource‚ offering gaskets‚ gauges‚ regulators‚ and handles.
Model Identification: Before ordering‚ identify your cooker’s model number‚ often stamped or etched on the bottom of the pot. This ensures compatibility. Accurate model identification is crucial for correct parts.
Online Marketplaces: Explore online marketplaces like eBay and Amazon for a wider selection of parts‚ including both new and used options. Compare prices and seller ratings.
Direct from Manufacturers: Check if the manufacturer or authorized distributors offer direct online sales of replacement parts. This can guarantee authenticity and quality.
Mirro Pressure Cooker Parts by Model Quart Size
Parts Availability: Red Hill General Store specializes in Mirro Pressure Cooker parts‚ categorized by model and quart size. This ensures you find the correct component for your specific cooker.
Quart Size Matters: Different quart sizes often require unique parts‚ particularly gaskets and seals. Always verify the quart capacity of your cooker before ordering.
Common Parts: Frequently requested parts include replacement pressure regulators‚ safety valves‚ and handles. Availability varies depending on the model and age of the cooker.
Model-Specific Listings: The store provides model-specific listings‚ simplifying the search process. Input your cooker’s model number to view compatible parts. Detailed diagrams aid in identification.
Downloading Mirro Pressure Canner Manuals
Accessing Manuals: Finding the correct Mirro Pressure Canner manual is crucial for safe and effective operation. Numerous online resources offer free downloads of original Mirro instruction manuals.
Online Resources: Several websites specialize in providing appliance manuals‚ including those for Mirro cookers and canners. A quick online search will reveal several options.
Model Identification: Before downloading‚ identify your canner’s model number. This ensures you obtain the correct manual with specific instructions for your unit.
Safety First: Always prioritize safety by carefully reading and understanding the manual before using your Mirro canner. Proper operation prevents accidents and ensures food preservation.
Comprehensive Guides: These manuals cover everything from basic operation to advanced canning techniques‚ offering a wealth of information for both beginners and experienced users.
Understanding Pressure Cooking Terminology

Pressure Cooking Basics: Familiarizing yourself with key terms is essential for successful Mirro Matic pressure cooking. Understanding these concepts ensures safe and efficient operation of your appliance.
Pressure Regulator: This controls the internal pressure within the cooker‚ maintaining a consistent temperature for optimal cooking. Different settings correspond to varying temperatures.
Venting: Releasing pressure from the cooker‚ either naturally (allowing it to cool down) or quickly (using a vent). Proper venting is crucial for safety.
Sealing Ring/Gasket: Creates an airtight seal between the lid and the pot‚ enabling pressure to build. Regular inspection and replacement are vital.
Altitude Adjustment: Higher altitudes require increased pressure and longer cooking times. Consult your manual for specific adjustments.
Converting Cooking Times (Altitude Adjustments)
Altitude’s Impact: As elevation increases‚ water boils at a lower temperature‚ impacting pressure cooking times. Mirro Matic cookers require adjustments for optimal results at higher altitudes.
Adjustment Guidelines: Generally‚ increase processing times as altitude rises. For example‚ at 2‚000 feet‚ add 5% to recommended cooking times. At 4‚000 feet‚ increase by 10%‚ and so on.
Pressure Regulator Settings: Ensure your pressure regulator is set correctly for your altitude. Some models have specific markings for different elevations.
Canning Considerations: Altitude adjustments are critical for safe canning. Insufficient processing can lead to spoilage and health risks. Always consult reliable canning guides.
Refer to Manual: Your Mirro Matic manual provides detailed altitude adjustment charts for various foods. Prioritize these recommendations for accurate cooking.
Frequently Asked Questions (FAQ)
Q: Where can I find replacement parts? A: Red Hill General Store offers a wide selection of Mirro Matic parts – gaskets‚ gauges‚ handles‚ and more. Online retailers also stock components.
Q: How do I identify my cooker model? A: Look for a number stamped or etched on the bottom of the pot. This helps determine compatible parts and manuals.
Q: Can I download a manual if I lost mine? A: Yes! Numerous websites offer free downloads of Mirro and other pressure cooker instruction manuals.
Q: What if my cooker isn’t building pressure? A: Check the gasket for damage‚ ensure the vent is clear‚ and verify proper water levels.
Q: Is it safe to use a damaged pressure regulator? A: Absolutely not! A faulty regulator can compromise safety. Replace it immediately.
Where to Find Additional Support
For comprehensive assistance with your Mirro Matic pressure cooker‚ several resources are available. Begin with online forums dedicated to pressure cooking and canning; experienced users frequently share troubleshooting tips and advice. Red Hill General Store often provides helpful guidance alongside their parts selection.
Manufacturer websites‚ though potentially outdated‚ may contain archived manuals and FAQs. Consider contacting appliance repair services in your local area for professional diagnostics and repairs. YouTube channels dedicated to cooking often feature tutorials demonstrating proper Mirro Matic operation.
Remember to always prioritize safety and consult multiple sources before attempting any repairs or modifications. Detailed parts diagrams can aid in identifying specific components needing replacement or attention.