ultrasound guided biopsy of breast cpt code
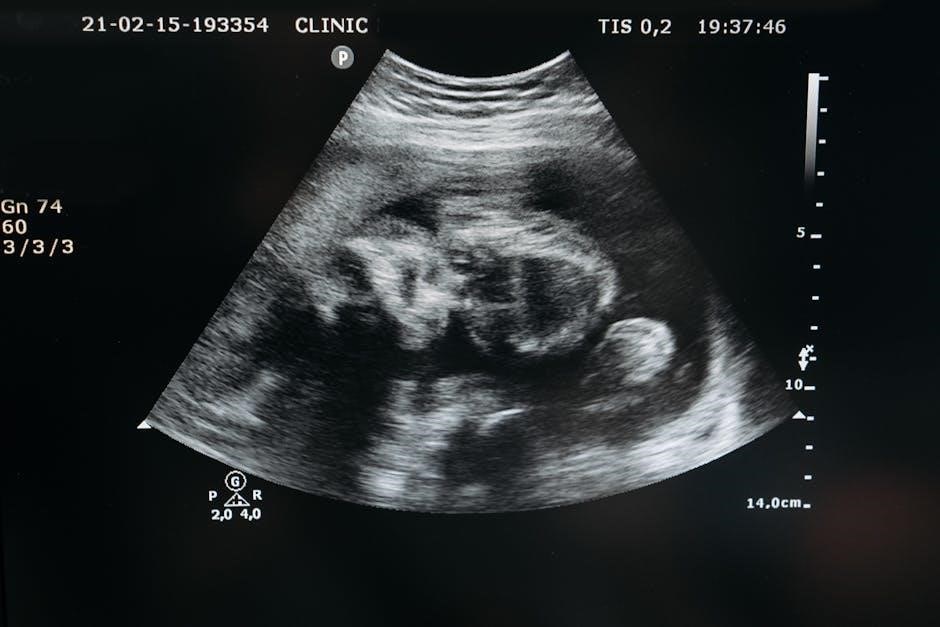
An ultrasound-guided breast biopsy is a minimally invasive procedure using sound waves to precisely locate and sample breast tissue for diagnostic examination, coded as CPT 19083 for the first lesion․
1․1 Overview of Breast Biopsy Procedures
A breast biopsy involves removing a tissue sample from the breast to examine for abnormalities, such as cancer․ It is a diagnostic procedure that can be performed using various methods, including ultrasound guidance, stereotactic guidance, or without imaging assistance․ Breast biopsies are categorized into image-guided and non-image-guided procedures, with ultrasound-guided biopsies being a common and precise method․ The procedure is minimally invasive, often performed percutaneously, and ensures accurate tissue sampling for microscopic examination․ Imaging guidance enhances the precision of lesion localization, making the process more effective and reliable for diagnostic purposes․
1․2 Importance of Ultrasound Guidance in Breast Biopsies
Ultrasound guidance is critical in breast biopsies as it provides real-time imaging, enabling precise localization of breast abnormalities․ This method enhances diagnostic accuracy by ensuring targeted tissue sampling, reducing the risk of missing lesions․ Ultrasound is particularly valuable for palpable or non-palpable lesions, offering a minimally invasive approach that minimizes patient discomfort․ It also allows for efficient placement of localization devices when needed․ The use of ultrasound guidance is associated with higher success rates and fewer complications compared to non-image-guided procedures, making it a preferred method for both physicians and patients․ CPT codes like 19083 and 19084 specifically account for these procedures․

CPT Codes for Ultrasound-Guided Breast Biopsy
CPT codes 19083 and 19084 are used for ultrasound-guided breast biopsies, with 19083 for the first lesion and 19084 for additional lesions, ensuring accurate billing․
2․1 CPT Code 19083: First Lesion Biopsy
CPT code 19083 is specifically used for an ultrasound-guided breast biopsy targeting the first lesion․ This code encompasses the entire procedure, including the use of ultrasound imaging to localize the lesion and the percutaneous removal of tissue samples for diagnostic examination․ It is a comprehensive code that covers all aspects of the biopsy process for a single lesion, making it the foundational code for this type of procedure․ Accurate billing requires reporting this code for the initial lesion sampled during the biopsy․ Additional lesions are reported separately using CPT code 19084․
2․2 CPT Code 19084: Additional Lesions
CPT code 19084 is used for each additional lesion sampled during an ultrasound-guided breast biopsy, beyond the first lesion․ This code is an add-on to the primary procedure code 19083 and must be billed separately for each additional lesion․ It ensures accurate billing for procedures involving multiple lesions, distinguishing it from the initial biopsy code․ Proper documentation is essential to avoid coding errors, as each additional lesion requires a separate reporting of this code․ This distinction helps in maintaining precise billing records and ensures appropriate reimbursement for the procedure․
2․3 CPT Code 19085: First Lesion with Localization Device
CPT code 19085 is used for an ultrasound-guided breast biopsy of the first lesion when a localization device, such as a clip or metallic pellet, is placed during the procedure․ This code encompasses the biopsy itself, the placement of the localization device, and imaging guidance․ It is essential for accurate billing when both the biopsy and device placement are performed․ The code applies specifically to the first lesion and is distinct from codes for additional lesions or procedures without localization devices, ensuring precise documentation and reimbursement for complex cases․
2․4 CPT Code 19086: Additional Lesions with Localization Device
CPT code 19086 is designated for additional lesions sampled during an ultrasound-guided breast biopsy when a localization device is placed․ This add-on code is used after the primary procedure (CPT 19085) and applies to each subsequent lesion requiring localization․ It ensures accurate billing for complex cases involving multiple lesions, covering both the biopsy and device placement․ Proper documentation is crucial to distinguish this code from others, ensuring correct reimbursement for additional procedures beyond the initial lesion․
Billing for Bilateral Breast Biopsies
Bilateral breast biopsies require reporting initial codes (19081, 19083, 19085) for the first lesion and additional codes (19082, 19084, 19086) for contra-lateral or extra lesions, ensuring accurate billing․
3․1 Initial Biopsy Codes (19081, 19083, 19085)
For bilateral breast biopsies, initial procedures are coded using CPT 19081, 19083, or 19085․ CPT 19083 is used for the first lesion without a localization device, while CPT 19085 includes a localization device․ CPT 19081 applies when stereotactic guidance is used․ These codes are reported once per breast for the initial lesion, ensuring accurate billing for the primary procedure․ Proper use of these codes is essential for compliance with reimbursement guidelines and avoiding claim denials․ Always verify documentation to ensure correct code selection and sequencing․

3․2 Contra-Lateral and Additional Biopsy Codes (19082, 19084, 19086)
For contra-lateral or additional breast biopsies, CPT codes 19082, 19084, and 19086 are used․ CPT 19082 applies to stereotactic-guided additional lesions, while CPT 19084 is for ultrasound-guided additional lesions without a localization device․ CPT 19086 is used when ultrasound guidance includes a localization device for additional lesions․ These codes are add-on codes, requiring a primary procedure code (e․g․, 19081, 19083, or 19085) to be billed first․ Accurate use of these codes ensures proper reimbursement for bilateral or multiple lesion biopsies, avoiding billing errors and denials․
Modifiers and Documentation Requirements
Use Modifier 26 for professional components of ultrasound-guided breast biopsies․ Accurate documentation of imaging guidance, lesion details, and patient history is essential for compliant billing and reimbursement․
4․1 Use of Modifier 26 for Professional Components
Modifier 26 is used to denote the professional component of ultrasound-guided breast biopsies, distinguishing it from technical or facility fees․ This modifier ensures accurate billing for radiologists interpreting imaging and guiding the procedure․ It applies to CPT codes like 19083 and 19084, separating the physician’s expertise from facility charges․ Proper use of Modifier 26 prevents overbilling and ensures compliance with payer guidelines, maintaining transparency in reimbursement processes for both Medicare and private insurers․ Documentation must clearly reflect the professional service provided to justify its application․
4․2 Documentation Guidelines for Accurate Billing
Accurate documentation is critical for correct billing of ultrasound-guided breast biopsies․ Medical records must include details such as the number of lesions sampled, imaging guidance used, and whether localization devices were placed․ Documentation should clearly distinguish between initial and additional lesions to support the use of appropriate CPT codes (e․g․, 19083 for the first lesion and 19084 for additional lesions)․ Records must also specify the type of biopsy (e․g․, core needle) and confirm the use of ultrasound guidance․ Incomplete or vague documentation can lead to denied claims or audits, emphasizing the need for precise and detailed reporting․

Coding for Image-Guided vs․ Non-Image-Guided Biopsies
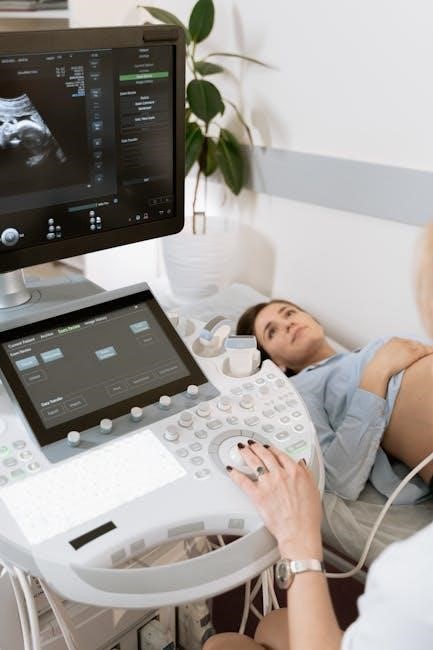
Image-guided biopsies use CPT codes like 19083 for ultrasound guidance, while non-image-guided procedures are coded as 19101, reflecting the absence of imaging in the procedure․
5․1 CPT Code 19101: Non-Image-Guided Breast Biopsy
CPT code 19101 is used for non-image-guided breast biopsies, specifically percutaneous needle core biopsies without imaging guidance․ This code applies when no ultrasound, stereotactic, or MRI guidance is utilized during the procedure․ It is a separate procedure distinct from image-guided biopsies, which require specific imaging codes like 19083 for ultrasound guidance․ The key difference lies in the absence of imaging, making it a standalone code for biopsies performed solely through clinical examination or palpation․ Accurate coding ensures proper reimbursement and distinguishes it from image-guided methods, which have their own coding requirements․
5․2 Key Differences in Billing and Documentation
The primary distinction in billing for image-guided vs․ non-image-guided biopsies lies in the CPT codes used․ Image-guided procedures, such as ultrasound-guided biopsies, require specific codes like 19083, which include imaging guidance․ In contrast, non-image-guided biopsies (CPT 19101) do not involve imaging, making them distinct in billing․ Documentation must clearly state whether imaging was used, as this affects code selection and reimbursement․ Additionally, modifiers like 26 may be required for professional components in image-guided cases․ Accurate documentation ensures proper coding and avoids billing errors, highlighting the importance of detailed records for each procedure type․
Common Coding Errors and Solutions
Common errors include using unlisted code 19499 for image-guided biopsies and misreporting additional lesions․ Ensure correct CPT codes (19083, 19084) are used for accurate billing and documentation․
6․1 Incorrect Use of Unlisted Procedure Code 19499
A common coding error involves using CPT code 19499 for image-guided breast biopsies․ This unlisted procedure code is often misapplied for stereotactic or tomosynthesis-guided biopsies․ However, CMS guidelines specify that code 19081 should be used for biopsies involving stereotactic guidance, while 19499 is reserved for procedures using only tomosynthesis imaging without other guidance․ Providers must ensure accurate code selection to avoid reimbursement issues․ Correct coding prevents delays and ensures compliance with billing regulations․ Always verify the specific imaging modality used during the procedure to apply the appropriate CPT code․
6․2 Misreporting of Additional Lesions
Misreporting additional lesions is a frequent coding error in ultrasound-guided breast biopsies․ CPT code 19084 is designated for each additional lesion beyond the first, requiring the primary code 19083 to be billed first․ Providers often incorrectly report 19083 multiple times for multiple lesions or fail to use 19084 altogether․ This leads to denied claims and reimbursement delays․ Accurate documentation of the number of lesions sampled is essential to ensure proper coding․ Always verify the procedure details to avoid misreporting and ensure compliance with billing guidelines․ Correct use of 19083 and 19084 prevents financial and administrative complications․
Clinical Scenarios and Coding Examples
CPT code 19083 is used for the first lesion in ultrasound-guided breast biopsies, while 19084 applies to additional lesions․ Examples include single or multiple lesion sampling, ensuring accurate billing and documentation for each scenario․
7․1 Single Lesion Ultrasound-Guided Biopsy
CPT code 19083 is used for an ultrasound-guided breast biopsy targeting a single lesion․ This code covers the entire procedure, including ultrasound guidance for precise lesion localization and tissue sampling․ It is a minimally invasive method that ensures diagnostic accuracy with minimal patient discomfort․ The procedure involves using sound waves to guide the needle to the target tissue, allowing for precise extraction of a tissue sample for microscopic examination․ Accurate coding is essential for proper billing and reimbursement, making CPT 19083 the primary code for this specific clinical scenario․
7․2 Multiple Lesions and Bilateral Biopsies
For multiple lesions or bilateral breast biopsies, CPT code 19083 is used for the first lesion, while CPT code 19084 is reported for each additional lesion․ In bilateral cases, the initial biopsy is coded with 19083, and the contra-lateral or additional lesions are billed using 19084․ This coding approach ensures accurate billing for procedures involving multiple sites or lesions․ Proper documentation of each lesion and its location is crucial to avoid coding errors and ensure proper reimbursement․ Accurate coding is essential for reflecting the complexity of the procedure and adhering to billing guidelines․
Reimbursement and Insurance Guidelines
Medicare, Medicaid, and private insurers typically cover ultrasound-guided breast biopsies, with reimbursement based on CPT codes like 19083 and 19084․ Proper documentation ensures accurate claims processing and payment․
8․1 Medicare and Medicaid Reimbursement Policies
Medicare and Medicaid reimburse ultrasound-guided breast biopsies using specific CPT codes, such as 19083 and 19084, ensuring coverage for diagnostic procedures․ These codes are recognized under Medicare’s payment policies, with reimbursement rates determined by regional fee schedules․ Medicaid reimbursement varies by state but generally aligns with Medicare guidelines․ Proper documentation, including imaging guidance and lesion details, is essential for accurate claims processing․ Follow-up mammograms post-biopsy are considered part of the procedure and are not separately reimbursed․ Providers must adhere to coding and documentation standards to avoid denied claims and ensure timely payment․
8․2 Private Insurance Billing Practices
Private insurance billing for ultrasound-guided breast biopsies typically requires accurate CPT coding, such as 19083 for the first lesion and 19084 for additional lesions․ Insurers may have specific coverage policies, so verification of benefits is essential․ Documentation must include imaging guidance details and medical necessity․ Some plans may require preauthorization, while others may have varying reimbursement rates․ Providers should ensure compliance with insurer-specific guidelines to avoid claim denials․ Patient cost-sharing, such as copays or coinsurance, may apply based on individual plans․ Accurate coding and thorough documentation are critical for seamless reimbursement and patient billing․
Procedure Overview
An ultrasound-guided breast biopsy uses sound waves to locate abnormalities, enabling precise tissue sampling for diagnostic examination, often coded as CPT 19083 for the first lesion․
9․1 Steps Involved in Ultrasound-Guided Breast Biopsy
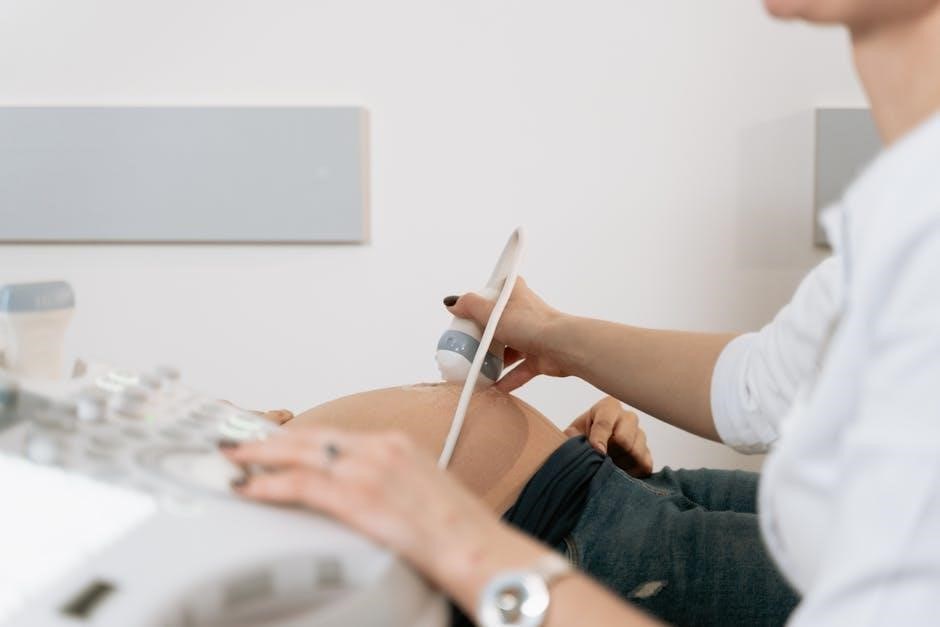
The procedure begins with patient positioning, often lying on their back with the affected arm raised․ Ultrasound imaging is used to locate the lesion․ Local anesthesia is administered to minimize discomfort․ A biopsy needle is guided under ultrasound visualization to the target tissue․ Samples are collected and stored for pathological examination․ Post-procedure, pressure is applied to reduce bleeding, and the site is bandaged․ Patients are monitored briefly before discharge․ This method ensures precise tissue sampling with minimal invasiveness, coded as CPT 19083 for the first lesion․

9․2 Role of Imaging in Precise Tissue Sampling
Imaging plays a critical role in ultrasound-guided breast biopsies by providing real-time visualization of the lesion․ Ultrasound ensures accurate needle placement, minimizing tissue damage and improving diagnostic accuracy․ The imaging guidance allows for precise targeting of abnormalities, enabling effective tissue sampling․ This method reduces the risk of complications and enhances patient comfort․ The use of ultrasound imaging is essential for ensuring that the biopsy is both accurate and minimally invasive, making it a preferred diagnostic tool․ CPT code 19083 is specifically used for this procedure, reflecting its importance in modern breast cancer diagnosis and treatment planning․

Advantages of Ultrasound-Guided Biopsy
Ultrasound-guided biopsy offers high diagnostic accuracy, minimal invasiveness, and real-time imaging for precise tissue sampling․ It reduces complications, recovery time, and costs, making it a preferred diagnostic method․
10․1 Minimally Invasive Nature
Ultrasound-guided breast biopsy is a minimally invasive procedure that uses sound waves to guide the needle, avoiding the need for surgical incisions․ This approach reduces discomfort, recovery time, and complications compared to traditional surgical biopsies․ The procedure typically involves local anesthesia, and patients often resume normal activities shortly after․ The use of ultrasound ensures precise tissue sampling while minimizing scarring and trauma to surrounding tissue․ This method is highly effective for diagnosing breast abnormalities, making it a preferred choice for both patients and clinicians due to its balance of accuracy and patient comfort․
10․2 High Diagnostic Accuracy
Ultrasound-guided breast biopsy offers high diagnostic accuracy due to real-time imaging, enabling precise tissue sampling․ This method reduces false negatives and ensures reliable results for diagnosing breast abnormalities․ The use of ultrasound guidance enhances the physician’s ability to target specific lesions, improving the likelihood of obtaining sufficient tissue for analysis․ With its high sensitivity and specificity, this approach is a trusted diagnostic tool, providing patients and clinicians with accurate information for timely treatment planning․ The combination of precision and minimal invasiveness makes it a preferred method for breast tissue sampling․
Future Directions in Breast Biopsy Coding
Emerging technologies and updates to CPT codes aim to enhance accuracy and efficiency in billing for ultrasound-guided breast biopsies, ensuring better patient care and reimbursement processes․
11․1 Emerging Technologies and Coding Updates
Advancements in ultrasound-guided breast biopsy technologies, such as enhanced imaging systems and AI integration, are driving updates to CPT codes․ New codes like 0857T address innovative diagnostic methods, ensuring accurate billing for cutting-edge procedures․ These updates reflect the evolving nature of breast biopsy practices, emphasizing precision and efficiency․ Staying informed about coding changes is crucial for healthcare providers to maintain compliance and optimize reimbursement․ As technology advances, CPT codes will continue to adapt, supporting better patient outcomes and streamlined billing processes in the field of breast care․
11․2 Impact of New CPT Codes on Billing Practices
New CPT codes for ultrasound-guided breast biopsies, such as 19083 and 19084, streamline billing by distinguishing between initial and additional lesions․ These codes reduce errors and ensure accurate reimbursement․ Providers must stay updated on coding changes to avoid denied claims․ Proper documentation of imaging guidance and lesion details is essential․ New codes also clarify billing for bilateral procedures and localization devices, enhancing transparency․ Regular training and adherence to guidelines help practices adapt to these updates, ensuring compliance and efficient financial management in breast biopsy billing․
Accurate coding and proper documentation are crucial for ultrasound-guided breast biopsies; Adhere to CPT guidelines, ensure precise billing, and stay updated on coding changes for optimal reimbursement and compliance․
12․1 Summary of Key Coding Principles
Accurate coding for ultrasound-guided breast biopsies requires using specific CPT codes like 19083 for the first lesion and 19084 for additional lesions․ Bilateral procedures need distinct coding, with initial biopsies reported using 19081, 19083, or 19085, and contralateral or additional biopsies using 19082, 19084, or 19086․ Modifiers, such as 26, should be applied for professional components․ Proper documentation, including imaging guidance and lesion details, is essential for reimbursement․ Avoid using unlisted codes like 19499 unless no specific code exists․ Staying updated on coding guidelines ensures compliance and accurate billing․
12․2 Recommendations for Accurate Billing
For accurate billing, ensure correct CPT code selection based on procedure specifics, such as lesion count and imaging guidance․ Use 19083 for the first lesion and 19084 for additional ones․ Document all details, including imaging modality and lesion localization․ Apply modifiers like 26 when appropriate․ Regularly update coding knowledge to reflect changes in guidelines․ Verify payer-specific policies, especially for bilateral procedures and additional lesion billing․ Avoid using unlisted codes unless necessary․ Ensure compliance with documentation requirements to prevent denials and optimize reimbursement․ Stay informed about updates in CPT codes and billing practices to maintain accuracy and efficiency in the billing process․